Т³гж 4, Step 1 - mount the winch – Smittybilt 97203 XRC 3.0 3,0001b Winch User Manual
Page 4
AVOID WINCH AND EQUIPMENT
DAMAGE
Always avoid side pulls which can pile up rope at one end of the drum.
This can damage rope or winch.
Always ensure the clutch is fully engaged or disengaged.
Never use winch to tow other vehicles or objects. Shock loads can momentarily
exceed capacity of rope and winch.
Always avoid
powering out
for extended distances. This causes excess heat
and wear on the winch motor and brake.
Always use care to not damage the vehicle frame when anchoring to a vehicle
during a winching operation.
Never
jog
rope under load. Shock loads can momentarily exceed capacity of
rope and winch.
Never use winch to secure a load during transport.
Never submerge winch in water.
Always store the remote control in a protected, clean, dry area.
Always double line or pick distant anchor point when rigging. This maximizes
pulling power and avoids overloading the winch.
To prevent accidental activation of the winch and serious injury, complete
the winch installation and attach the hook before installing the wiring.
Safety
When installing your ATV winch system, read and follow all mounting and safety
instructions. Always use caution when working with el ectricit y and remember to ve rify
that no exposed electrical connections exist before energizing your winch circuit.
For specifications and performance data, refer to the specification sheet supplied with
your winch.
Never let rope slip through your hands.
Always be aware of possible hot surface at winch motor, drum or rope during or
after winch use.
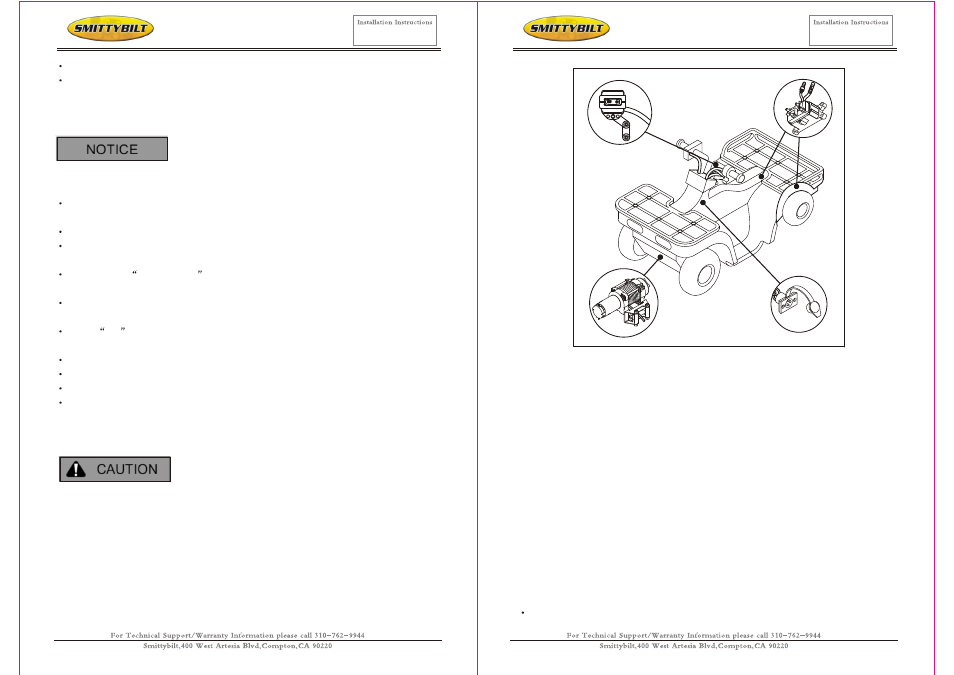
Figure 3: To install the complete kit, you will need to mount the winch, contactor
handlebar mounted Mini-rocker switch and remote socket (optional on some models).
Step 1 - Mount the Winch
To secure the winch, always use:
A flat, secure mounting location at least 4.8 mm (3/16 in.) Thick.
Lock washers.
Hex head cap screws when using a one-piece winch mount plate.
Note: When using separate winch mount and fairlead plates use hex head capscrews
on the motor side of the base as shown in Figure 4.
Torque the mounting bolts to 16 N-m (12 lb-ft)
Remove bottom tie bolt. This bolt should be retained for winch service.
Attach the clevis hook to the wire rope.
Put clutch in freespool position.
Manually feed cable loop through fairlead.
Attach hook to cable loop and re-engage clutch.
-7-
-8-
XRC 3.0 3,0001b Winch
Part # 97203
WWW.SMITTYBILT.COM
XRC 3.0 3,0001b Winch
Part # 97203
WWW.SMITTYBILT.COM