Installation instructions – Smittybilt 18604 CONTRACTORS RACK User Manual
Page 11
For Technical Support/Warranty Information please call 310-762-9944
Smittybilt, 400 West Artesia Blvd, Compton, CA 90220 / www.smittybilt.com
Installation Instructions
CONTRACTORS RACK
PART # 18604
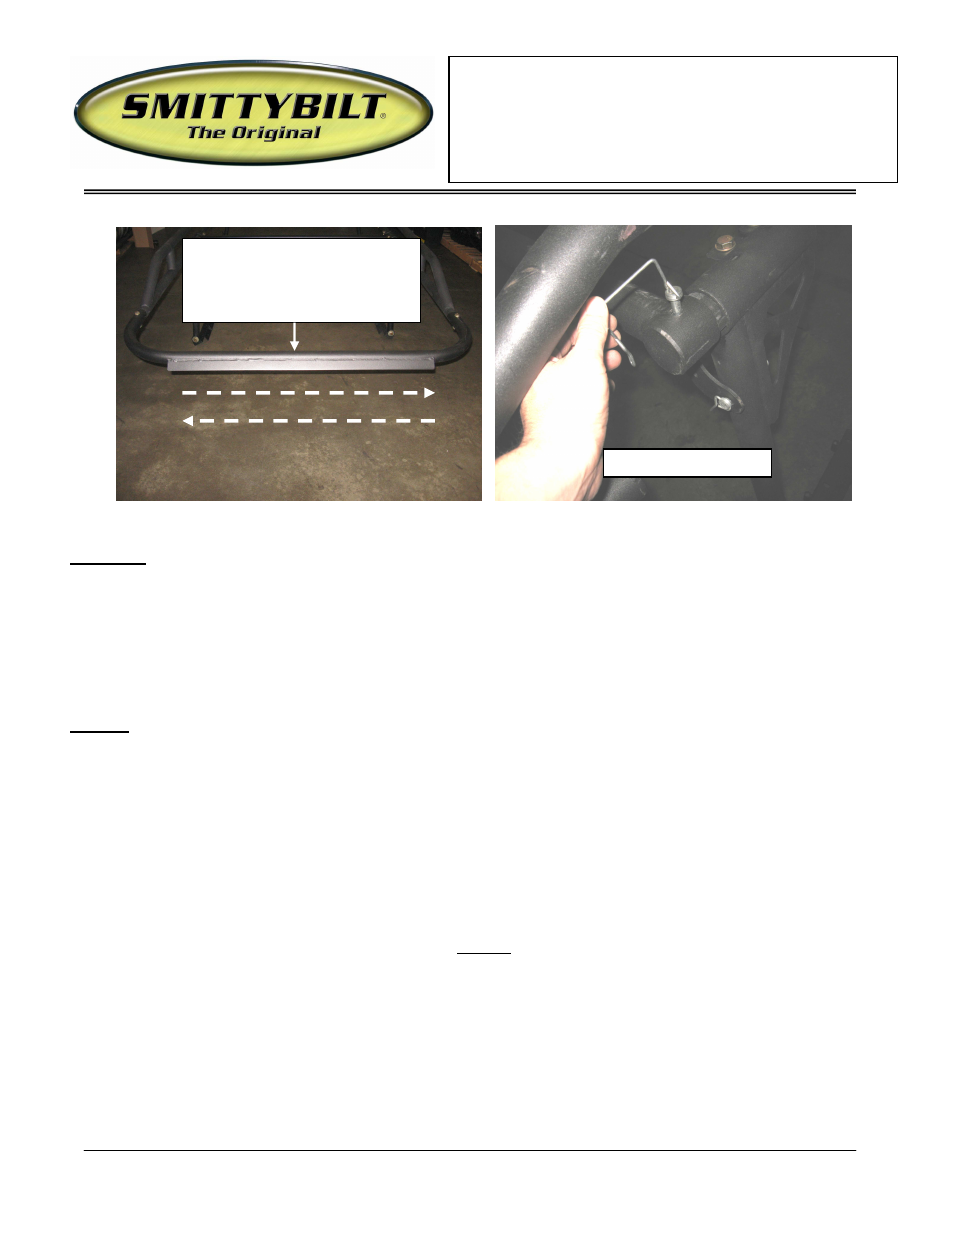
(Fig V) (Fig W)
STEP 14: When you are satisfied with the alignment of the rack proceed to securely tighten all four M18x19
bolts that hold the uprights to the mounting plates. (Fig T)
Now proceed to securely tighten the two M12x50 bolts that hold the uprights to the side rails.
(8 total) (Fig B)
CHECK TO MAKE SURE ALL HARDWAR E IS COMPLETELY TIGHT AT THIS TIME.
INSTALLATION IS NOW COMPLETE
NOTE: In order to load tall items you may remove the rear cross bar by simply removing the four quick
release pins. (Fig W) Be sure to re-attach bar and fasten after loading.
DO NOT CARRY LOAD WITHOUT REAR CROSS BAR
CLEANING
To keep your rack finish looking good, you can simply wash with a soft rag and mild soap.
Warning
Rollover and other types of vehicle accidents may result in serious injury or death to you, your passengers and others sharing the road. Smittybilt
accessories are decorative and are not intended to reduce or avoid injury or damage in the event of an accident. The weight and location of
Smittybilt accessories may affect your vehicles’ handling, stability and performance, creating an increased risk of accident or rollover. Before
installing any accessory, check state laws and assure that the accessory will not obscure any lights or interfere with proper operation on your
vehicle’s safety equipment. Consult your owner’s manual and the Smittybilt instructions, or additional safety information. Smittybilt products,
nor the warnings contained herein, are not a substitute for your safe driving. Don’t drink and drive, always use seat belts and don’t drive faster
than conditions permit.
While rack is on vehicle push or pull
the rack side to side in order to get the
front hoop parallel with the top of the
vehicle.
Actual pin may vary slightly