Installation instructions – Smittybilt 18604 CONTRACTORS RACK User Manual
Page 10
For Technical Support/Warranty Information please call 310-762-9944
Smittybilt, 400 West Artesia Blvd, Compton, CA 90220 / www.smittybilt.com
Installation Instructions
CONTRACTORS RACK
PART # 18604
STEP 11: Your rack is now ready to be installed on your vehicle.
Carefully lift the rack onto the side bed rails of your vehicle aligning the mounting plates as
close as possible to the corners of the bed rail. (Fig T)
The uprights and mounting plates can be adjusted while the rack is resting on the vehicle bed rail.
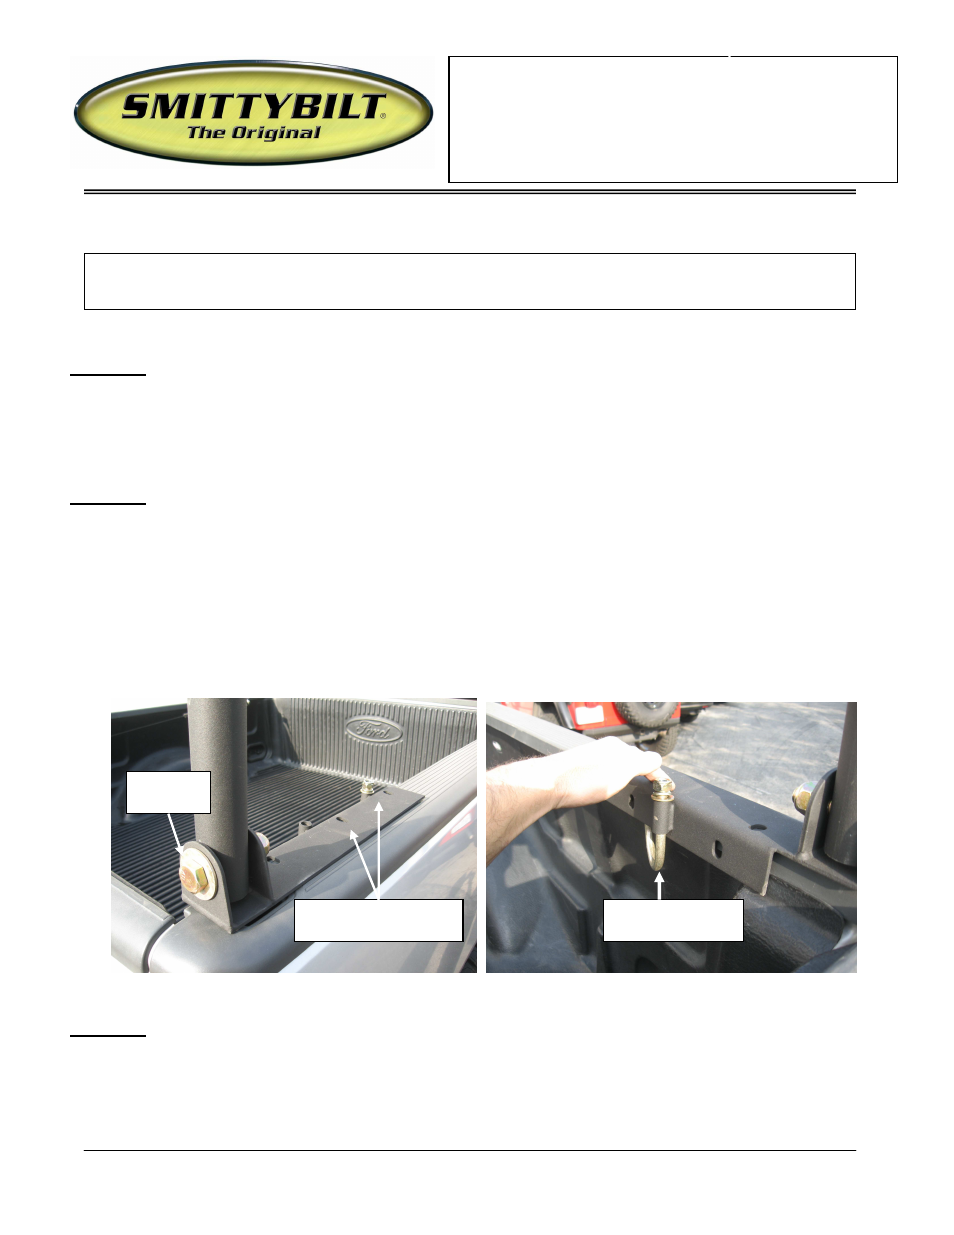
STEP 12: Once the desired location of the rack has been decided you can secure the mounting plates on the
bed rail .This can be done two different ways, using (1) “J Hooks or (2) bolting it down.
1.
Slide the “J” hook up through the sleeve in the mounting plate and secure with washer and nut.
Make sure the plate on the end of the “J” hook is resting flush underneath the bed rail. (FigU)
2.
Use the mounting plate as a template to mark and drill 7/16’ holes through your bedrail. Be
sure to check underside for any obstructions. Attach with M12x50 bolt sets.
Secure mounting plates to bed rail completely at this time.
(Fig T) (Fig U)
STEP 13: Standing in front of the vehicle to check the horizontal alignment of the front hoop in relation to
the top of the vehicle. Have an assistant push or pull the rack side to side in order to have the front
hoop become parallel with the top of the vehicle (Fig V)
NOTE: Take caution in the following steps in order to protect the finish of your rack and
vehicle. The following steps will require the help of additional personnel.
Permanent mounting
hole locations
“J” hook mounting
method
M18x90
bolt sets