Apple AppleVision 750 User Manual
Page 27
10
Click Agree once you’ve read and agreed to the terms in the document.
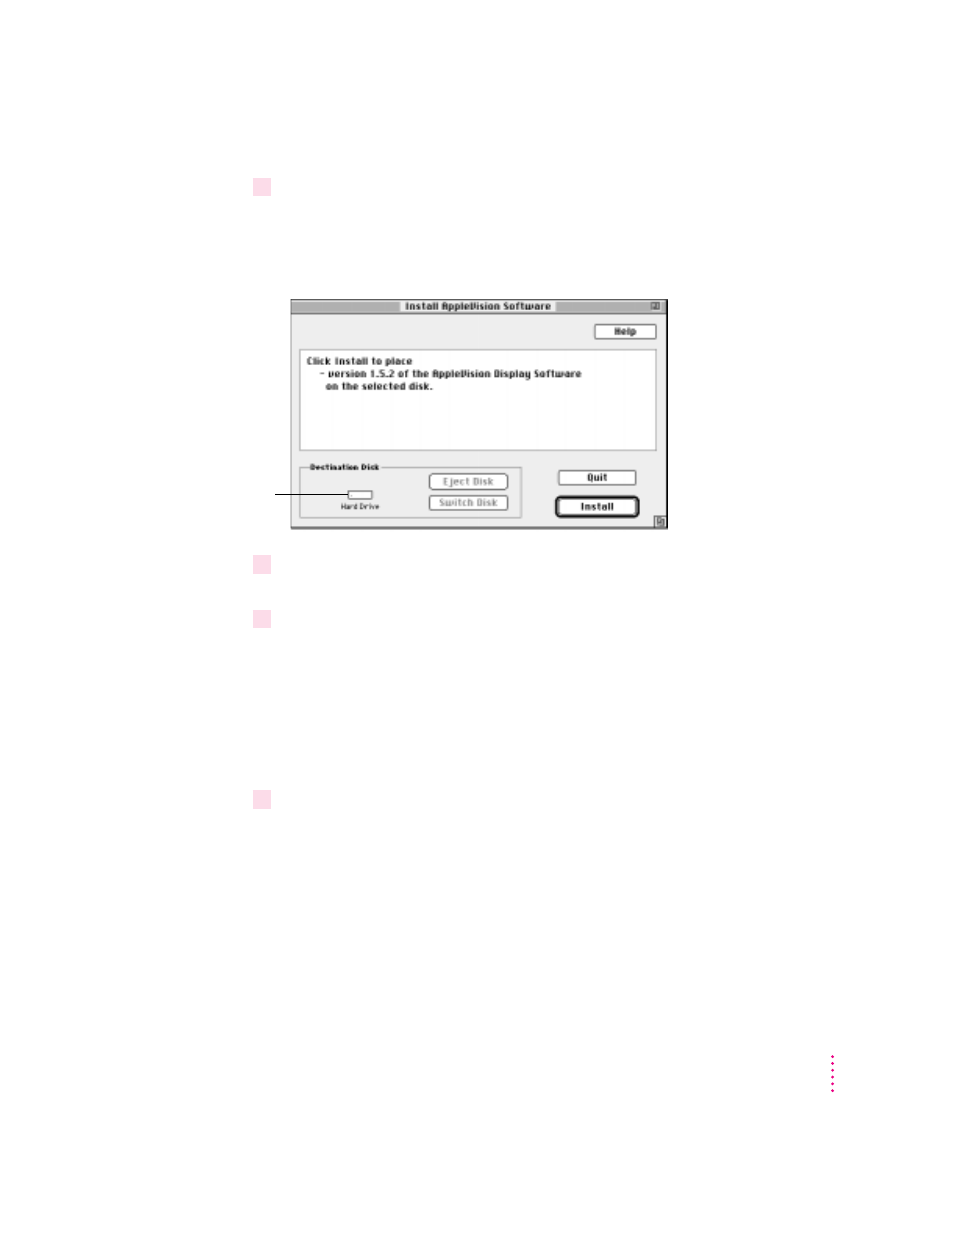
The Install AppleVision Software dialog box appears. The software
version number shown on your screen might be different from the one
illustrated here.
11
Make sure the destination disk named is the startup disk of your computer. If it isn’t,
click Switch Disk until you see the right name.
12
Click Install.
The Installer takes a few moments to calculate what needs to be done and
then begins to copy files. If you are running other applications, a message
appears telling you to quit any open applications. Click Continue to quit the
applications and continue with the installation.
Note: Make sure you use the Installer to install the software. Do not install
the software by dragging files.
13
Follow the instructions on the screen until the installation is complete.
IMPORTANT
The Installer checks to make sure you have the system software
you need to use the monitor. If you’re missing anything, a message tells you
what you need. You won’t be able to install the software until you correct the
problem. If a dialog box says you don’t have the correct system software, you
can purchase a new version from an Apple-authorized dealer.
After the installation, the Installer tells you to restart your computer.
27
Installing and Using AppleVision Software
Destination disk