PHCC Pro Series Pro Series C11 User Manual
Page 14
3. Fan the area around the top of the battery
with a piece of cardboard (or another non-
metallic material) to remove any hydrogen or
oxygen gas that may have been emitted from
the battery.
4. Remove the fluid sensor from the top of the
battery. Unscrew the wing nuts and remove
the battery cables.
5. Remove the old battery from the battery box
and place the new battery in the box. Fill the
battery following the instructions on page 4
or 5.
6. Clean any corrosion off of the ring connectors
on the ends of the battery wires. Use a stiff
brush or sandpaper. DO NOT apply corrosion
resisting sprays or pads to the terminal rings
or posts after you have cleaned them, since
this could prevent the battery from charging
properly.
7. Replace the battery cables, WHITE to the
NEGATIVE (-) post and BLACK to the POSITIVE
(+) post. Tighten the wing nuts.
8. Insert the fluid sensor in the top of the
battery, or in the cap 2nd from the POSITIVE
(+) post, depending on the configuration of
your battery.
9. Plug the primary pump into the blue
piggyback controller, and plug both into the
wall outlet. Plug the charger into an outlet,
too.
(You
should
provide
additional
protection for the control unit by using a
surge protector.)
10. If any of the alarms are sounding, press the
WHITE button on the front of the control
panel for one (1) second.
6
Test/reset button
The TEST button may be used to check the
backup pump and system. Push the TEST button.
This will activate the pump for as long as you
hold the button. It will stop as soon as you let
go of the button.
If the “Pump was activated” alarm is sounding,
press the button for one (1) second to reset the
alarm.
TESTING THE FLOAT SWITCH FOR THE
BACKUP PUMP
It is important to manually test the float
switches periodically.
Unplug the main AC pump when installing or
servicing the backup pump to avoid electric
shock. Failure to do so could cause serious
injury or death.
Review the safety
instructions on page 1.
Lift the float up and let go. This will activate
the pump. The control unit will run the pump for
approximately 25 seconds so it can empty all the
water in the sump pit. If there is no water in
the pit, the pump can run dry for this amount of
time. The alarm will sound and the “Pump was
activated” light will go on. After the pump has
stopped, push the WHITE button to silence the
alarm. If the WHITE
button is pressed
before the pump has
stopped, the alarm
will
go
off
temporarily.
Wait
for the pump to
stop pumping, and
then
push
the
WHITE button on the front of the control unit to
completely silence the alarm.
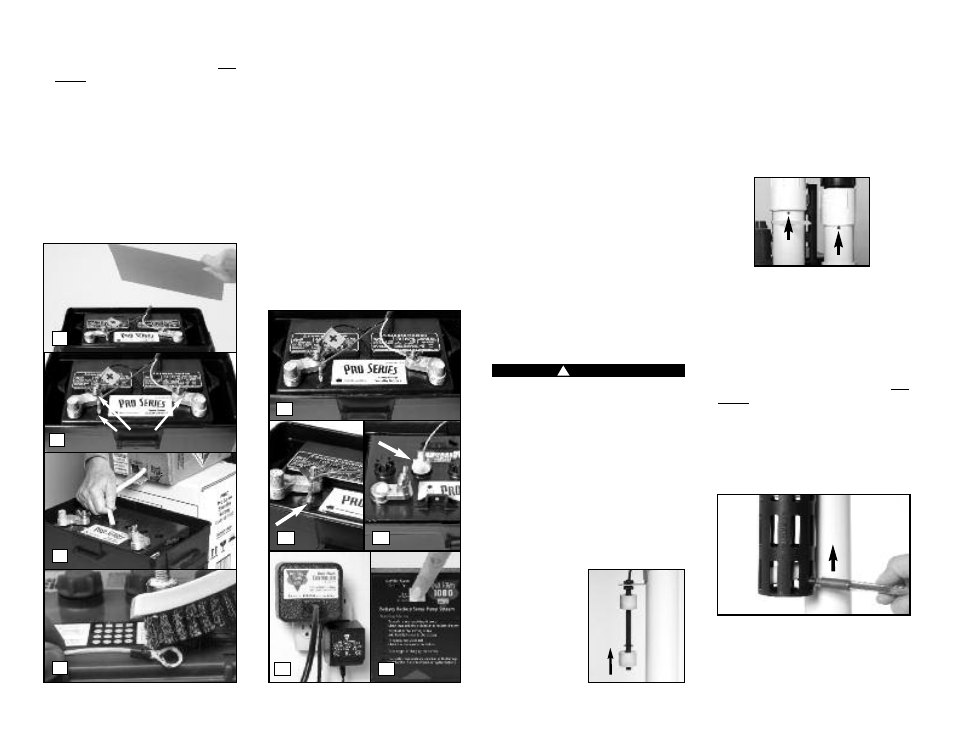
While the pumps are active, water will come out
of the 1/8” hole that is drilled in the pipe above
the pump. This is normal. The hole is needed to
prevent an air lock within the system. Do not
obstruct this hole or an air lock may prevent the
pump from activating, and the basement will
flood.
BE SURE TO PLUG IN THE MAIN AC PUMP WHEN
YOU HAVE COMPLETED THE TEST.
TESTING THE FLOAT SWITCH FOR THE
PRIMARY PUMP
Lift the float up with a pencil, or another non-
metallic item, and let it go to activate the pump.
The pump will run an additional 10 seconds after
the float returns to the original position. It will
not damage the pump to run it for this short
time if the sump pit is dry. However, do not hold
the float up for an extended time without water
in the sump pit.
While the pumps are active, water will come out
of the 1/8” hole that is drilled in the pipe above
the pump. This is normal. The hole is needed to
prevent an air lock within the system. Do not
Page 13
!
DANGER
Lift
Float
Lift
Float
5
6
10
9
8a
8b
4
Remove
7
3