Class1 Valve - 119138 User Manual
Page 14
14
Class 1 Valve Manual
p/n: 119138
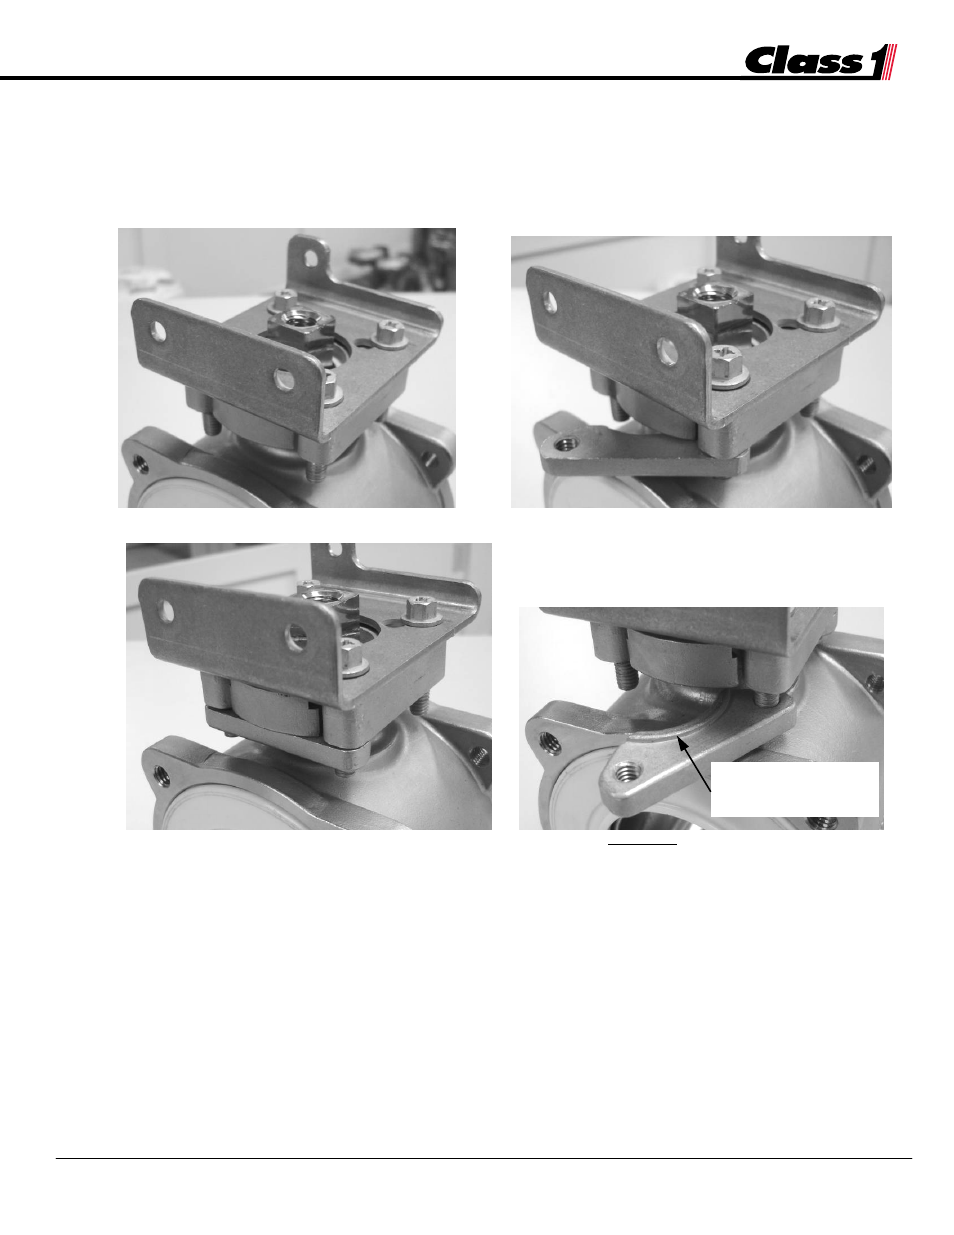
5. Add the bottom plates and thread the long bolts into the plates. (Loctite use is recommended.)
Orient the bottom plates so that the ridges face down, toward the valve body. Torque four bolts
in a criss-cross pattern to a maximum value of 11 ft-lbs. (Discard shims – they are not needed.)
[Figures 5.4-6 through 5.4-8]
Figure 5.4-5 Lower Bracket with Four Long Bolts
Figure 5.4-6 Adding the Bottom Plates
Figure 5.4-7 Fastening the Bottom Plates
Figure 5.4-8 Incorrect Orientation of Bottom Plates
6. Install the valve stem adapter onto the valve stem. [Figure 5.4-9]
7. Attach the upper bracket and actuator to the lower bracket, using the three smaller hex bolts and
nuts. (You may have to rotate the valve stem to allow the adapter to sit correctly. Loctite use is
recommended.) [Figure 5.4-10]
8. Connect all wiring and harnesses.
9. Using the smart switch panel, open and close the valve a few times to ensure it is working properly.
Check the lights on the smart switch to verify that the ball is in the OPEN/CLOSE position as
indicated. If the OPEN switch closes the valve, remove the actuator, rotate the valve stem and ball
90°, and reattach the electric actuator.
5. installation
5. installation
Incorrect Orientation –
Ridge must face DOWN,
toward valve body