Philips 10FF2CMW-27B User Manual
Page 22
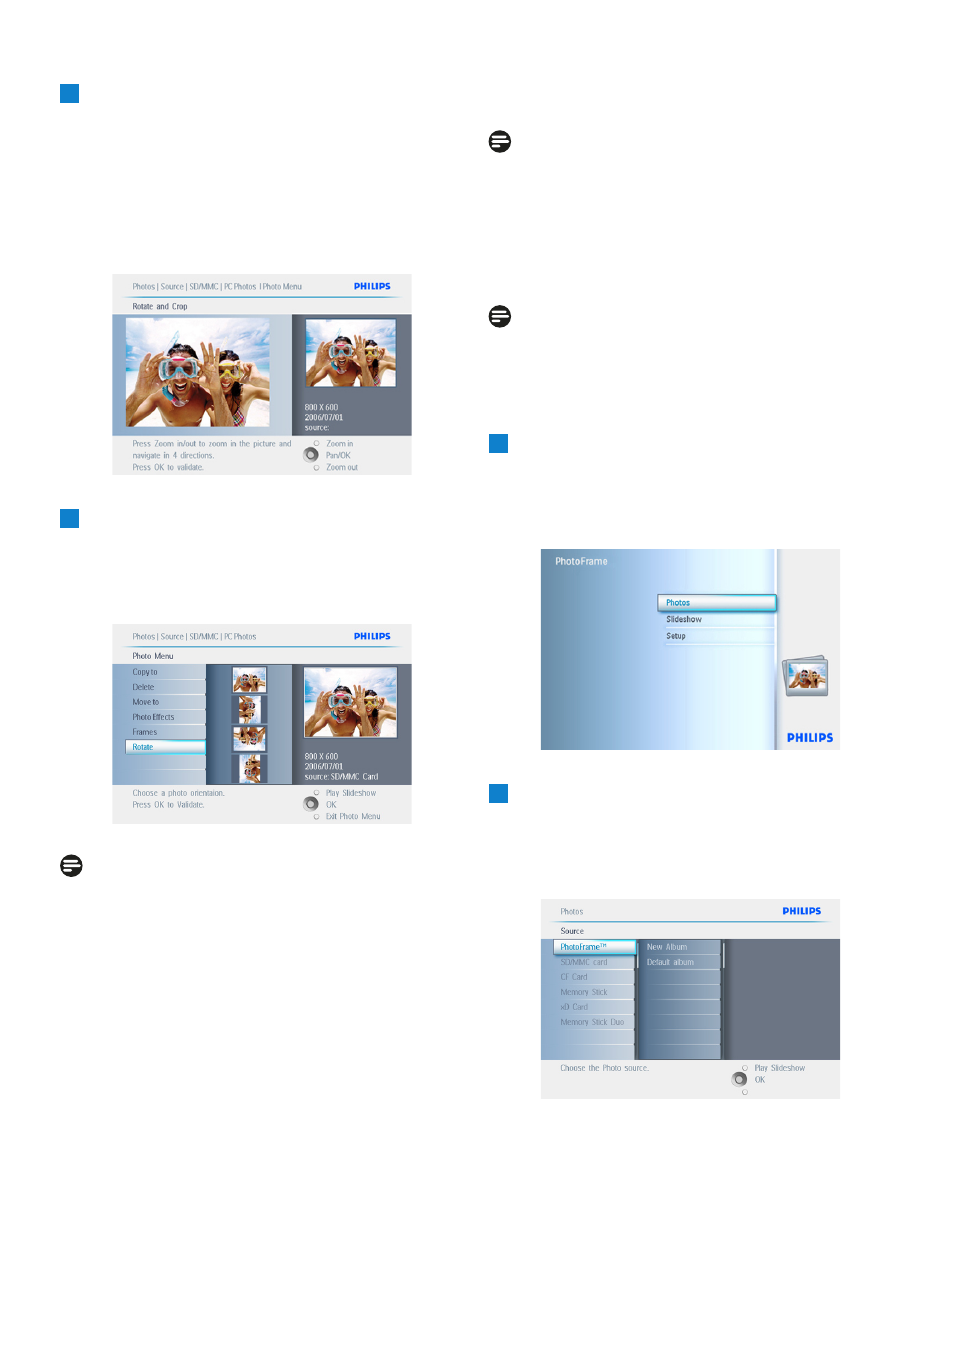
4
• Use the navigation buttons to select the
photo.
• Press the menu button to enter the
photo menu.
• Navigate down to go to Rotate and
Crop.
• Navigate right to go to the orientation.
5
• Navigate down to select the rotation.
• Press OK to confirm rotation.
• You will then access the crop function
window.
Note:
If you don’t want to crop your photos press the
play slideshow button.
Press Play Slideshow to leave this menu and
play the slideshow or navigate left to move back
through the menus.
Zooming and Cropping
Note 1:
To retain image quality it is recommended that
zooming and cropping is carried out before the
image is stored in an album. This function only
applies to original photos not those processed
by the PhotoFrame.
Note 2:
All photos processed and copied by the
PhotoFrame will be resized for optimal display
on PhotoFrame and to save storage space.
1
• Press the menu button to access the
Main Menu.
• Navigate right or press the OK button to
access the Photo menu.
2
• Navigate down to select the media to
browse.
• Navigate right to enter the required
album.
20
Using more of your PhotoFrame
- 7FF2CMI-27 10FF2CMI-27E 5FF2CMI-27 7FF2CMI-27B 7FF2CMI-27E 10FF2CME-27 10FF2M4-27B 7FF2CWO-27B 10FF2CME-27E 10FF2CMI-27B 10FF2CME-27B 7FF2CWO-27E 7FF2M4-27 5FF2CMI-27B 10.2" LCD 9.4" v.area 32 frame ratio PhotoFrame 10FF2XLE-27E 5FF2CMI-27E 10FF2CMI-27 PhotoFrame 7FF2CWO 7" LCD 6.5" v.area 32 frame ratio 7FF2M4-27E 7FF2CME-27 10FF2M4-27 7FF2CME-27E 10FF2CMW-27 10FF2XLE-27B 7FF2M4-27B 7FF2CME-27B 10FF2XLE-27