Bsa i, Nstallation – Broilmaster BRB-1 User Manual
Page 17
Page 17
B101502-1-0311
1
3
Bsa i
nstallatiOn
F
IGURE
1
F
IGURE
3
Make sure BSA Side Burner Surround opening
dimensions match those in FIGURE 1. Place the BSA
Liner into the Enclosure and check for proper hole
alignment. Secure the BSA Liner to the Enclosure with
four (4)
8 x 3/4” Hex Head
screws. You should use the
inside holes located on the inside of the BSA Liner.
FIGURE 2.
Recommended Tools: Phillips Screw Driver or an
electric screw driver.
BSA LINER
(4)
SCREWS
ENCLOSURE
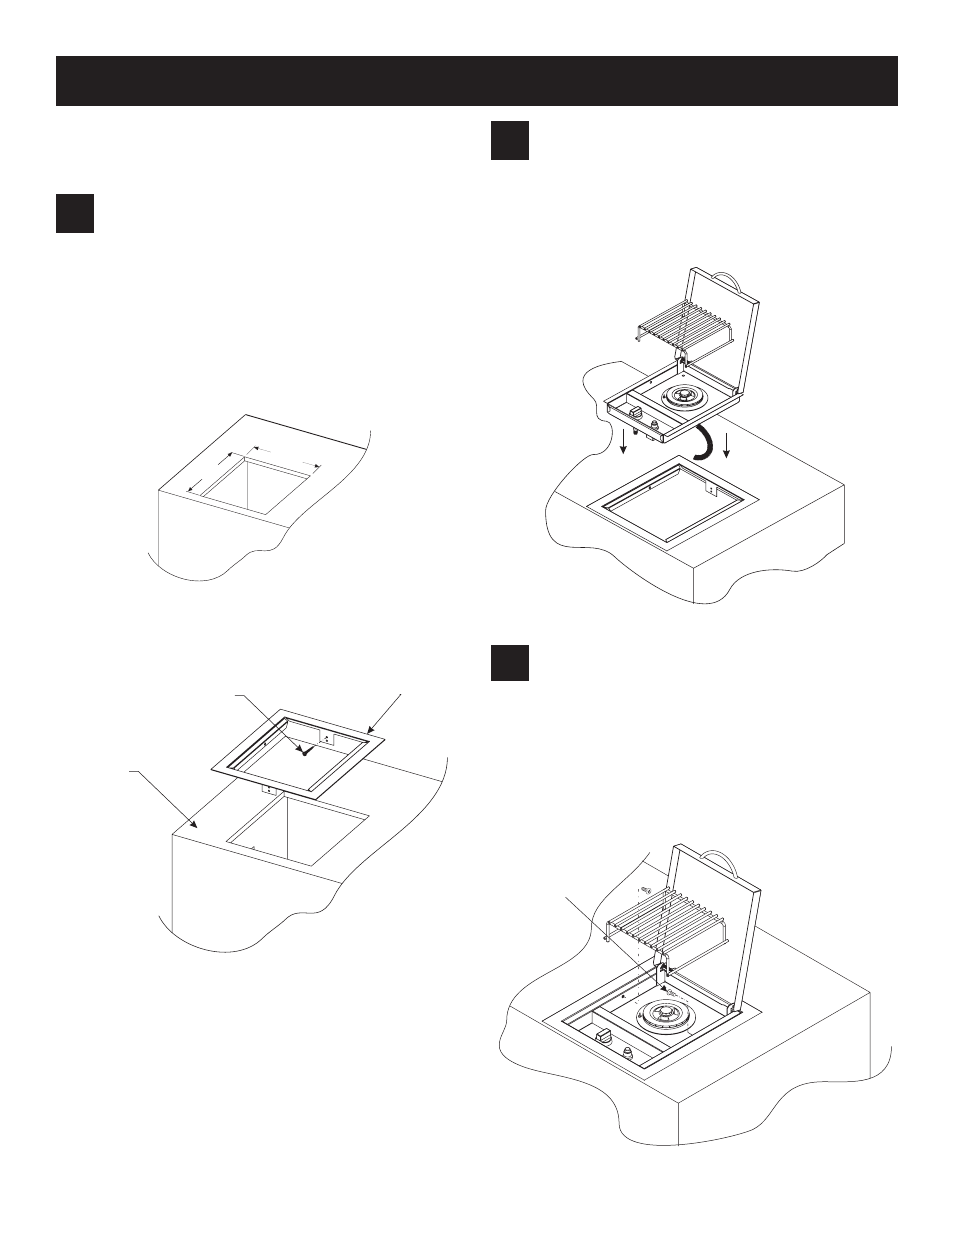
Attach one end of the Side Burner Hose to your
Broilmaster
®
DPASBC Side Burner. The remaining
end of the hose should be routed down through the
bottom of the BSA Liner. Place the side burner into
the BSA Liner and slide it completely to the rear of the
Liner. FIGURE 3.
#10-24 x 3/8 PH PN
SCREWS (2)
Secure the DPASBC Side Burner to the BSA Liner
with two 10-24 x 3/8 PH PN screws to the inside holes
located on the side of the Side Burner. FIGURE 4.
Note: If you have already routed your Side Burner
Hose make sure it is projecting up through the bottom
of the BSA Liner.
12 3/16”
14 3/8”
F
IGURE
2
F
IGURE
4
2