Using the component video jacks, Connecting up 03, 12 this receiver bd/dvd player tv – Pioneer VSX-519V-K User Manual
Page 14
Connecting up
03
14
En
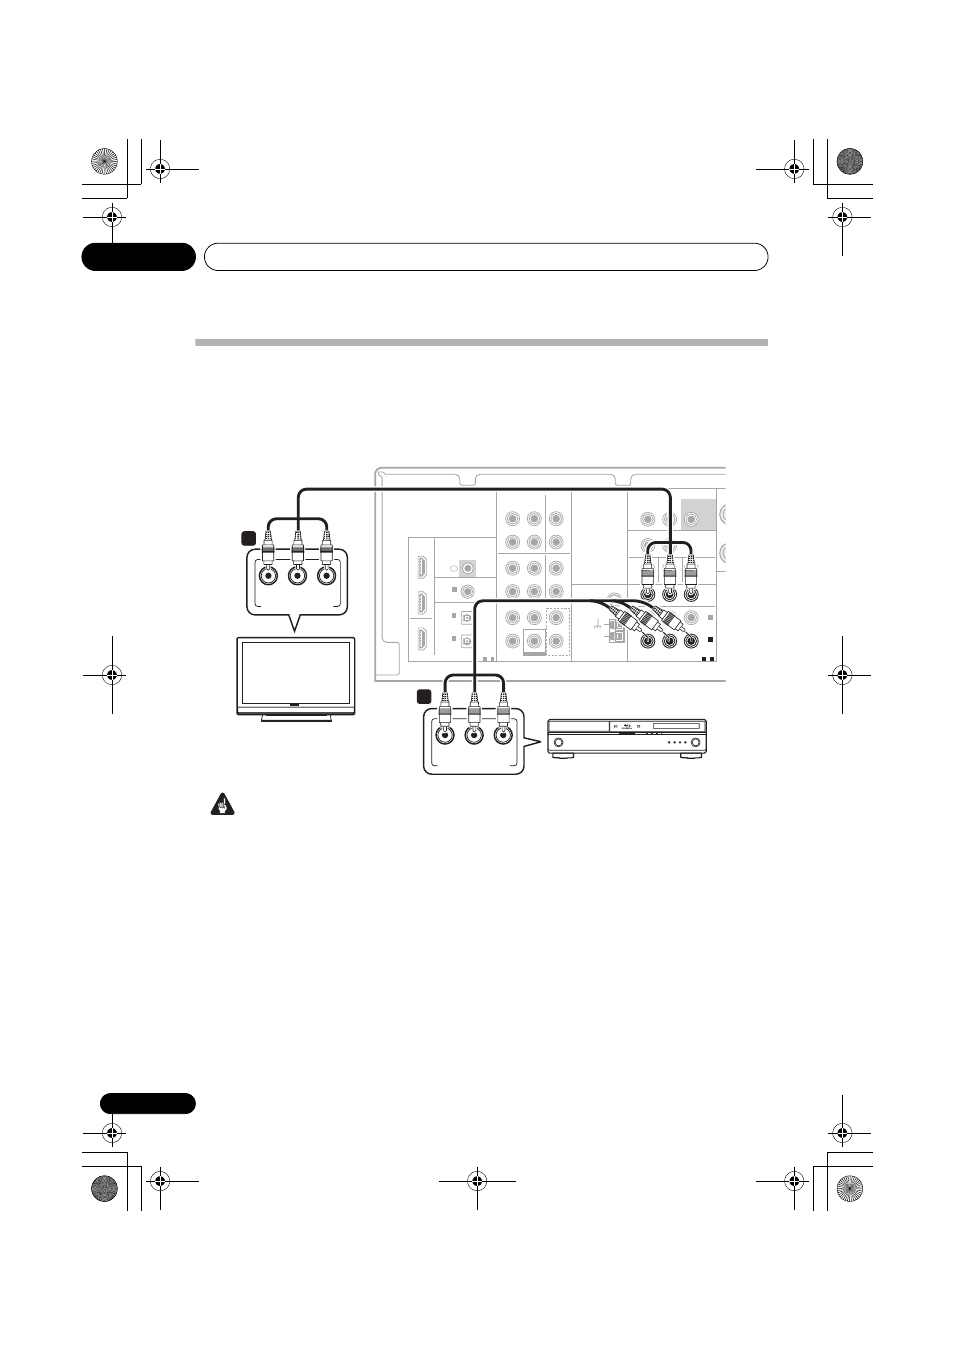
Using the component video jacks
Component video should deliver superior picture quality when compared to composite video.
A further advantage (if your source and TV are both compatible) is progressive-scan video, which
delivers a very stable, flicker-free picture. See the manuals that came with your TV and source
component to check whether they are progressive-scan video compatible.
Important
• If you connect any source component to
the receiver using a component video
input, you must also have your TV
connected to this receiver’s
COMPONENT
VIDEO OUT jacks.
1 Connect the component video outputs of
your source to a set of component video
inputs on this receiver.
Use a three-way component video cable.
2 If necessary, assign the component video
inputs to the input source you’ve connected.
This only needs to be done if you didn’t connect
according to the following defaults:
•
COMPONENT VIDEO IN 1 – BD/DVD
•
COMPONENT VIDEO IN 2 – TV/SAT
See The Input Assign menu on page 35.
3 Connect the COMPONENT VIDEO OUT
jacks on this receiver to the component video
inputs on your TV or monitor.
Use a three-way component video cable.
AUDIO
AUDIO
DIGITAL
COMPONENT VIDEO
BD/DVD MULTI CH IN
BD/DVD IN
HDMI
ANTENNA
FM
UNBAL
75
Ω
AM
LOOP
FRONT
L
R
L
R
CENTER
SURROUND
COAXIAL
(CD)
IN
1
(CD-R/TAPE)
IN
1
1
-
2
(DVR/VCR)
IN
2
(BD/DVD)
IN
1
(TV/SAT)
IN
2
OPTICAL
ASSIGNABLE
IR
ASSIGNABLE
1
-
2
ASSIGNABLE
OUT
OUT
Y
P
B
P
R
IN
ZONE2 OUT
MONITOR OUT BD/DVD IN TV/SAT IN
SUBWOOFER
PRE OUT
L
R
DVR/VCR
TV/SAT
OUT
IN
DVR/VCR
VIDEO
L
R
OUT
BD/DVD
IN
TV/SAT
IN
OUT
IN
IN
IN
CD-R/TAPE
CD
SUBWOOFER
IN
COMPONENT VIDEO
(BD/DVD)
IN
1
1
-
2
ASSIGNABLE
OUT
Y
P
B
P
R
COMPONENT VIDEO OUT
P
R
Y
P
B
COMPONENT VIDEO IN
P
R
Y
P
B
1
2
This receiver
BD/DVD player
TV
VSX_519V_MY.book 14 ページ 2009年1月16日 金曜日 午後7時32分