Lenovo ThinkServer RS140 User Manual
Page 94
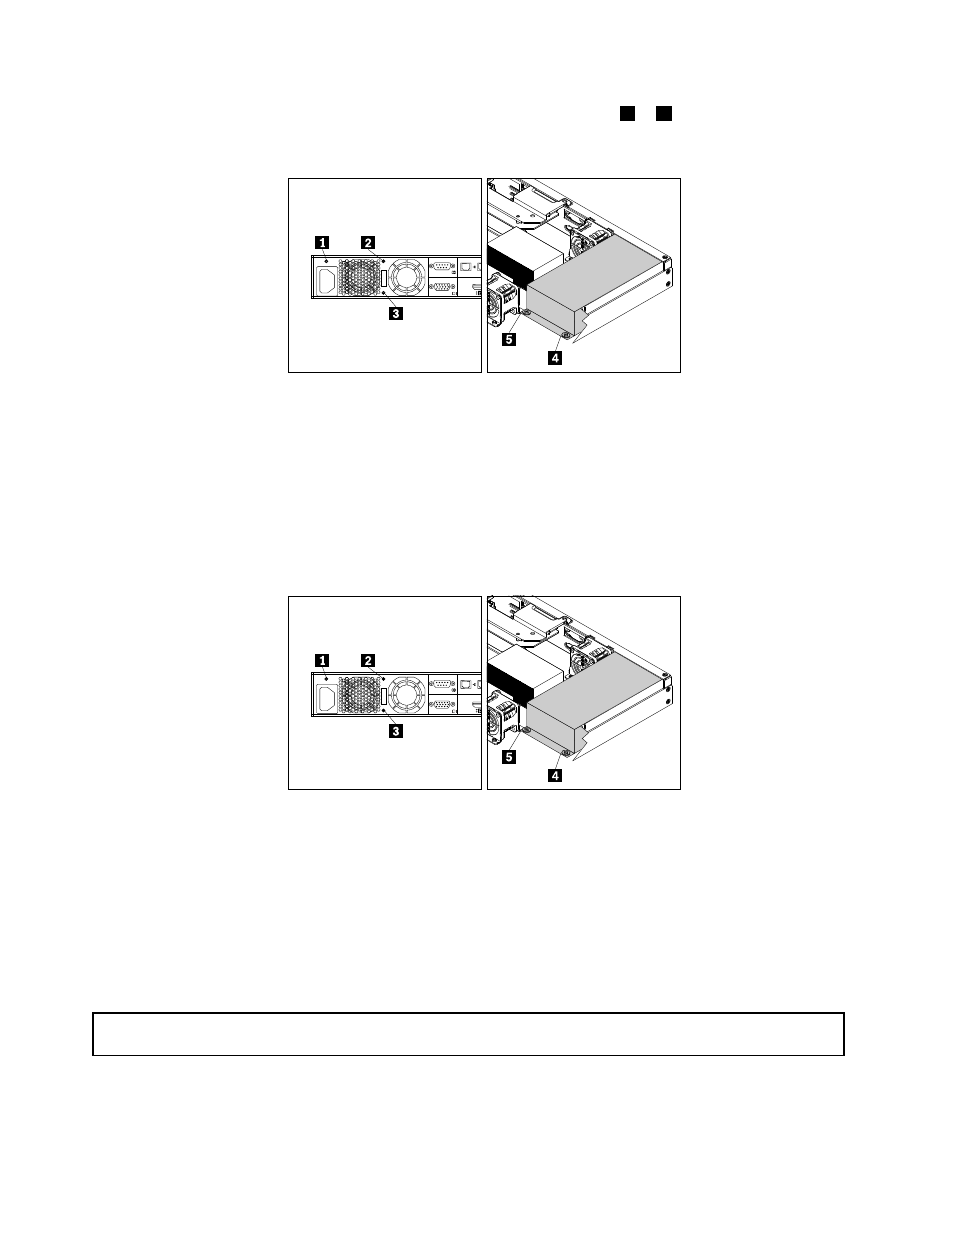
5. Locate the failing power supply in your server. Remove the five screws
1
to
5
that secure the power
supply assembly.
Figure 53. Removing the screws that secure the power supply assembly
6. Lift the failing power supply assembly up and out of your server.
7. Touch the static-protective package that contains the new power supply assembly to any unpainted
surface on the outside of the server. Then, remove the new power supply assembly from the package.
8. Note the orientation of the new power supply assembly and then position it into the chassis. Ensure that
the five screw holes in the new power supply assembly are aligned with the corresponding holes in the
chassis. Then, install the five screws to secure the new power supply assembly.
Figure 54. Installing the screws to secure the power supply assembly
9. Connect the power cables to the system board. See “System board components” on page 32.
10. Reinstall the server cover. See “Reinstalling the server cover and reconnecting cables” on page 106.
11. Connect the power cord to the power cord connector on the new power supply assembly.
12. If you are instructed to return the old power supply assembly, follow all packaging instructions and use
any packaging materials that are supplied to you for shipping.
Removing and reinstalling the slim-optical-drive bracket
Attention: Do not open your server or attempt any repair before reading and understanding “Safety information”
on page iii and “Guidelines” on page 53.
Before you begin, print all the related instructions or ensure that you can view the PDF version on another
computer for reference.
82
ThinkServer RS140 User Guide and Hardware Maintenance Manual