Vollrath 238R User Manual
Page 25
17
Figure 17. Auger Flight Spring
Figure 18. Mix Line Adapter
Figure 19. Removing O-rings
Spring
5. Turn springs into the plastic flights (See Fig.17).
Install first flight to bottom of auger, rotate, add
successive flights from bottom as the auger is
pushed slowly into the freezer barrel. Carefully
engage auger with drive socket in speed reducer
by rotating auger slowly and pushing on end of
auger. The front door will push auger into its final
position when the door is tightened down.
6. Apply a thin film of sanitary lubricant to the inside
and outside of the front auger support bearing,
then place on the front of the auger. Assemble
the front support on the auger over the front bear-
ing.
3.17 DISASSEMBLY AND ASSEMBLY OF MIX LINE
ADAPTER (REMOTE MODELS)
To aid in the disassembly and assembly of the mix line
adaptor, refer to Figure 18 in the following steps:
NOTE
Relieve pressure before disassembly . Place mix
pump OFF and main drive switch in the CLEAN po-
sition. Open spigot and operate until mix does not
dispense.
A. Disassembly of Mix Line Adaptor
1. Remove the mix line adaptor by pulling clip and
lifting adaptor straight out.
2. Remove the O-rings for cleaning. Section 3.15
describes the correct procedure for O-ring removal,
identification and care.
B. Assembly of Mix Line Adaptor
1. On remote pump freezers, assemble O-rings and
install mix line adaptor. Apply sanitary lubricant
to the outside of O-rings.
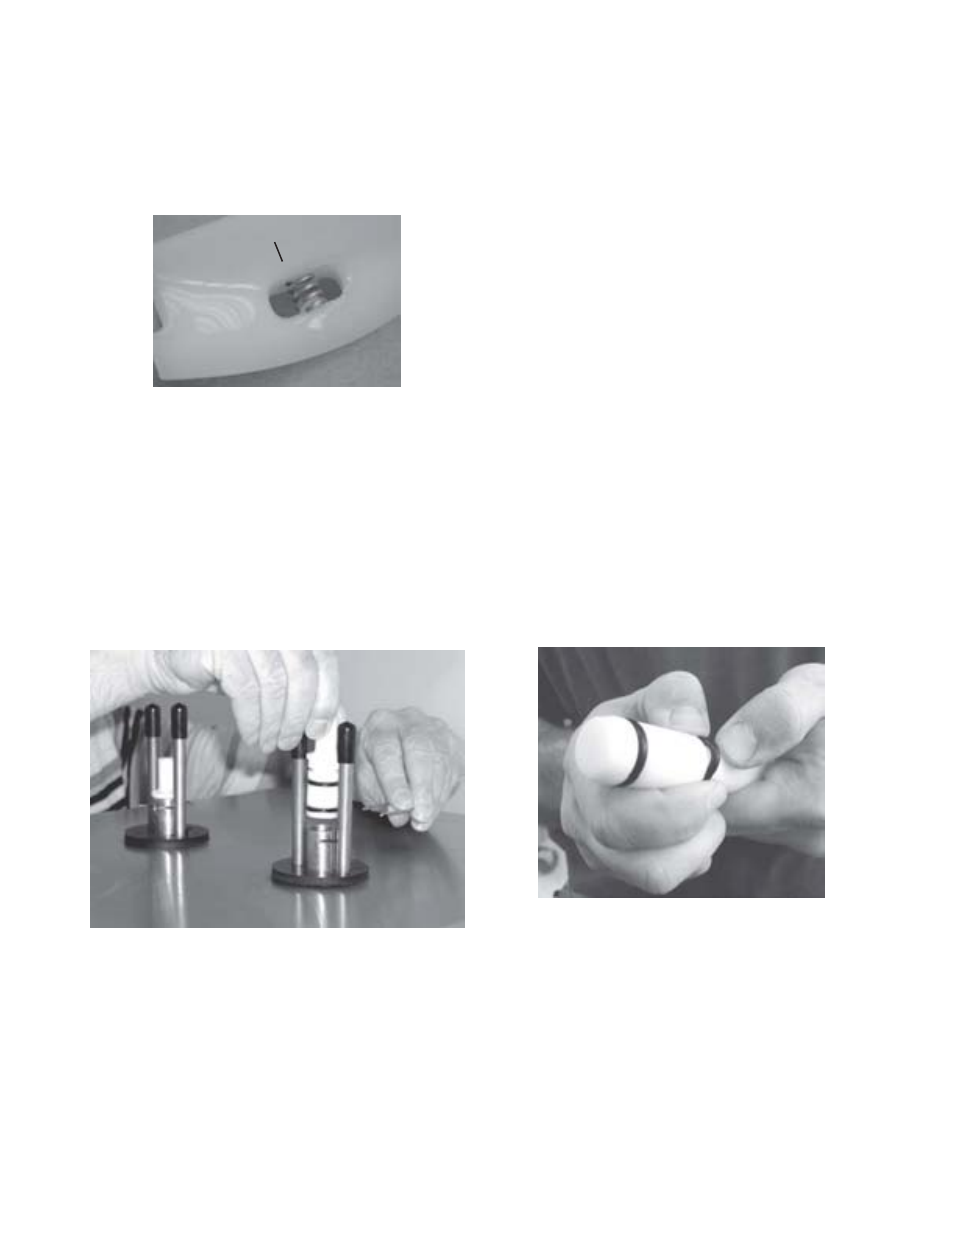
3.18 O-RING REMOVAL AND CARE
Worn or damaged o-ring seals must be replaced to insure
proper operation. To prevent undue damage to these seals,
be sure to apply lubricant where required and avoid twist-
ing O-rings during assembly. Worn or damaged O-rings
or twisted O-rings will cause air and/or mix leakage.
To remove O-rings from parts for cleaning or servicing,
refer to Fig. 19 and follow the following steps:
A. Remove all lubricant from O-ring using a clean paper
towel.
B. Remove O-ring by squeezing upward with a dry cloth
as shown in Fig. 19. When a loop is formed, use
your other hand and roll the O-ring out of the groove.
NOTE
Do not use any type of sharp object to remove
O-ring.
3.19CLEANING OF FREEZER AND FREEZER PARTS
A high quality grade of stainless steel has been used on
the freezer to ease clean-up. To remove spilled or dried mix
from the exterior, simply wash in warm, soapy water and
wipe dry. The use of soft water is recommended. Do not
use highly abrasive materials as they will mar the finish.