Vollrath 238R User Manual
Page 11
3
SECTION 2
INSTALLATION
2.1 SHIPMENT AND TRANSIT
The freezer has been assembled, operated, and inspected
at the factory. For shipment, the freezer is placed on skids,
with small parts placed separately in boxes. Upon arrival
at the final destination, the freezer must be checked for
any damage which may have occurred during final transit.
With the sturdy packaging used, the equipment should
arrive in satisfactory condition. THE CARRIER IS
RESPONISIBLE FOR ALL DAMAGE IN TRANSIT,
WHETHER VISIBLE OR CONCELAED. Do not pay the
freight bill until you have checked the equipment. Have
the carrier note any visible damage on the freight bill. If
concealed damage and or shortage is found later advise
the carrier within ten days and request inspection. The
customer must place claim for damage and/or shortages
in shipment with the carrier. Stoelting, Inc. cannot make
any claims against the carrier.
2.2 INSTALLATION
Installation of the freezer involves moving the freezer close
to its permanent location, removing all protective packag-
ing, setting in place and cleaning.
A. Remove all protective packaging. Remove the hold
down bolts from the wooden pallet, and walk freezer
off the pallet.
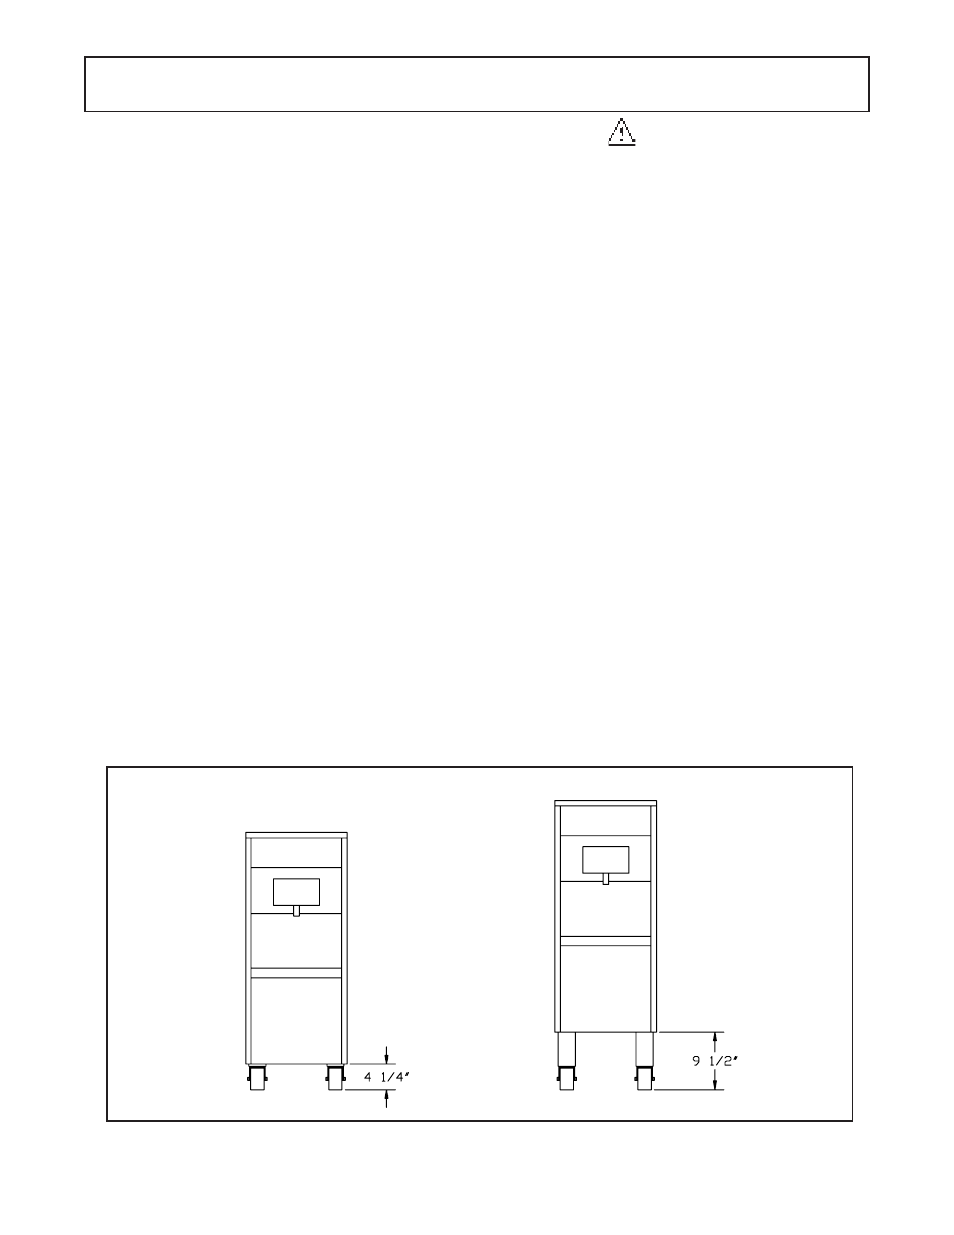
B. The freezer is shipped without legs. To install legs,
lift freezer and screw caster, extension, or leg into
the bottom of frame at each corner. Refer to caster
and leg options in Figure 1.
Figure 1. Caster Options
For Models DQ217, 217R, 225R, 237R
WARNING
FREEZER MUST NOT BE ALLOWED TO TIP
MORE THAN 10°. FAILURE TO HEED THIS WARN-
ING COULD RESULT IN THE FREEZER FALLING
ON IT’S SIDE CAUSING SERIOUS DAMAGE OR
INJURY.
C. To level turn the top part of the caster or the bottom
part of the leg in or out. Then level by placing a level
on top of the freezer at each corner.
NOTE
Leveling is necessary for correct freezer drainage.
D. For all freezers allow a minimum of 6 inches of space
at the front and rear for air circulation. For efficient
operation, the room temperature should not be be
low 60° F (16° C) or above 90° F (32° C).
E. For water cooled freezers, install a minimum of 1/2
inch pipe or 5/8 inch inside diameter copper water
line to the freezer. The water line must be connected
in a manner that will comply with local codes and
allow adequate room for servicing.
NOTE
All external plumbing is to be supplied by the customer.
Water lines connect to fittings at the rear of the freezer.
(See Fig.2) Connect the clean, potable, water inlet to water
source using flexible high water pressure line. Ordinary
garden hose is not recommended. Connect the water out-
let to flexible plastic tubing. The outlet can be secured to
floor drain, as the outlet is clean, warm water.
Option B - Casters & Extensions
Option A - Casters