Vollrath Somerville Buffet Service User Manual
Page 6
B
uffet
and
t
aBletop
S
ervice
O
peratOr
’
s
M
anual
6
i
nitial
S
etuP
, d
roP
-i
n
c
hafer
Carefully remove crating or packaging materials from the unit. When no longer
needed, dispose of all packaging materials in an environmentally responsible
manner.
For new installations:
Cutout dimensions are for reference only. Vollrath recommends that actual
cutouts be made when the chafer is received. Small variances in chafer
dimensions can happen and it is best to mate the chafer with the counter-top
before cutting.
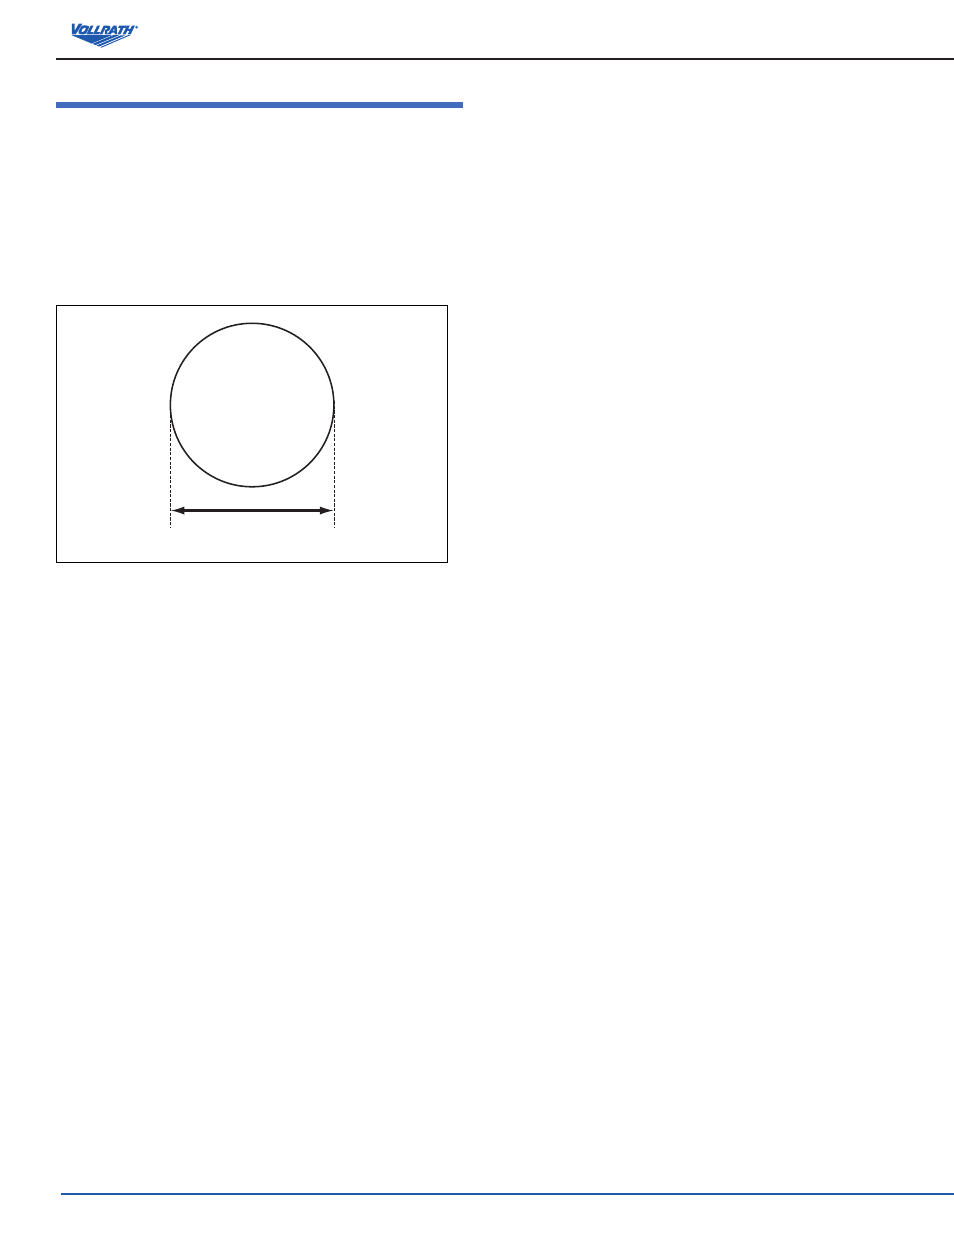
1. Cut out counter opening using chafer and Figure 6.
19” (48.25
cm
)
Figure 6. Cutout Dimensions.
2. Remove the food and water pan from the chafer.
3. Remove two (2) nuts from beneath spacer on underside rim of chafer.
4. Gently place chafer into the opening.
5. Decide which mounting clips are appropriate for your application (short clips
for thin counters and long clips for thicker counters).
6. Using the hole that is already threaded start threading the thumbscrew
into the clip approximately 1/2”. Do not thread too far or you may not have
enough room to insert the clip under the chafer in the next step.
7. From below, slide the clips over the studs where you removed the two nuts
in step 3, so that the clip hangs down and points out from the chafer rim.
Reattach nuts to the studs and tighten. Finish threading thumbscrews to
tighten the chafer to the bottom side of the counter. This will work with either
composite or stainless steel countertops.
8. Attach the heater tray assembly to the inside band of the chafer. Remove
Phillips head screw from each side of band by hinge. Attach tray bracket so
the tray is under the counter with the tray facing. Reattach screws.
9. Follow the steps in the OPERATION, DROP-IN CHAFER Section of this
manual.
For Retrofit Installations:
NOTE:
Always size the hole and make sure it meets min/max cut out
dimensions below. Always receive the chafer and retrofit kits prior
to cutting any countertops. Due to changes in manufacturer’s
specifications, and to different installation requirements, Vollrath’s
retrofit kits will fit a majority of installations. Extreme care must be made
to measure cut out holes prior to ordering and installation.
Identify the model that you are replacing and measure the opening.
Round Adaptor Ring: Part# 46281 - Sized to replace Many round chafers of
approximately 6 quart capacities.
Minimum Cutout Dimension: 18 5/8” diameter.
Maximum Cutout Dimension: 19-1/2” diameter.
NOTE:
6 qt. Chafers are far less standardized in size than rectangle chafers.
Measure everything carefully and confirm measurements with actual
chafer before making final cut.
10. Place adaptor ring over opening. Remove cover, food and water pans
from chafer and then place the chafer body into the adapter opening and
center both over the existing opening in the counter top.
11. Remove the two (2) nuts from beneath spacer on rim of chafer.
12. Decide which mounting clips are appropriate for your application (short
clips for thin counters and long clips for thicker counters).
13. Using the hole that is already threaded start threading the thumbscrew
into the clip approximately 1/2”. Do not thread too far or you may not have
enough room to insert the clip under the chafer in the next step.
14. From below, slide the clips over the studs where you removed the two
nuts in step 3, so that the clip hangs down and points out from the chafer
rim. Reattach nuts to the studs and tighten. Finish threading thumbscrews
to tighten the chafer to the bottom side of the counter. This will work with
either composite or stainless steel countertops.
15. Follow the steps in the OPERATION, DROP-IN CHAFER Section of this
manual.