English – Vollrath Somerville Buffet Service User Manual
Page 3
B
uffet
and
t
aBletop
S
ervice
3
ENGLISH
O
peratOr
’
s
M
anual
1. Remove the food pan (D) from the water pan (H) or remove the insert (E)
from the urn body (I). See Figures 1 and 2.
2. Pour about 2 quarts (2 L) of clean fresh water into the water pan (H) or
urn body (I).
NOTE:
Follow the manufacture’s instructions for usage and safety for the
electric chafer heater of chafer fuel.
3. Put the cover (B) in the closed position. Preheat the water by using a
universal electric chafer heater on “HI” or by using chafer fuel for 30
minutes.
4. Open the cover (B).
5. Place the food pan (D) or insert (E) containing food product that is
already at proper serving temperatures into the water pan (H) or urn
body (I). Close the cover (B).
NOTE:
Monitor food temperature closely for food safety. The United States
Public Health Service recommends that hot food be held at a minimum
of 140 ºF (60 ºC) to help prevent bacteria growth.
6. Regularly check the food temperature.
7. If necessary adjust the electric chafer heater between “HI” and “LO” to
maintain correct food temperature.
8. When finished with the equipment turn the electric chafer heater to the
“OFF” position and unplug or extinguish the flame on the chafer fuel
source.
9. Open the cover (B). Remove the food pan (D) or the insert (E). When
removing hot food containers from unit use gloves, mitts or pot holders to
protect hands. See Figures 1 and 2.
10. Allow ample time for the water to cool. Remove the water pan (H) or the
urn body (I) and dispose of water.
c
leaning
, t
abletoP
h
ot
f
ood
and
b
everage
To maintain the appearance and increase the service life, clean your
equipment daily.
1. Unplug the electric chafer heater or extinguish the flame on chafer fuel
and let it completely cool.
2. Remove the heating source.
3. Wipe the unit exterior with a clean damp cloth.
4. For coffee urns: Thoroughly clean the inside of the beverage body (E)
with hot water and mild soap. Run the hot soapy water through the faucet
(H). Rinse the beverage body (E) and faucet (H) completely with warm
water. Dry the equipment thoroughly.
5. Do not use abrasive materials, scratching cleansers or scouring pad to
clean the unit. These can damage the finish.
6. Thoroughly wipe off any mild soap or chemical cleaners. Residue could
corrode the surface of the unit.
A
B
F
M
G
J
K
O
N
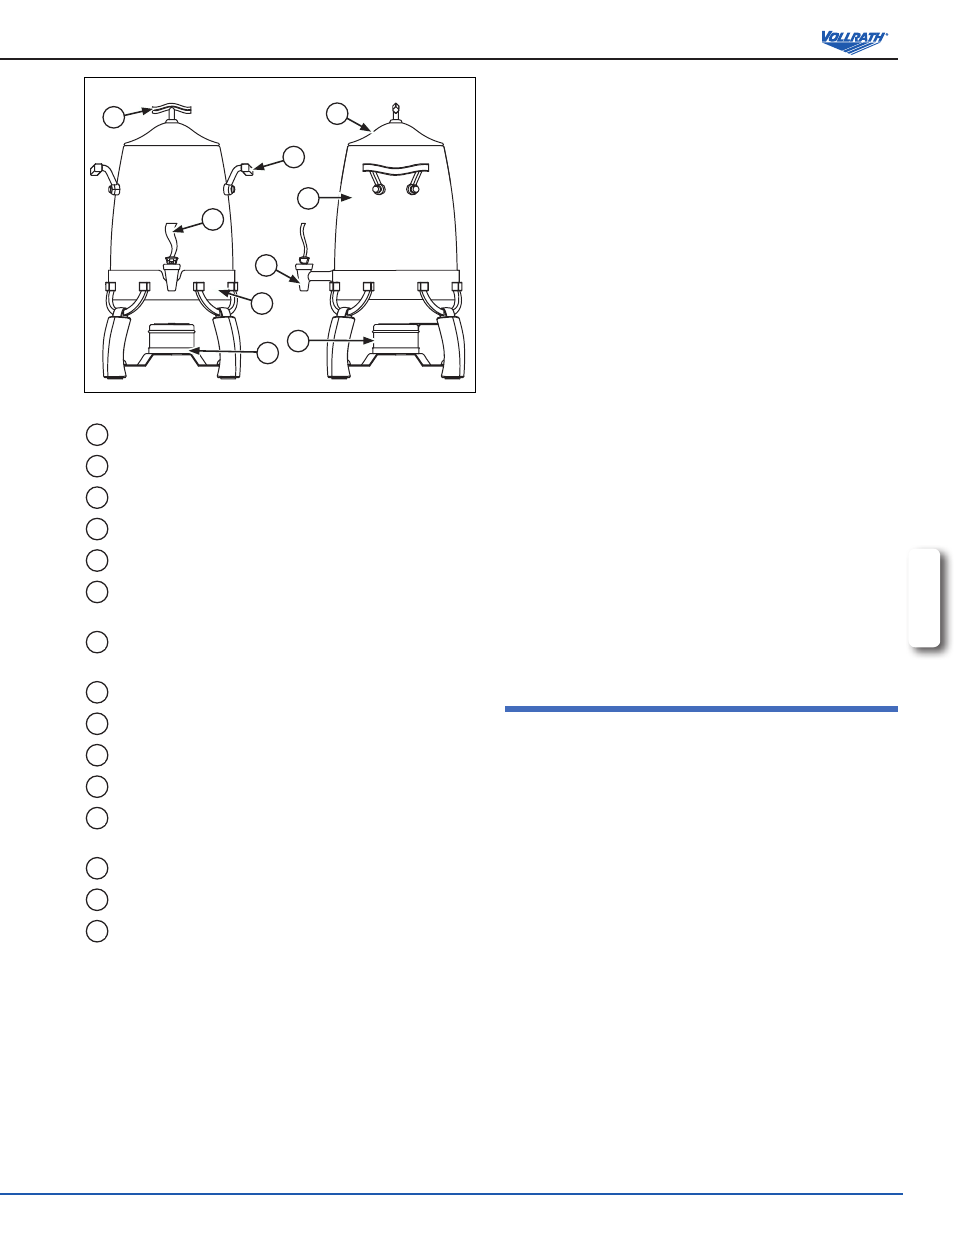
Figure 3. Coffee Urn Features and Controls.
A
COVER HANDLE. Used to open and close the cover.
B
COVER. Covers the food/beverage product.
C
HINGE. Allows the cover to rotate.
D
FOOD PAN. Holds the food product.
E
INSERT. Holds the food product.
F
HEATER/FUEL TRAY. Holds the electric chafer heater or
chafer fuel.
G
FUEL HOLDER with COVER. Designed to hold chafer fuel.
Includes a paddle for extinguishing the fuel flame.
H
WATER PAN. Holds the water.
I
URN BODY. Holds the water.
J
HANDLE. Used to lift the urn body.
K
BASE. Supports the urn body or beverage body.
L
UTENSIL CUTOUT. Opening that allows the handle of a
serving utensil remain in the insert with the cover closed.
M
BEVERAGE BODY. Holds the beverage product.
N
FAUCET. Opening that the beverage flows through.
O
FAUCET HANDLE. Controls the flow of beverage.