DuraVent PelletVent Pro User Manual
Page 20
20
Figure 32
Figure 33
Figure 34
members.
6. Run the Support Box through the roof as shown
in (Figure 30), and place it so that the bottom of
the Support Box protrudes at least 2 inches below
the low side of your opening in the finished ceiling
(Figure 31). Align the Support Box vertically and
horizontally with a level. Temporarily tack the
Support Box in place through the inside walls and
into the roof sheathing.
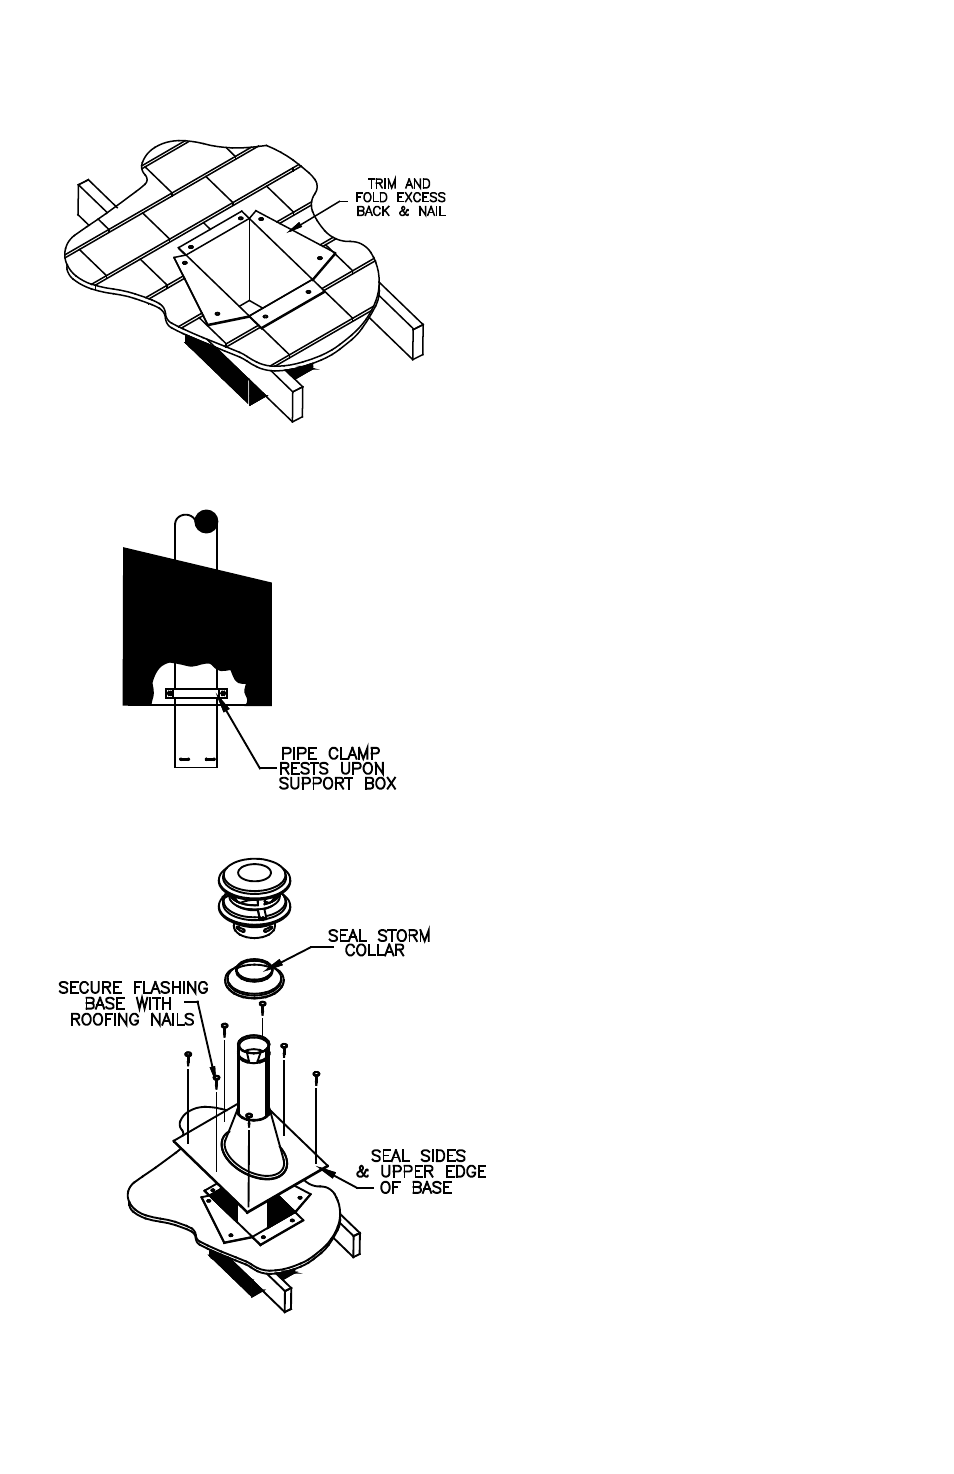
7. If the Support Box protrudes the roofline use
tin snips to cut from the top corners down to
the roof line, and fold the resulting flap over the
roof sheathing (Figure 32). Before nailing it to
the roof, run a bead of non-hardening sealant
around the outside top edges of the Support
Box so as to make a seal between the box and
the roof. Clean out any combustible material or
debris from inside the Support Box.
8. Place the Support Clamp, included with
Support Box, loosely around Pipe Sections
running through hole in Support Box (Figure
33).
9. Connect the necessary amount of Pipe
Sections to reach the stove and extend at least
12-inches above the roof before attaching
Termination Cap (Figure 32).
10. After all PelletVent Pro Pipe Sections and
components are assembled and connected
down to the appliance seal and secure the
Appliance Adapter to stove. Using a level,
make slight adjustments in the position of the
appliance until the pipe is truly vertical. Tighten
the bolts in the Support Clamp (Figure 33).
Note that the overall length of the PelletVent
Pro system can be no longer than 42 feet.
11. Slip Roof Flashing over the supported
Pipe Section(s) protruding through the roof.
Apply sealant to underside of Roof Flashing
along upper edge and sides. Secure the base
of Roof Flashing to the roof with roofing nails
(Figure 34). Ensure that the roofing material
overlaps the top edge of the Roof Flashing.