DuraVent PelletVent Pro User Manual
Page 10
10
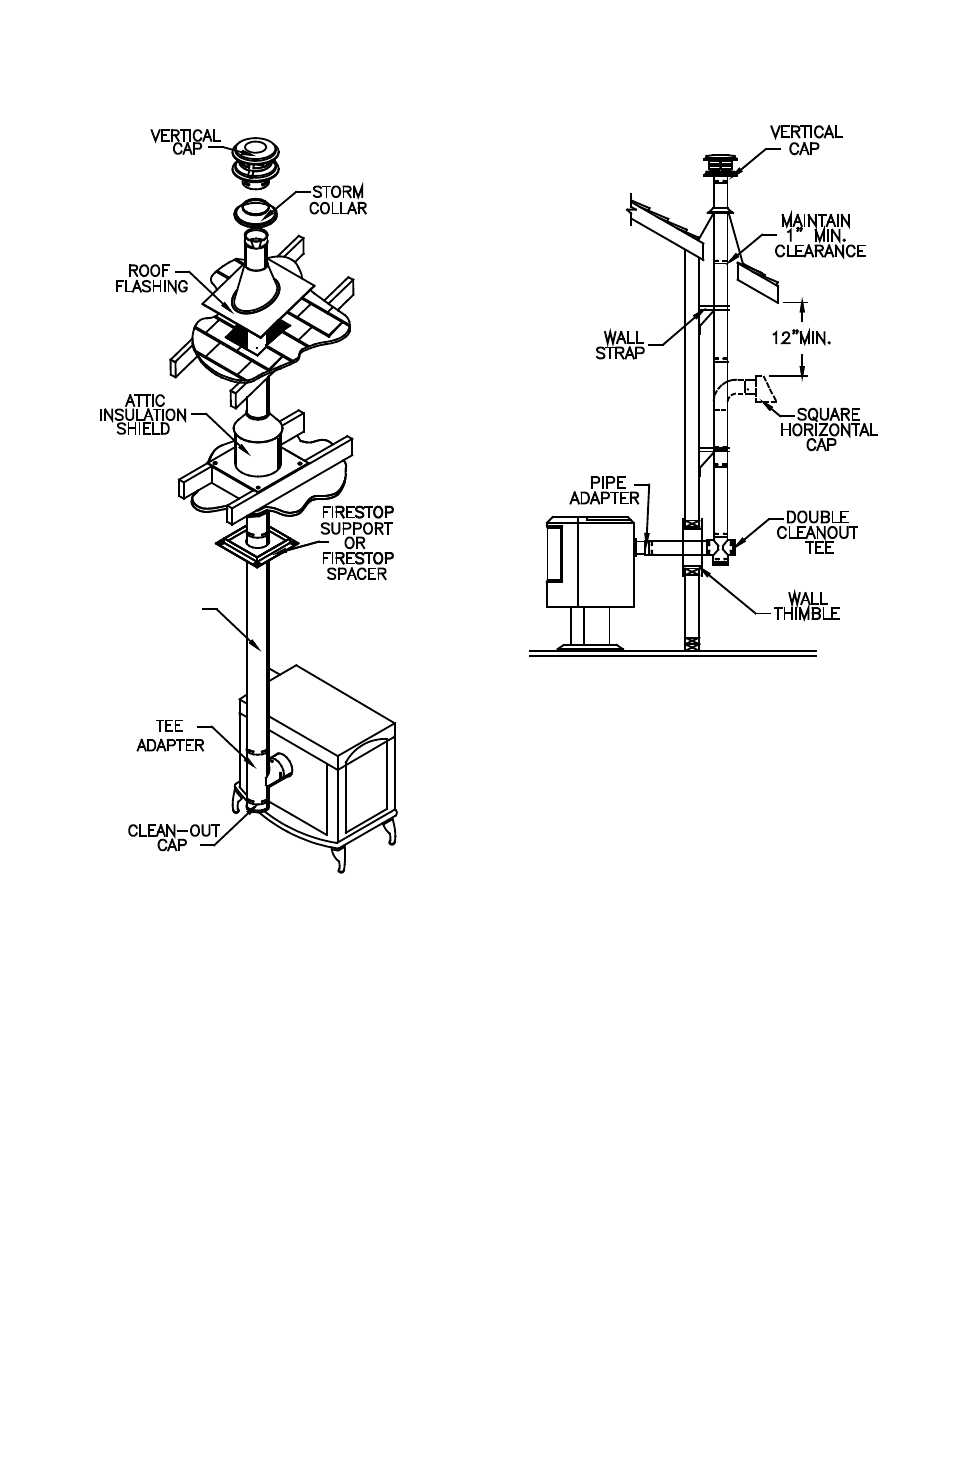
Figure 10
Figure 11
3.
If the flue exits on back of stove and an
interior installation is desired (Figure 10):
A. Place the appliance according to the
manufacturer’s instructions.
B. Connect the Tee Adapter or combine Tee
with Cleanout and Pipe Adapter then seal and
secure the Pipe Adapter to the back of the
stove.
C. Continue to assemble Pipe Sections as
described in Step 2.
4.
If the flue exit is on the back of stove, and
an exterior vertical installation or partial vertical
installation is desired (Figure 11):
A. Place the appliance according to
manufacturer’s instructions.
B. Cut and frame a square opening in the wall
as specified in Table 1. PelletVent Pro can be
installed with the standard Wall Thimble, Wall
Thimble Air Intake Kit , or CAS Wall Thimble
for through the wall installations. If the CAS
Wall Thimble is used, refer to the PelletVent
Pro CAS Installation Instructions for direction
on how to install the Combustion Air System
(CAS). The Wall Thimble Air Intake Kit allows
combustion air to be drawn through the framed
Thimble opening, eliminating the need to
cut another opening in wall. The small flex
provided with this kit allows connection to the
Pellet Stove combustion air inlet. Note that
when installing the Wall Thimble Air Intake
Kit, the pipe will not be centered within the
framed opening. Loosely assemble both
halves of the Wall Thimble onto Pipe Section.
PELLET VENT
PRO PIPE