Installation into a masonry fireplace – DuraVent PelletVent Pro User Manual
Page 15
15
Figure 22
Figure 21
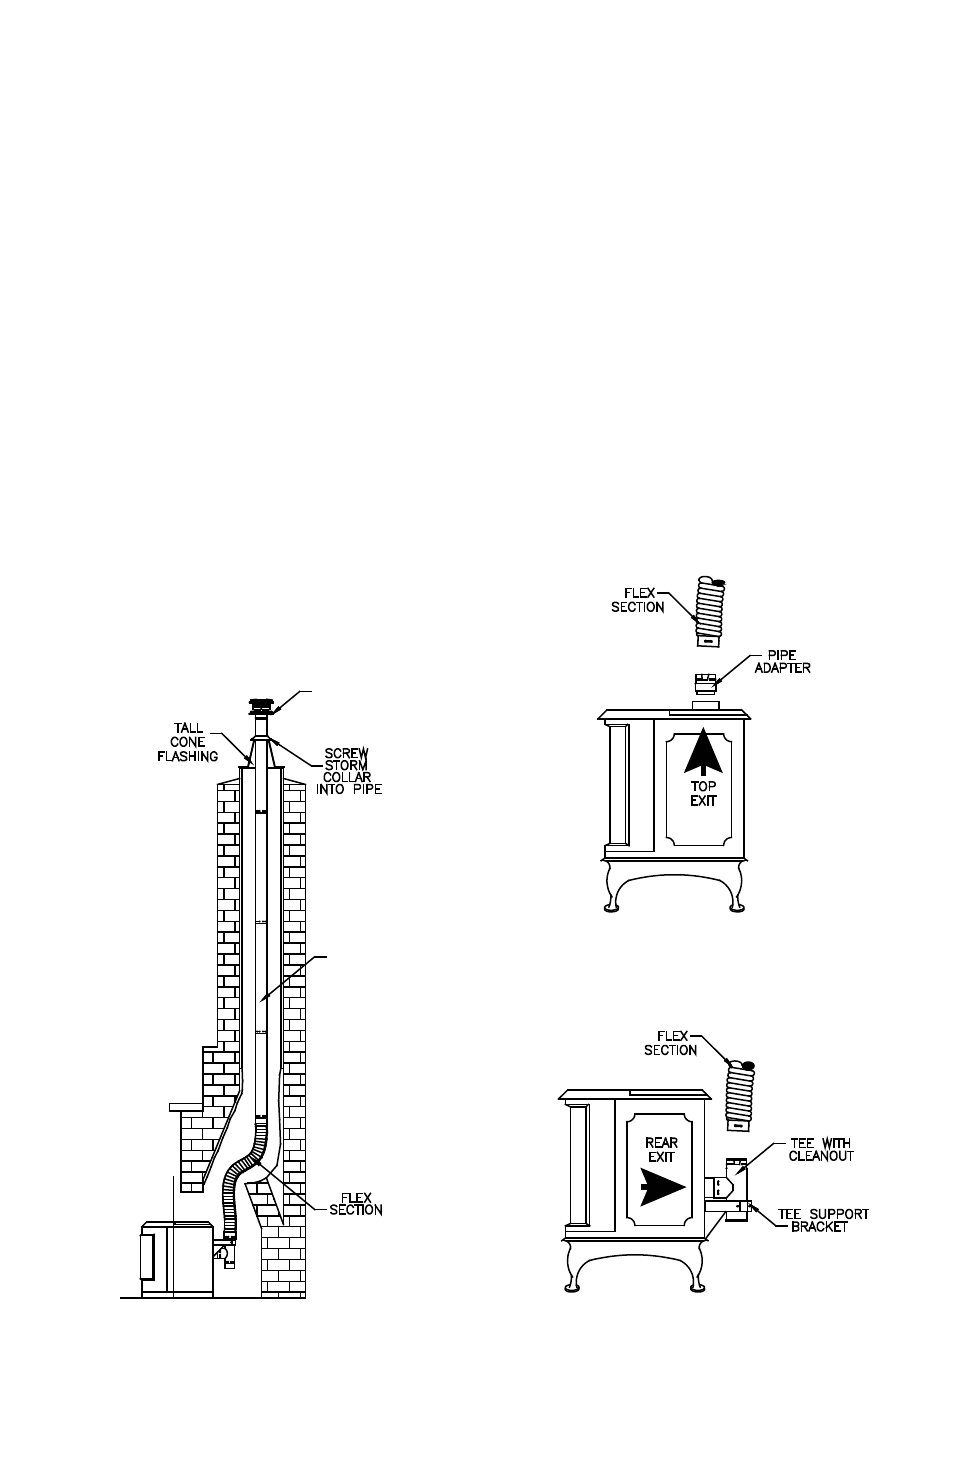
INSTALLATION INTO A MASONRY
FIREPLACE
1. Have the masonry chimney inspected
by a certified chimney sweep or installer to
determine its structural condition.
2. Carefully read the pellet stove or insert
installation instructions.
3. Measure and record the dimensions as
shown in (Figure 18).
4. Use dimension “A” to determine total pipe
requirements. Add 12 additional inches to
ensure the termination is an adequate distance
above the roofline.
5. The gross pipe required will be dimension
“A” plus 12 inches. Five feet of this will be Flex
Pipe. The remainder will be rigid pipe. For
each joint, subtract 1-1/2 inches to allow for
the overlap. You may need extra pipe, or an
adjustable length pipe section to achieve the
correct height.
6. Assemble the first rigid Pipe Section to
the Flex Pipe, ensuring that the “UP” arrows
shown on the pipe labels are, in fact, pointing
up. Push the sections together and twist to
lock. Screws are not required for a firm lock,
however, should it be desired to use them, use
stainless steel sheet metal screws 1/4-inch
long - do not penetrate the inner liner of the
pipe.
7. Repeat this process for the remainder of
the pipe sections, and lower the assembly
down the chimney as shown in (Figure 19).
Lower it below its normal position in order
Figure 20
PELLET VENT PRO
RIGID PIPE
PELLET VENT PRO
VERTICAL CAP
15