Installation through side of masonry chimney – DuraVent PelletVent Pro User Manual
Page 17
to connect the Flex Pipe to the pipe on the
appliance. It may be necessary to tie a line to
the top section, to pull it back up later.
8. In making the connection at the appliance,
configurations other than the one shown
in (Figure 20) may be made. It may be
necessary to contact the manufacturer of the
unit to determine exactly what may or may not
be done to make the correct connection. Some
typical arrangements are shown in (Figures 21
and 22). An Appliance Adapter or Increaser
Adapter may be needed, depending on the exit
size of the stove or insert collar.
9. If a Tee or Tee Adapter is necessary to make
the connection, as shown in (Figure 22), the
Tee has a removable Clean out Adapter on
its base to enable cleaning. The Tee Support
Bracket to hold the Tee to the rear of the
appliance is mandatory. If it is desired to mount
the Tee Support to the rear of the stove, obtain
approval from the manufacturer of the stove
before drilling, tapping, or performing any other
alterations to the appliance.
10. Connect the appliance to the coupling on
the bottom of the Flex Pipe, by twisting to the
locked position. Push the appliance into the
fireplace to its final resting place. Go to the top
of the chimney and pull the vent system up to
its desired height.
11. For support at the termination of the
PelletVent, use a Tall Cone Flashing, and a
Storm Collar. This will require 14 inches of
pipe above the top of the masonry chimney.
Pull the pipe up through the flashing to the
desired height. Mark location of the Storm
Collar. Slip the Storm Collar down over the
pipe and affix it to the pipe with a 1/4”-long
stainless steel sheet metal screw (Figures 23
& 24). The Storm Collar will then support the
entire vent system. Install the Cap. Seal the
joint at the Storm Collar, and any other joints
or seams which may appear suspect. (Figure
Figure 26
17
25) shows a Tall Cone Flashing modified to fit
a chimney where the tile liner protrudes above
the masonry, as another alternate termination
technique. This completes the masonry
installation.
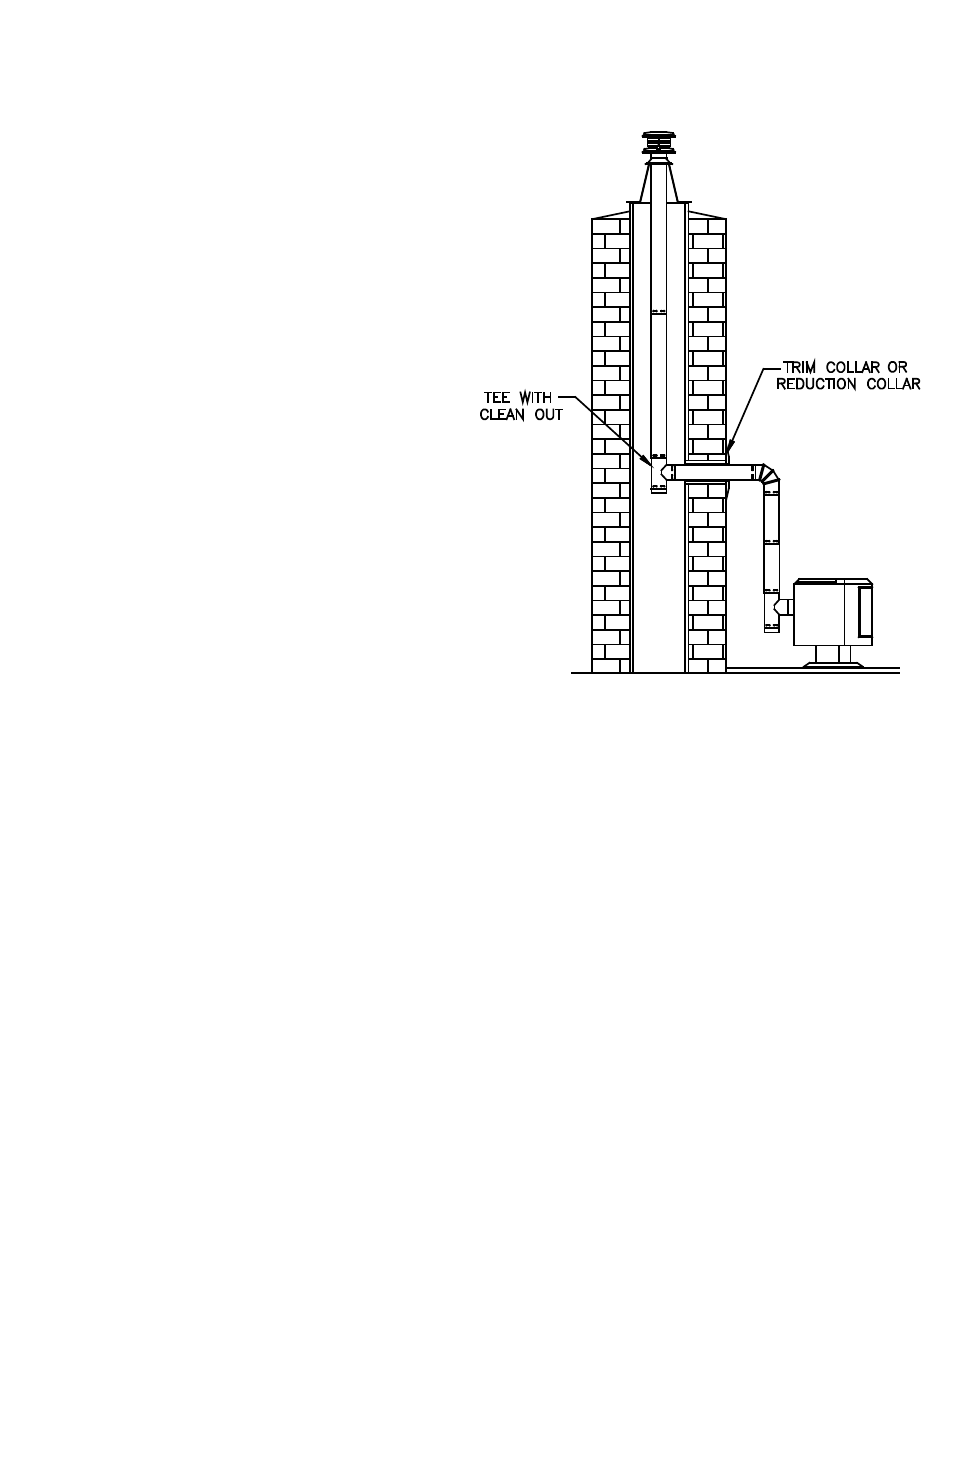
INSTALLATION THROUGH SIDE OF
MASONRY CHIMNEY
1. Set the appliance in its final location and
mark the center of the hole where the pipe is
to penetrate the masonry chimney. Ensure
that you comply with the manufacturer’s
specifications in regards to clearance and
distances from combustible surfaces.
2. The PelletVent Pro system is assembled
essentially the same as previously described
for installation in an existing masonry chimney
with the exceptions listed:
A. No Flex Pipe is required, unless the
masonry chimney has an offset. If an offset
exists, then a Flex Pipe will be needed from