6 operating the vm-24h, 1 controlling via rs-232, Operating the vm-24h – Kramer Electronics VM-24H User Manual
Page 14: Controlling via rs-232, Figure 4: crossed cable rs-232 connection, 6operating the vm-24h
VM-24H - Operating the VM-24H
11
6
Operating the VM-24H
This section describes how to:
Control the VM-24H via RS-232, see
Section
Operate the VM-24H, see
Section
Use the EDID button, see
Section
6.1
Controlling via RS-232
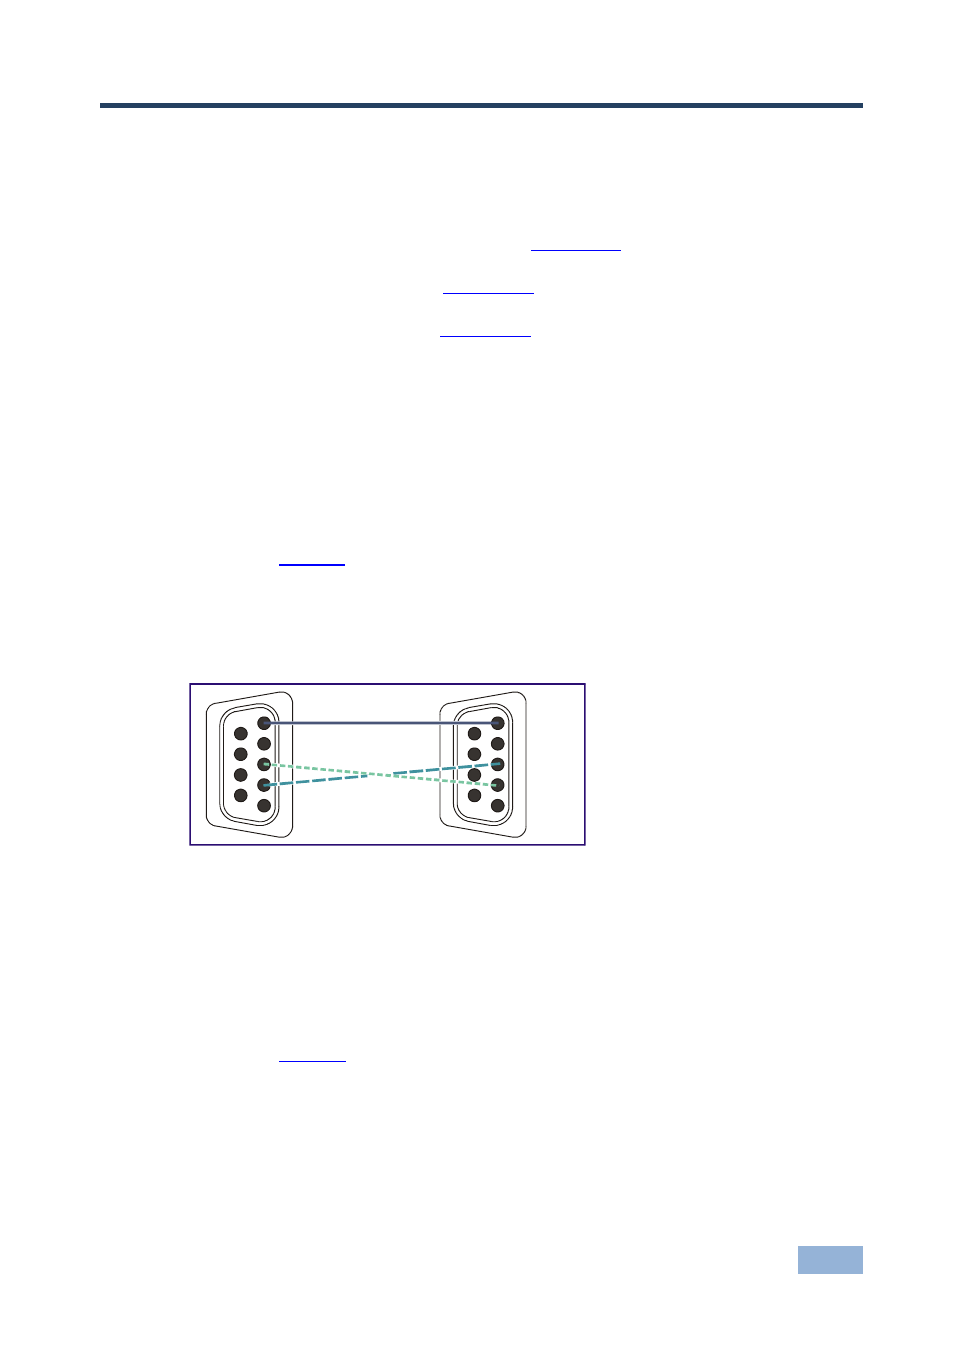
You can connect to the unit via a crossed RS-232 connection, using for example,
a PC. A crossed cable or null-modem is required as shown in method A and B
respectively. If a shielded cable is used, connect the shield to pin 5.
Method A (
—Connect the RS-232 9-pin D-sub port on the unit via a
crossed cable (only pin
2
to pin
3
, pin
3
to pin
2
, and pin
5
to pin
5
need be
connected) to the RS-232 9-pin D-sub port on the PC.
Note: There is no need to connect any other pins.
Figure 4: Crossed Cable RS-232 Connection
Hardware flow control is not required for this unit. In the rare case where a
controller requires hardware flow control, short pin 1 to 7 and 8, and pin 4 to 6 on
the controller side.
Method B (
—Connect the RS-232 9-pin D-sub port on the unit via a
straight (flat) cable to the null-modem adapter, and connect the null-modem
adapter to the RS-232 9-pin D-sub port on the PC. The straight cable usually
contains all nine wires for a full connection of the D-sub connector. Because the
null-modem adapter (which already includes the flow control jumpering described
1
2
6
3
7
4
8
5
9
1
2
6
3
7
4
8
5
9
PC