Product familiarisation, Unpacking your tool, Operating instructions – Silverline Automatic Optical Level User Manual
Page 6: Prior to use
www.silverlinetools.com
5
Automatic Optical Level
633665
1
Lens
2
Peep Sight
3
Eyepiece Cover
4
Eyepiece
5
Horizontal Calibrator
6
Horizontal Calibrator Reference Point
7
Vial
8
Vial Adjustment Screws
9
Vial Viewing Prism
10 Focus Dial
11 Horizontal Movement Dial
12 Foot Screw
Product Familiarisation
Accessories
1 x Plumb Bob, 1 x Hex Key, 2 x Adjustment Tools
Unpacking Your Tool
• Carefully unpack and inspect your tool. Fully familiarise yourself with all
its features and functions
• Ensure that all parts of the tool are present and in good condition. If
any parts are missing or damaged, have such parts replaced before
attempting to use this tool
Operating Instructions
This is a precision instrument. Please read these instructions carefully and
follow guidance on correct handling and storage so that you get the best
out of your level and prolong its working life.
Transport
• Protect the instrument from excessive movement or knocks. Always
transport the instrument in the case provided
Prior to Use
• For optimum performance of your level, thoroughly check the instrument
before use
• Due to the precision nature of this instrument, even if it has been packed
correctly in its case it may need re-adjustment (See ‘Horizontality of the
line-of-sight’, below)
• Allow a short time before use for the instrument to adapt to the prevailing
temperature
Setting up
• Always handle the instrument with care when setting up
• Set the tripod (not included) at a comfortable height and so that the top of
the tripod is as level as possible. When working on soft ground, tread the
legs of the tripod firmly into the ground
• Attach the Level securely using the tripod fixing screw
• Centre the circular bubble in the vial by rotating the foot screws (Fig 6)
Fig.6
Pointing and focusing
• Point the Level towards a bright background or hold a white sheet of
paper in front of the lens
• Rotate the Eyepiece (4) until the cross hairs are sharp and black
• Turn the level towards the measuring staff (not included); you can use
the peep sight
• Looking through the eyepiece, rotate the Focus Dial (10) until the image
of the staff is sharp and clear
• Rotate the Horizontal Movement Dial (11) to set the vertical hair down the
centre of the staff
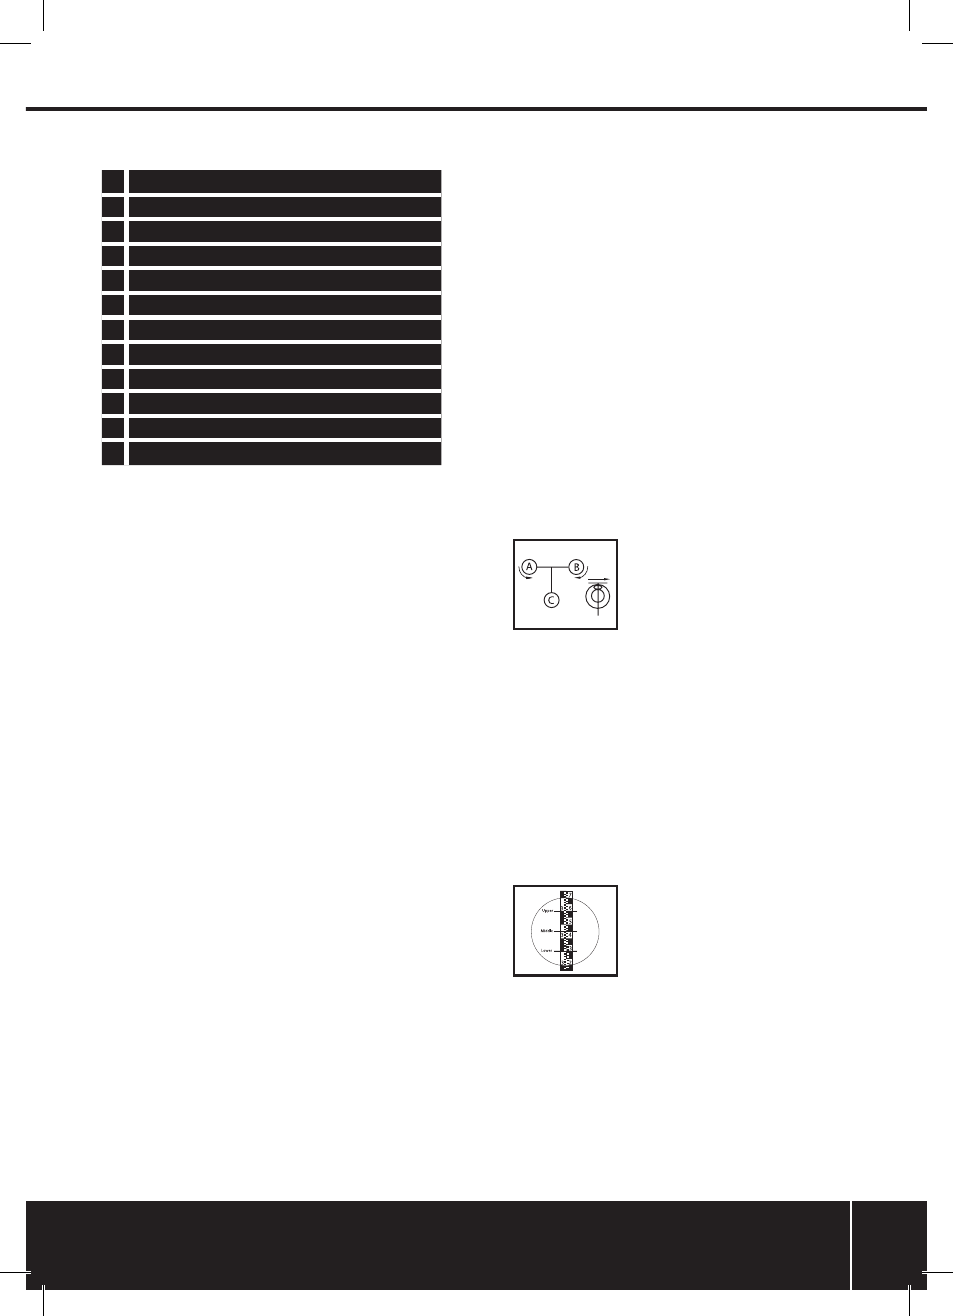
Measuring
Height measurement
• Read the staff where it is intersected by the middle hair. With metric
staffs it is usual to estimate to 1mm. The height reading in fig.7 is
3.456m
Fig.7
Distance measurement
• Read the staff where it is intersected by the upper and lower stadia hairs.
The difference multiplied by 100 is the distance from the instrument to
the staff
• For example, in fig.7 these readings are at 3.601m and 3.309m,
therefore, the distance from the instrument to the staff is: (3.601m -
3.309m) x 100 = 29.2m
633665_Z1MANPRO1.indd 5
26/10/2011 15:44