Installation of extended exhaust porch – COOK Laboratory Exhaust User Manual
Page 15
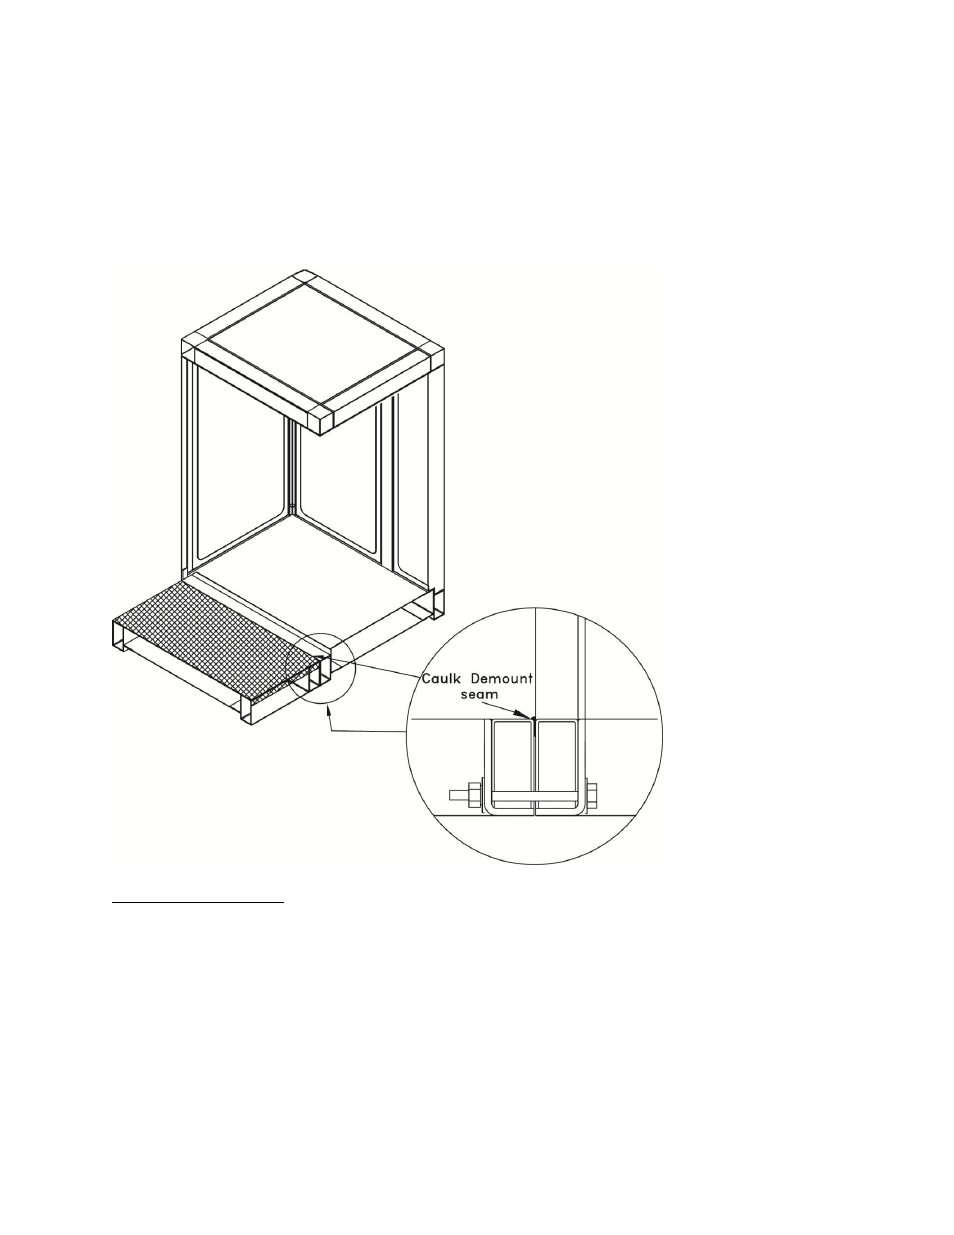
6.0
Installation of Extended Exhaust Porch
The final step in assembly of the equipment is the installation of the extended exhaust.
1. Caulk base tube of porch and base tube of energy recovery coil plenum
2. Pull both sections together with the lifting lugs
3. Apply finish seam of caulk after the unit is bolted tightly together.
(See Figure 9)
Assembly Instructions:
1. Apply degaseal 200 adhesive sealant or equal in a z-pattern on both sides of the
demount tubes.
2. Pull unit sections together by lugs and bolt together with supplied hardware.
3. Apply a finish seam of degaseal 2000 adhesive sealant or equal between the exterior
unit panel and the exhaust fan base
(as seen in above picture)
.
See also other documents in the category COOK Kitchen:
- AC (12 pages)
- ACSC (8 pages)
- VA (12 pages)
- ASP (8 pages)
- Automatic Belt Tensioner Supplement I (2 pages)
- Automatic Belt Tensioner Supplement II (2 pages)
- CA (16 pages)
- CA-4 (1 page)
- CCP (8 pages)
- CFS (8 pages)
- CIC (12 pages)
- CPL (8 pages)
- CV (8 pages)
- Duct Blower (8 pages)
- EC Motor Wiring (1 page)
- Constant Pressure Control System (2 pages)
- Economizer Fan (8 pages)
- ERV (16 pages)
- ERV Evaporator Coil Supplement (2 pages)
- ERV Fluid Coil Supplement (2 pages)
- FCE (6 pages)
- FCP (8 pages)
- Gemini (8 pages)
- Gemini (1 page)
- GEMINI 100 SERIES PRE-2014 MOTOR (1 page)
- GEMINI 200, 300, & 500 PRE-2014 MOTOR (1 page)
- Gemini 100 Series (4 pages)
- Curtain Style Ceiling Radiation Damper (1 page)
- Gemini with Motion Sensor (2 pages)
- GI (4 pages)
- HMD EN (16 pages)
- Hinged Base (2 pages)
- IMH (8 pages)
- Inlet Vane Damper (1 page)
- Laboratory Exhaust (17 pages)
- Laboratory Exhaust (4 pages)
- Power-Plume (4 pages)
- TCN (12 pages)
- QMX (12 pages)
- LC (8 pages)
- Lo-Pro (8 pages)
- Motor Pack (2 pages)
- Universal Motor Pack (2 pages)
- PR (2 pages)