COOK Laboratory Exhaust User Manual
Page 13
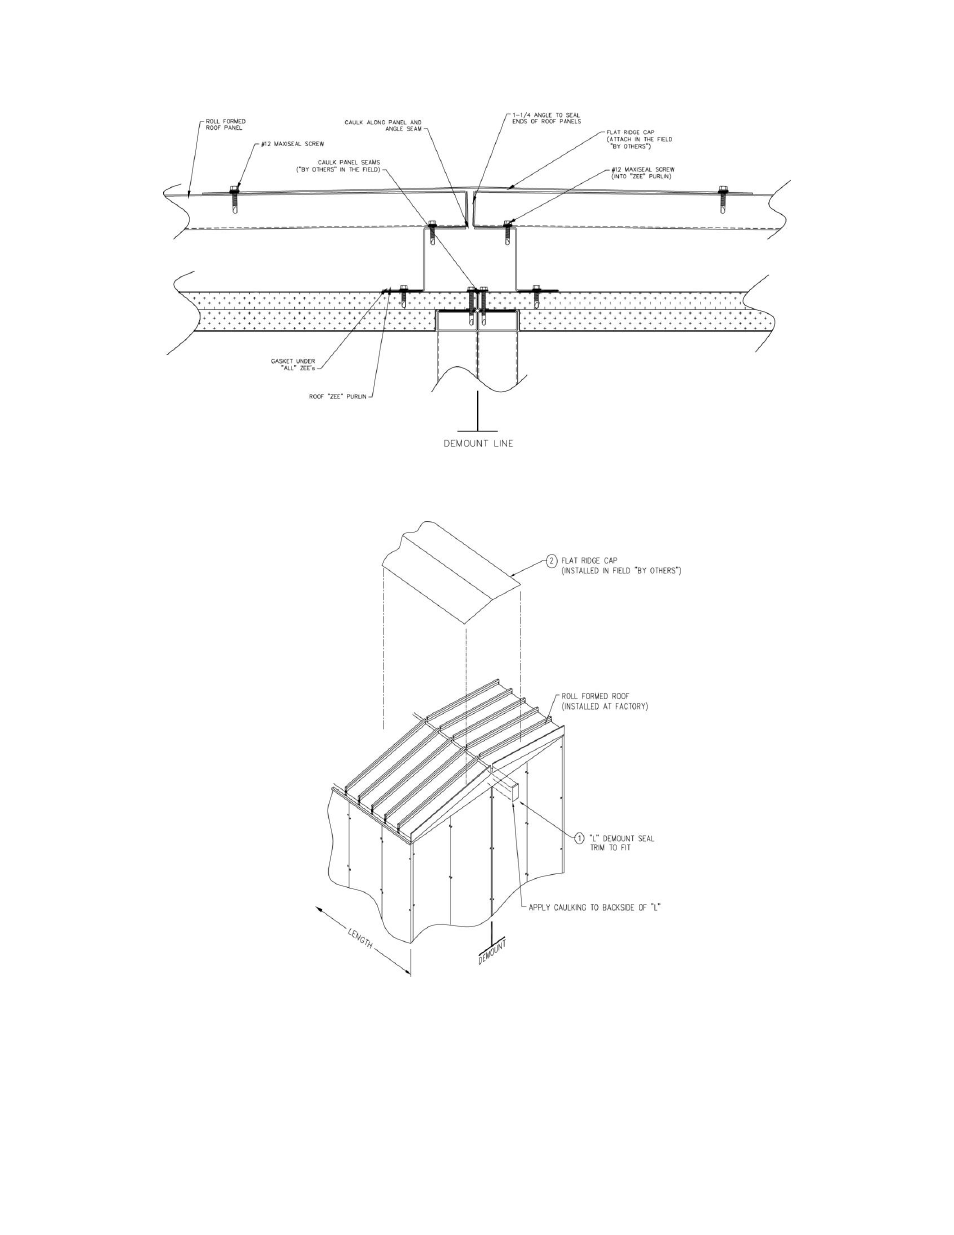
Figure 7 Typical Outdoor Units, Water Shed Panels Center Pitched Roof, Water Shed Panels
Perpendicular to Pitch of Roof
Figures 7 and 8 show how a demounted center (or double) pitched roof configuration is
assembled. Note: The water shedding panels are aligned perpendicular to the demount line.
The only parts that need to be assembled in the field are the ridge caps
and the tall “L” trim as
indicated in figure 8. Apply sealant to the back side of this trim prior to installation of this trim.
Attach the ridge cap as shown in Figure 8 in the following section.
Figure 8 Installing Ridge Cap and Flashing
– Center Demounts
See also other documents in the category COOK Kitchen:
- AC (12 pages)
- ACSC (8 pages)
- VA (12 pages)
- ASP (8 pages)
- Automatic Belt Tensioner Supplement I (2 pages)
- Automatic Belt Tensioner Supplement II (2 pages)
- CA (16 pages)
- CA-4 (1 page)
- CCP (8 pages)
- CFS (8 pages)
- CIC (12 pages)
- CPL (8 pages)
- CV (8 pages)
- Duct Blower (8 pages)
- EC Motor Wiring (1 page)
- Constant Pressure Control System (2 pages)
- Economizer Fan (8 pages)
- ERV (16 pages)
- ERV Evaporator Coil Supplement (2 pages)
- ERV Fluid Coil Supplement (2 pages)
- FCE (6 pages)
- FCP (8 pages)
- Gemini (8 pages)
- Gemini (1 page)
- GEMINI 100 SERIES PRE-2014 MOTOR (1 page)
- GEMINI 200, 300, & 500 PRE-2014 MOTOR (1 page)
- Gemini 100 Series (4 pages)
- Curtain Style Ceiling Radiation Damper (1 page)
- Gemini with Motion Sensor (2 pages)
- GI (4 pages)
- HMD EN (16 pages)
- Hinged Base (2 pages)
- IMH (8 pages)
- Inlet Vane Damper (1 page)
- Laboratory Exhaust (17 pages)
- Laboratory Exhaust (4 pages)
- Power-Plume (4 pages)
- TCN (12 pages)
- QMX (12 pages)
- LC (8 pages)
- Lo-Pro (8 pages)
- Motor Pack (2 pages)
- Universal Motor Pack (2 pages)
- PR (2 pages)