Preparing the computer – CatEye CC-TR300TW [V3] User Manual
Page 6
ENG-11
ENG
ENG-10
Continue
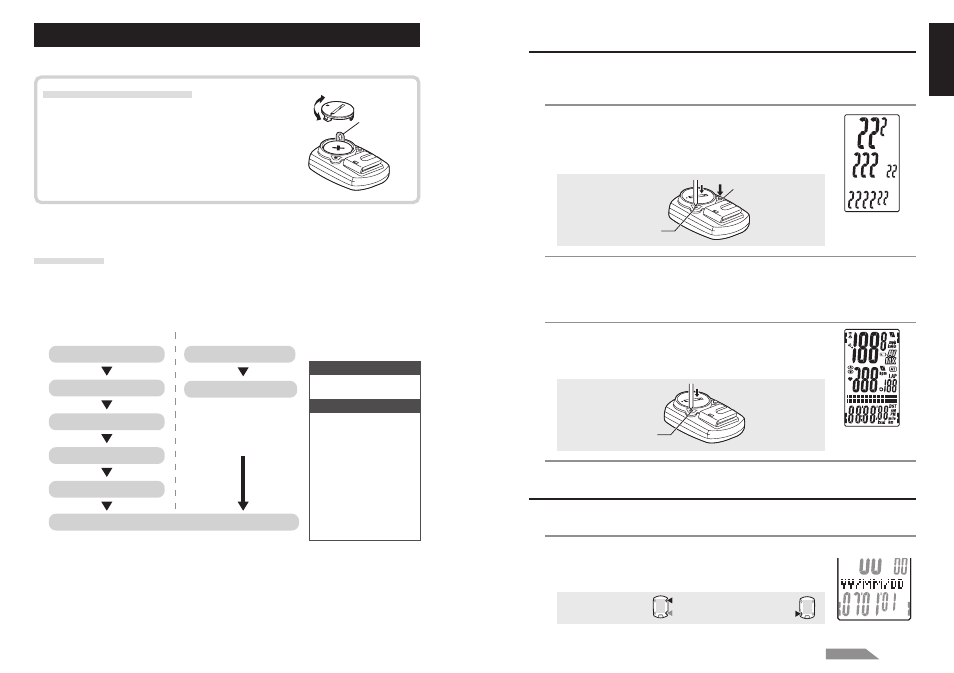
1. Formatting/Restarting operation
Formatting operation
Caution: All data are reset to the default and deleted.
1. While pressing the MENU button on the back of the
computer, press AC button.
Release the MENU button when a test pattern is displayed
on the screen. The date/clock setting screen appears.
Continue with date/clock setting.
Formatting operation:
* When all screen items light up without any test pattern displayed on the screen,
the formatting operation has not been completed properly. Perform the formatting
operation again.
Restarting operation
1. Press the AC button on the back of the computer.
After all screen items light up for a second, the date/clock
setting screen appears.
Continue with date/clock setting.
Restarting operation:
* Most of the settings and file data saved are retained for the restarting operation
(see chart on page 10).
2. Date/Clock setting
Set the current date and time.
1. Select the date display format.
Select the date display format from “YY/MM/DD”, “MM/DD/
YY”, and “DD/MM/YY” using the M1/+ and M2/- buttons,
and confirm with the SSE button.
Switch the display:
M1/+
M2/-
Confirm:
SSE
After a test pattern is
displayed, all screen
items light up.
All screen items light
up (for a second).
(or)
MENU
AC
AC
(At initial purchase, or reset all to default.)
(When you replace batteries, or an error is displayed.)
Removing the insulation sheet
When using the unit for the first time after purchas-
ing, open the battery cover and remove the insula-
tion sheet.
* After you remove the insulation sheet, replace the
battery cover in place.
Preparing the computer
Computer's basic items must be set up before using it.
Insulation
sheet
Open
Close
Measurement screen
For formatting:
For restarting:
Restarting operation
* The date when you per-
formed the restarting
operation will be ini-
tially displayed.
Date/clock setting
In the restarting operation,
the following data are re-
tained.
Selecting speed unit
Set the sensor ID
Tire circumference input
Date/clock setting
Formatting operation
Measurement screen
Total time
Total distance
Menu screen
File data saved
Time format
Date
Tire circumference and
wheel selection
Speed unit
Sensor ID
Auto-mode
Countdown distance
Sound
Setting the target zone
Flow of set-up
There are 2 different set-up operations:
• Formatting operation: At initial purchase, or reset all to default.
• Restarting operation: When you replace batteries, or an error is displayed.
Each operation has a different flow of set-up.
* If mistake was made or “ID-ERROR” showed in the initial set up, go through the
full initial set up steps first, and all corrections can be made afterwords through
Menu screens. (page 23)