CatEye CC-TR300TW [V3] User Manual
Page 15
ENG-29
ENG
ENG-28
M2/-
M1/+
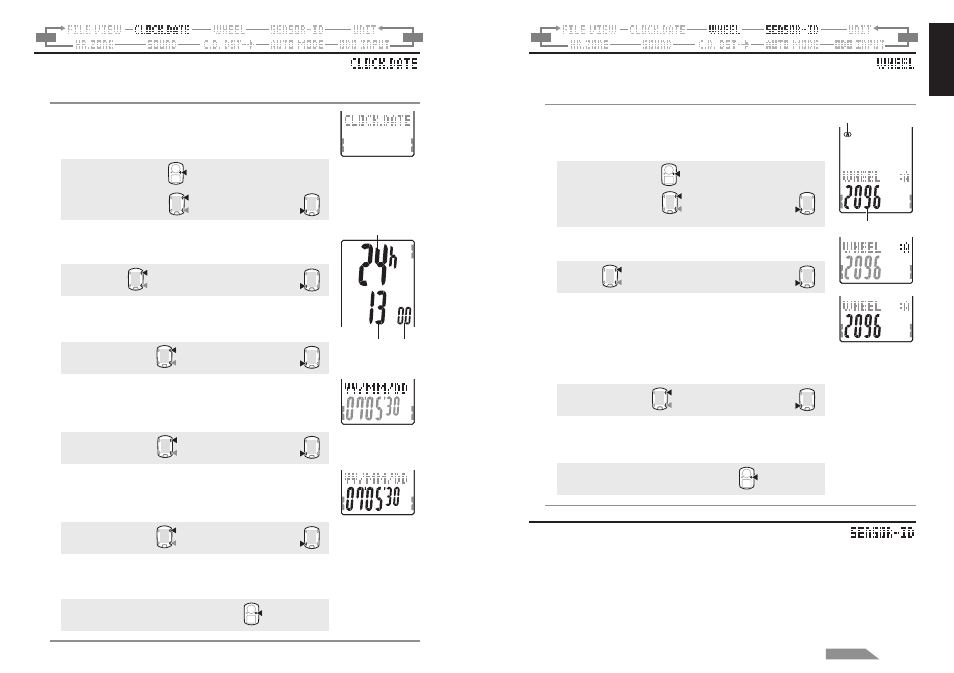
Wheel selection and tire circumference
Switch the Wheel Size (A / B), and change the Tire Size (tire roll out length).
* For the tire size, see “Tire circumference” (page 13).
1. Press the MENU button in the measurement screen to
switch to the menu top screen.
Switch to the WHEEL screen using the M1/+ and M2/-
buttons, and confirm with the SSE button.
Menu top:
MENU
Changing the menu:
M1/+
M2/-
Confirm:
SSE
(or)
Wheel selection
Current wheel size
2. Select the Wheel Size “A” or “B” using the M1/+ and M2/-
buttons.
A
↔ B:
M1/+
M2/-
Confirm:
SSE
At this point if change of tire circumference is not necessary,
you can escape the setup by pressing the MENU button.
3. Enter the last 2 digits of the tire circumference for the wheel
selected in Step 1 using the M1/+ and M2/- buttons, and
confirm with the SSE button.
Then, enter the first 2 digits in the same way.
Increase/decrease:
M1/+
M2/-
Move digits:
SSE
4. Pressing the MENU button returns to the menu top screen
(WHEEL screen), and confirm the change(s).
Pressing it again returns to the measurement screen.
To the menu top/measurement screen:
MENU
Searching the sensor ID
When moving the computer from one sensor to another or to use a different HR chest
strap, this operation must be performed.
* This unit requires the sensor ID.
The computer cannot receive the sensor signal unless the sensor ID is synchronized properly.
* To synchronize the sensor ID, the heart rate sensor must be worn properly (page 9), and be near
the bicycle with a speed/cadence mounted (page 7).
* When searching the sensor ID, make sure no other sensors are in the area within 10 m radius.
For the Speed/Cadence sensor, it is also possible to press the Reset button on the sensor to
intentionally turn off the signal transmission from the sensor.
(or)
(or)
(Back)
(Back)
M2/-
M1/+
Setting the clock/date
Set the “Clock display format”, “Hour”, “Minute”, “Date display format”, “Year”,
“Month” and “Day.”
1. Press the MENU button in the measurement screen to
switch to the menu top screen.
Switch to the CLOCK.DATE screen using the M1/+ and M2/-
buttons, and confirm with the SSE button.
Menu top:
MENU
(or)
(or)
(or)
(or)
Hour Minute
(or)
Display format
(Back)
(Back)
Changing the menu:
M1/+
M2/-
Confirm:
SSE
2. Select the clock display format.
Select “24h (24 hour)” or “12h (12 hour)” using the M1/+
and M2/- buttons, and confirm with the SSE button.
24h
↔
↔
↔
↔
↔ 12h:
M1/+
M2/-
Confirm:
SSE
3. Enter the “Hour” or “Minute.”
Enter the “Hour” using the M1/+ and M2/- buttons, confirm with
the SSE button, and then enter the “Minute” in the same way.
Increase/decrease:
M1/+
M2/-
Confirm:
SSE
4. Select the date display format.
Select the date display format from “YY/MM/DD”, “MM/DD/
YY”, and “DD/MM/YY” using the M1/+ and M2/- buttons,
and confirm with the SSE button.
Switch the display:
M1/+
M2/-
Confirm:
SSE
5. Enter the “Year”, “Month” and “Day.”
Enter the “Year”, “Month” and “Day” in the display order
selected in Step 4 using the M1/+ and M2/- buttons, and
confirm with the SSE button. Enter the last 2 digits of the year.
Increase/decrease:
M1/+
M2/-
Confirm:
SSE
6. Pressing the MENU button returns to the menu top screen
(CLOCK.DATE screen), and confirm the change(s).
Pressing it again returns to the measurement screen.
To the menu top/measurement screen:
MENU
Continue