Step 7, Splice post/door jamb – Arrow Fastener VD108-A 697.68618 User Manual
Page 20
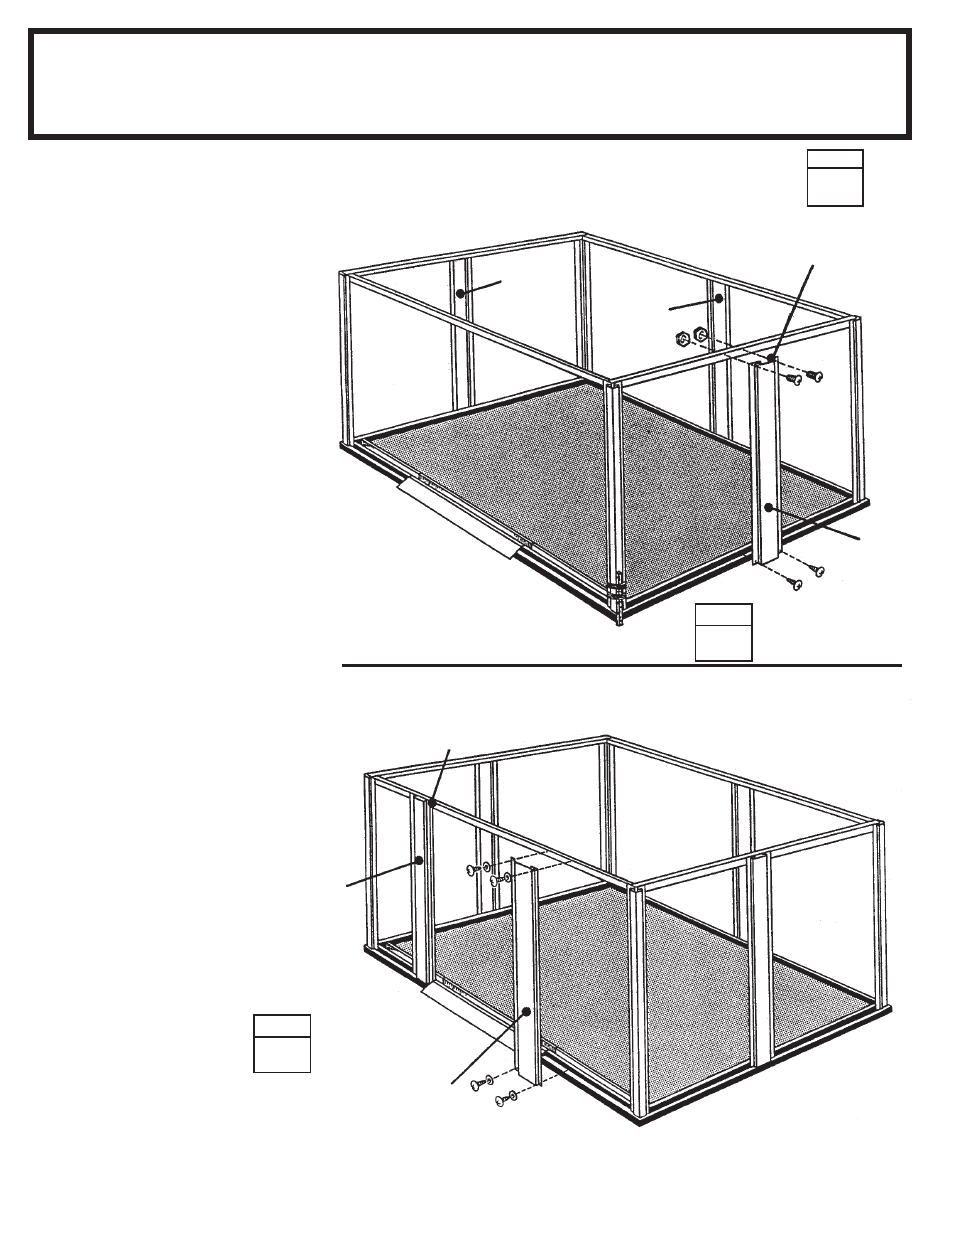
The door jambs reinforce the door
opening and provide an attractive
trim. The splice post supports the
wall.
1
Position splice post at the center
of the rear wall and fasten using 4
bolts and nuts into rear wall angle
and 2 screws into rear floor frame.
Hint: Measure or count holes to de-
termine if post is centered on angle.
2
Fasten splice posts to the sides of
building in the same manner.
3
Fasten the top of the door jambs
to the door track with 2 screws. Do
the same for the bottom into frame.
Notched edge faces toward center of
building.
●
●
●
●
● 5287 Splice Post (3)
●
●
●
●
● 7311 Door Jamb (2)
● Parts Needed For ●
Splice Post/Door Jamb
Step 7
Y20
20
ANGLED END OF
SPLICE POST MUST
BE ON TOP
1
STEP
STEP
3
NOTCHED EDGE
MUST FACE CENTER
OF BUILDING
FRONT
FRONT
Washer
7311
5287
5287
5287
STEP
2
7311