Network services – Samsung GX-SM530CF-XAA User Manual
Page 79
77
Network Services
h Using Apps
USING APPS
You can download applications various for pay or free-of-charge application from the Internet and view them on your TV. To access some applications, you
need to have a Samsung account.
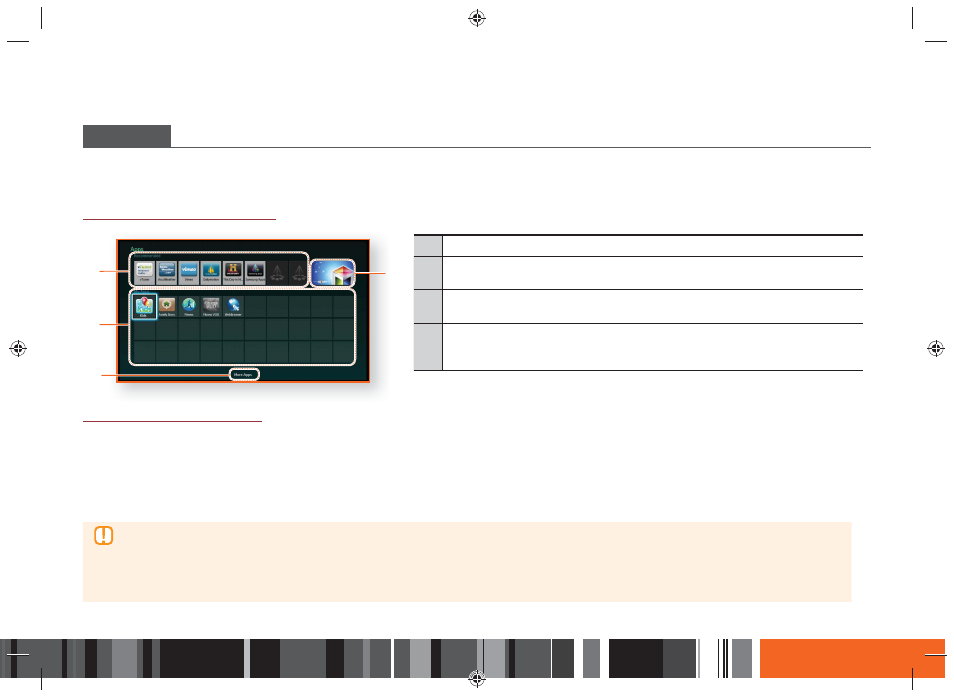
The Apps Screen at a Glance
2
3
1
4
1
Recommended : Displays recommended contents managed by Samsung.
2
My Apps : Displays your personal gallery of applications modifiable on the More Apps
screen.
3
More Apps : Select to access the More Apps screen where you can add, modify, and
delete applications and see all downloaded applications.
4
Featured Applications : Use the ▲▼◀▶ buttons to highlight the displayed Feature
Application, and then press the E button. Information about the featured application
appears.
Downloading Applications
You can download for pay or free-of-charge applications through Samsung Apps.
1.
On the Apps screen, select Samsung Apps, and then press the
E
button. The Samsung Apps screen appears.
2.
Across the top of the screen, under What’s New, you'll see a series of new apps. Use the ◀▶ buttons to scroll the list right or left, and then select an app.
Press the
E
button to see more information about the app. If the app is free, select Download, and then press the
E
button to download the app.
If it is a for pay app, select Buy, press the
E
button, and then follow the instructions on the screen.
▶
To buy an app, you must be logged into your Samsung account and have a credit card registered to the account. Press the RED (A) button on
your remote to log in.
▶
If you haven’t registered a card, after you log in, press the RED (A) button again, and then select Change Account Information in the pop-up that
appears. On the Change Account information page, select Register Card, press the
E
button, and then follow the directions on the screen.
▶
You can also access and download apps from the categories listed on the left of the screen. For instructions, see Step 4.