Siemens 36inc Stainless Gas Cooktop User Manual
Page 18
18
IMPORTANT INFORMATION
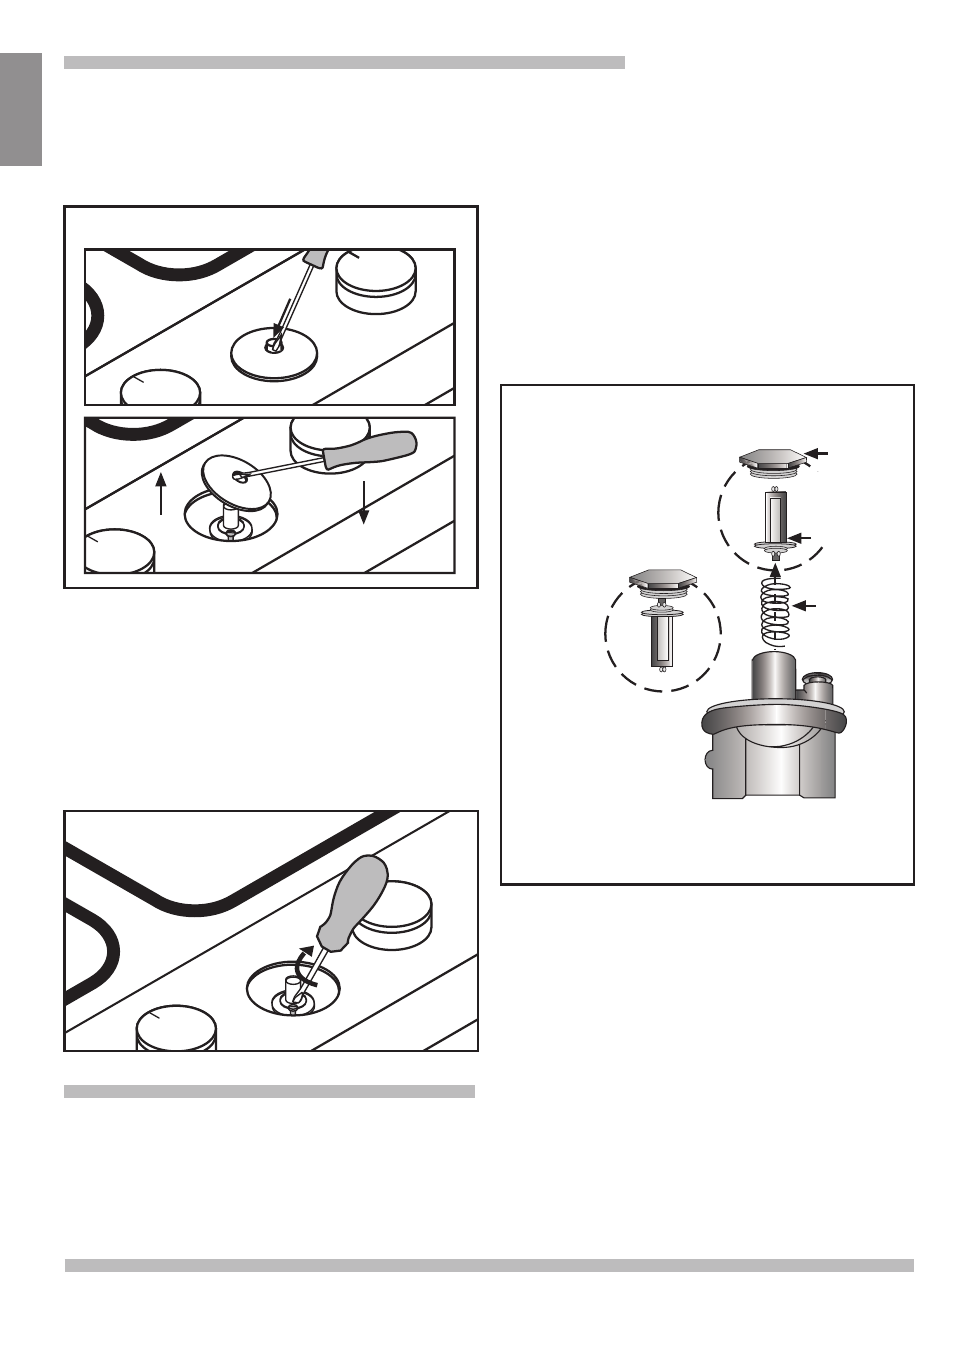
disc seals. Remove them with a screwdriver,
levering through their central opening. Figure 6.
• When you have removed the disc seals from the
orifice the control shaft emerges from, you will find
an interior seal made of flexible rubber; you only
need to press this with the tip of a screwdriver to
clear the path to the tap adjusting screw. Never
remove the inner disc seals.
4 - Adjust the by-pass screw.
Fully tighten the by-pass screw. Figure 7.
Figure 6
Fig. 7
After performing the gas transformation, always
ensure that the flame of the burners is correct, so
that when changing from the maximum to the
minimum setting it does not go out, or cause
backflashing.
5 - It is important to ensure the proper placement
of all seals in order to prevent any short circuits
6 - Replace the control knobs on the taps.
Never remove the tap shaft. In case of fault, change
the whole tap.
C) Place the tag indicating the gas type to which
the appliance has been transformed over the
existing natural gas tag.
Conversion of the 6” W.C. pres-
sure regulator to 10” W.C.
Remove the hexagonal lid from the upper part of
the regulator with an adjustable wrench.
Remove the plastic button on the lid and turn it,
pressing it firmly into place so that the letters "LP",
instead of "NAT" can be clearly read on the button.
Replace the lid and button set on the upper part
of the regulator, properly sealing it. Make sure that
the spring is in place. Do not over-tighten.
NOTE: The arrow on the rear part of the regulator
should point in the direction of the gas flow on the
Figure 8
NAT
NAT
Lid
Hex
Setting
of the pin
for natural
gas
Pin position
for propane
NAT
Hex
Cap
Hex Lid
Pin
LP
Spring
PRESSURE REGULATOR
DIAGRAM
Pin
• Your cooktop is equipped with exterior plastic
cooktop. Figure 8.
in case of spillage on the cooktop.