Reassembly / maintenance, English, You will need – Wagner Power Painter Pro with EZ Tilt User Manual
Page 17
English
© Wagner Spray Tech. - All Rights Reserved
17
Reassembly / Maintenance
You will need:
• Scrap piece of wood or cardboard
• Lubricant
note: Power Painter Max only - Refer to page 61 to see
the proper way to repack the sprayer and components ito
the carrying case.
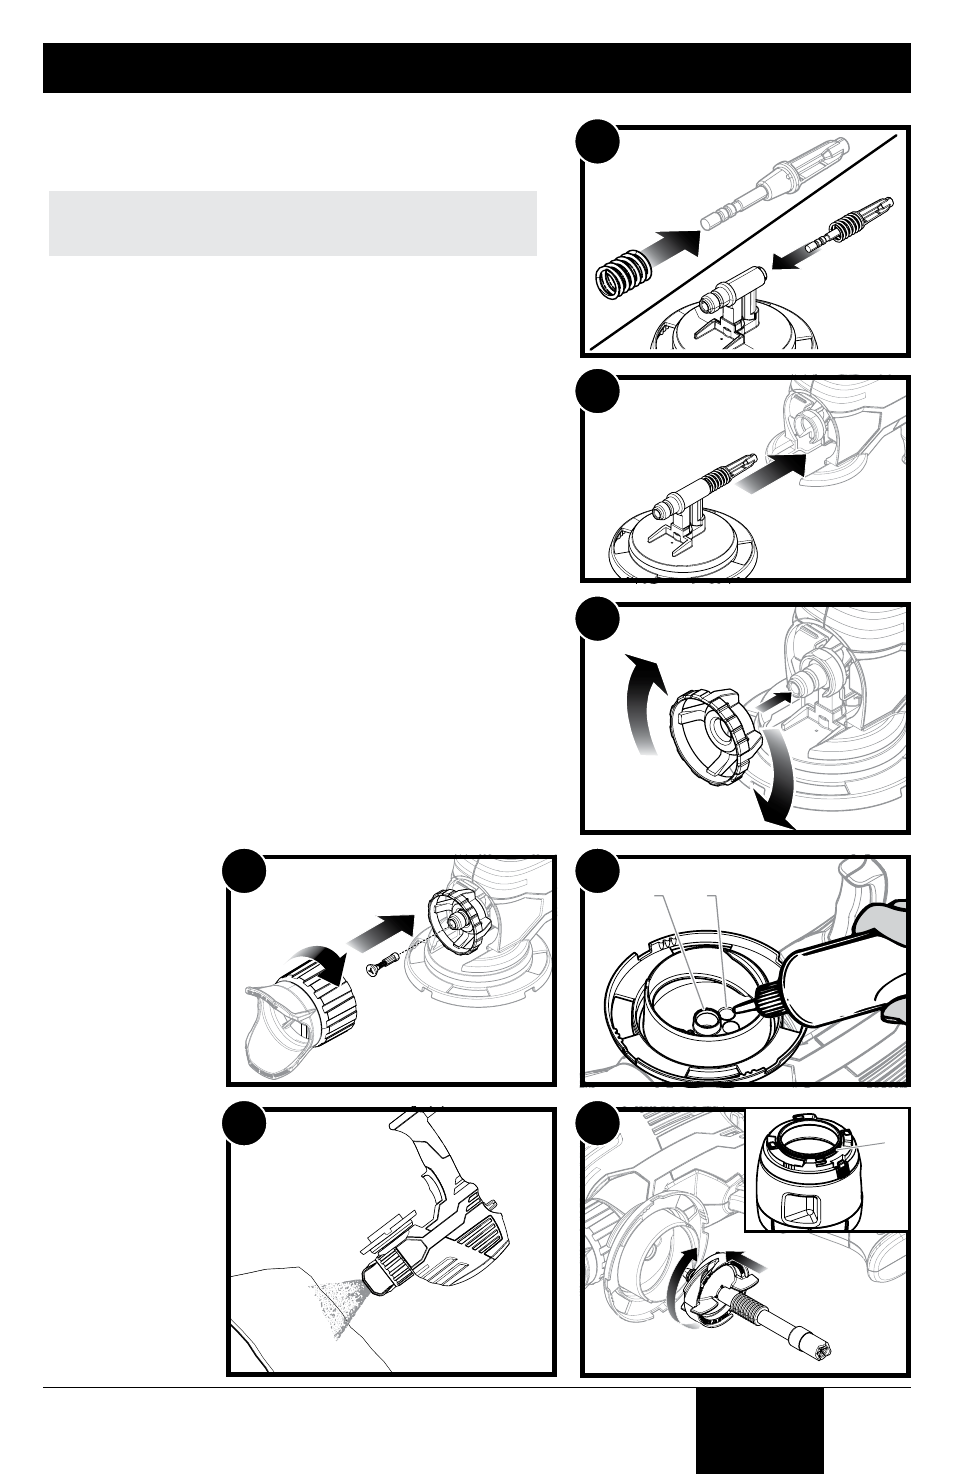
1. Slide the spring onto the front end of the piston.
Insert the piston into the back of the pump housing.
2. Insert the pump housing assembly into the front of the
sprayer.
3. Place the locking nut onto the pump housing. Press in
while turning the locking nut clockwise.
Do not cross-thread the locking nut. Make certain it is
threaded correctly before tightening.
4. Insert the atomizer valve into the front end of the pump
housing.
Place the adjustable spray tip assembly onto the
pump housing and turn the tip nut clockwise until it is
tightened securely.
5. Turn the sprayer upside-down while the cup is removed.
Squeeze a small amount of lubricant into both the intake
(a) and return (b) openings on the pump housing.
6. Plug in the sprayer. Aim at piece of scrap wood or
cardboard and squeeze the trigger of the sprayer for 2 to
3 seconds while sprayer is still inverted.
7. Reassemble and reattach the filter and suction tube
assembly.
Lubricate the O-ring (c) as shown with the included
lubricant. Replace the cup.
2
3
(a)
(b)
5
7
4
6
(c)
1