6 assembling and installing, 1 assembly, 2 installation – Videotec HGV User Manual
Page 7: 1 opening of the housing, 1 assembly 6.2 installation
EN - English - I
nstruc
tions manual
5
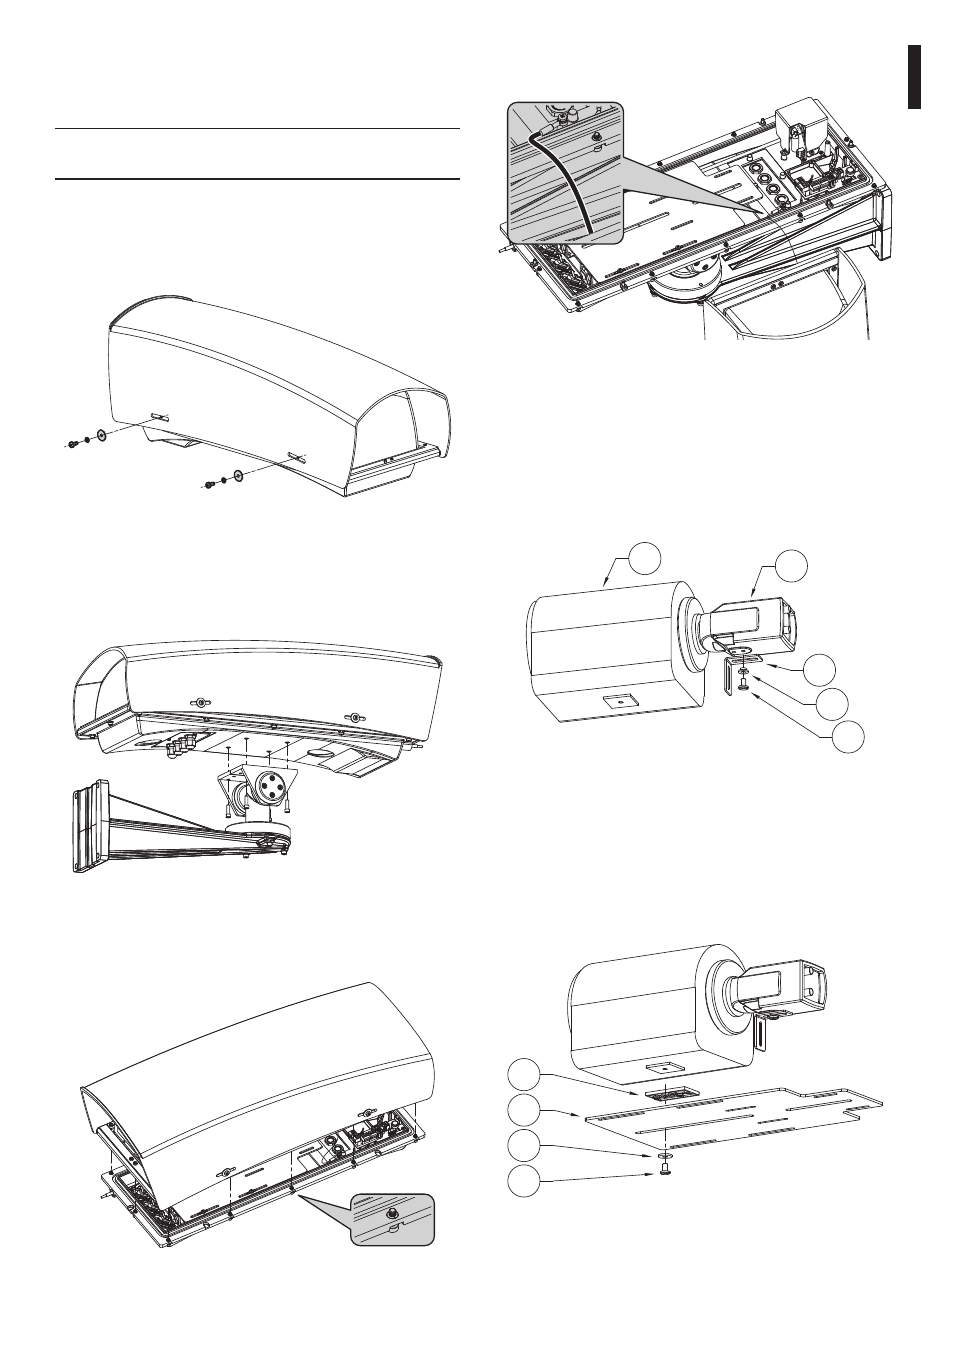
Lift the upper casing with integrated sunshield and
leave it hanging to the sturdy anchoring cable.
Fig. 04
6.2.1.1 Fastening of the lens and
camera to the internal slide
Hook the camera (02) to the lens (01).
Fasten the L-shaped small aluminium bracket of
the selected length (03) to the camera by means
of the nylon washer (04) and the 1/4" screw (05).
01
02
03
04
05
Fig. 05
Position the lens on the slide (02) interposing
the plastic spacer (01), and fasten the
whole assembly by means of the nylon
washer (03)and the 1/4" screw (04).
If necessary, use the additional spacers to
correctly position the camera and lens
01
02
03
04
Fig. 06
6 Assembling
and installing
h
Only specialised personnel should be
allowed to assemble and install the device.
6.1 Assembly
Mount the sunshield to the housing with the 4
screws and washers provided as standard.
Fig. 01
6.2 Installation
Secure the housing to the bracket with
the 4 screws provided as standard.
Fig. 02
6.2.1 Opening of the housing
Undo the 12 captive screws
Fig. 03