HighPoint RocketRAID 3510 User Manual
Page 42
Web RAID Management Interface
5-5
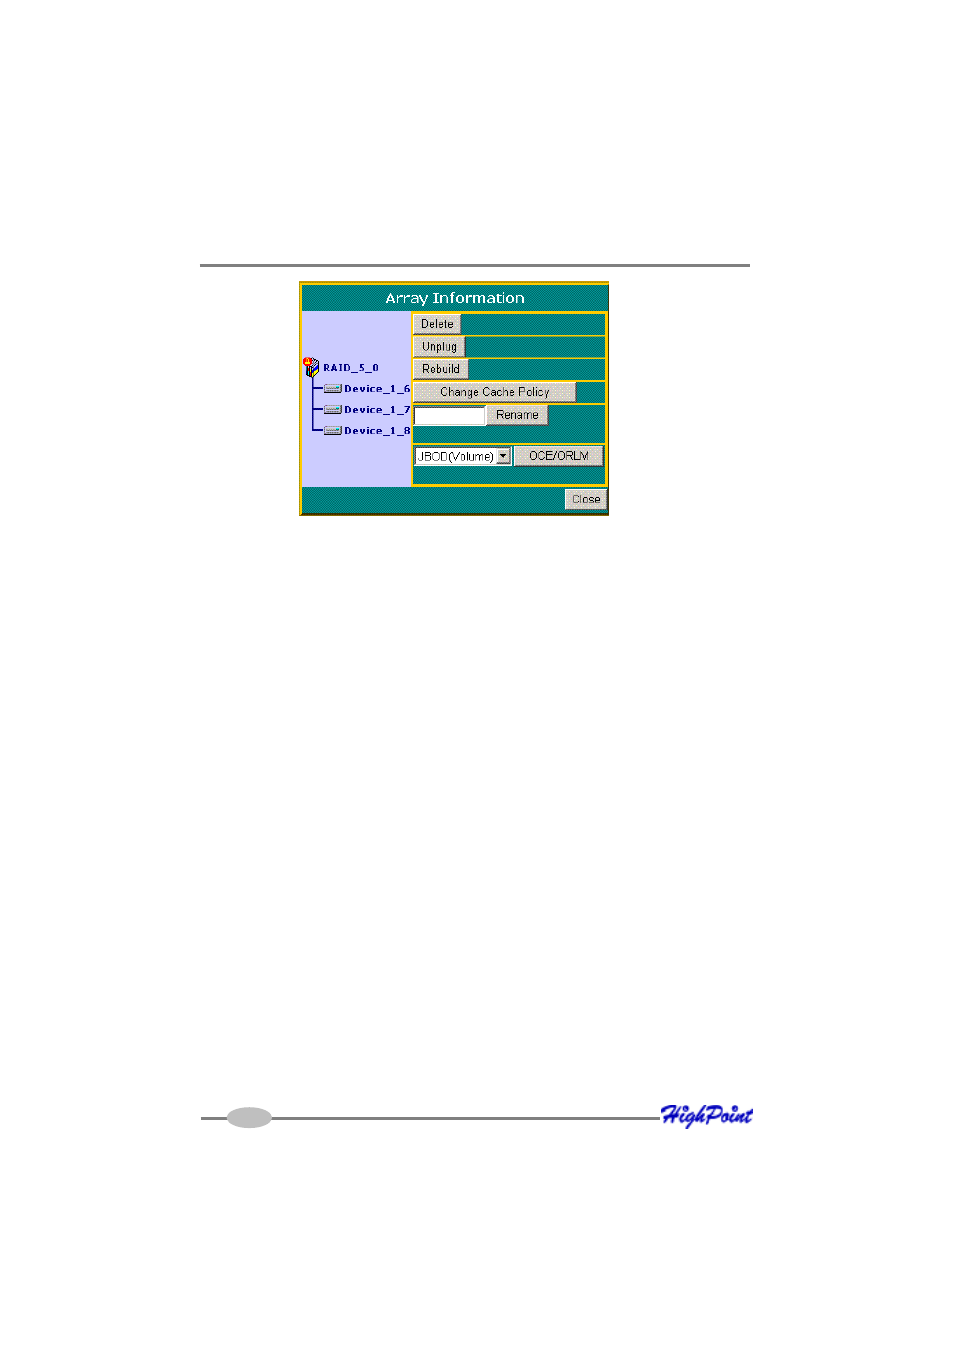
3)
Click the
Delete
button.
Note: An array in use by the operating system cannot be deleted. Any data stored on
a deleted array will be inaccessible.
Array Maintenance – Rebuilding/Verifying/Modifying RAID arrays
Rebuilding a Failed Array
When an array member in a redundant array fails, the array will be listed as broken. A
broken array will be automatically rebuilt using available-spare disks. However, if you
have no spare disks configured, you can still rebuild by manually adding an Available
Disk to the array. To add a disk to a broken array:
1)
Select menu “
Manage - Array
”.
2)
Highlight the desired RAID array
3)
Click the “
Maintenance
” button.
4)
Click the “
Add Disk
” button.
5)
If the disk is successfully added to the array, rebuild process will start
automatically. A progress bar will be displayed.
Note: If the system utilizes hot-swap capable enclosures, you can add new physical
disks to the RocketRAID card in order to rebuild or modify an existing array, using the
“Rescan” feature.
Reminder: When adding disks manually, make sure to initialize the disk (see Preparing
Hard Disks).
Only initialized disks can be used to rebuild RAID arrays.