81 camaro tigercage main hoop installation, Important – Ridetech 41190000 User Manual
Page 12
Air Ride Technologies
Front
Tiger Clamp
Assembly
Main Hoop
Package
Tray Bar
Front
Tiger Clamp
Assembly
Main Hoop
Tiger Tab
Package
Tray Bar
41190000
0
74-81 Camaro TigerCage
Main Hoop Installation
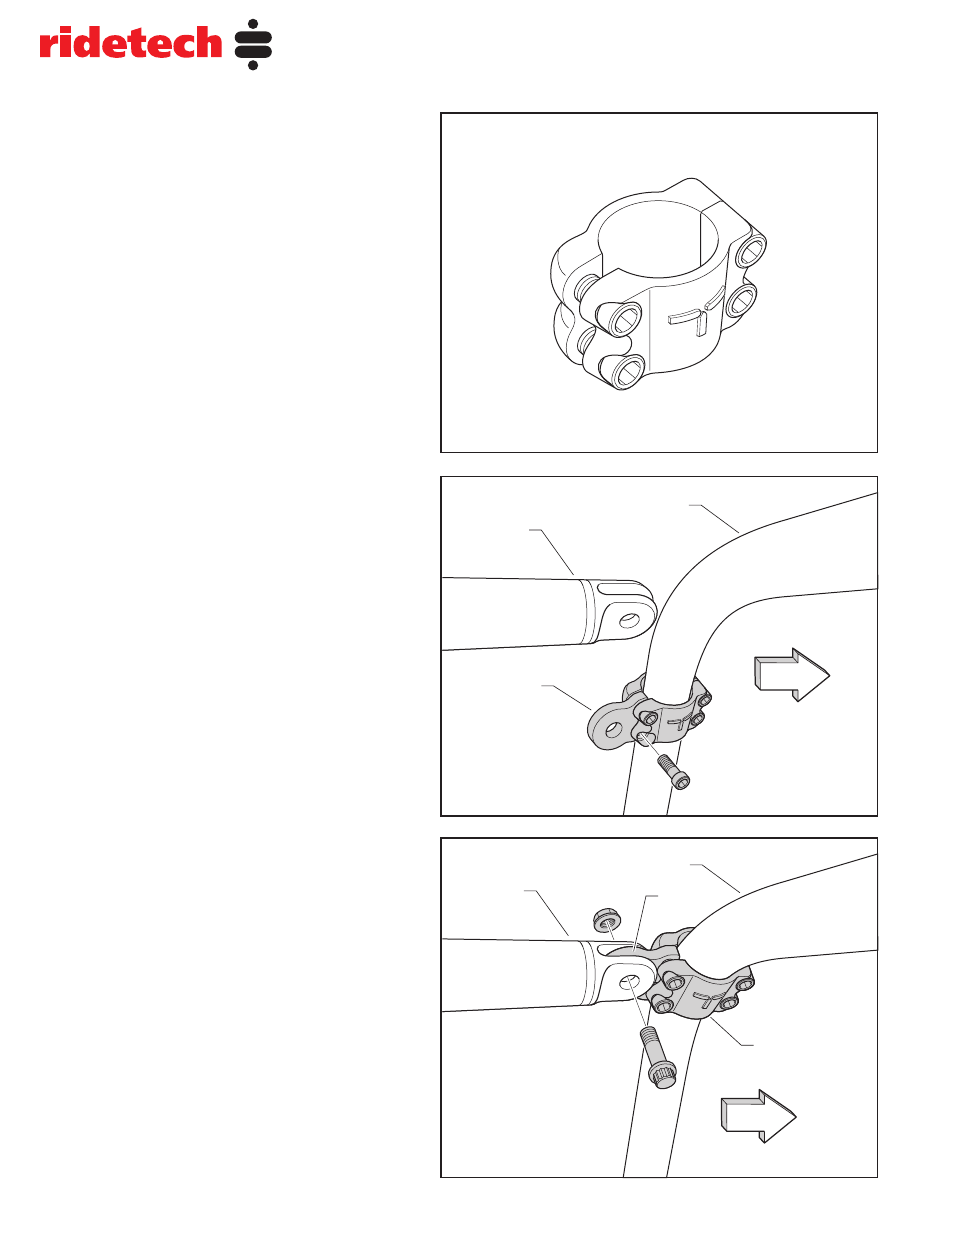
IMPORTANT:
Before performing step 24 be
aware there are two different direction clamps
that make up a tiger clamp assembly. Care
must be taken as to which clamp halves are
bolted together. The “T” in the casting must be
facing up at all times and there must be a gap
on one side for the tiger tab to slide into
(See Fig 21).
NOTE: Fig 2 on page 3 shows the proper
clamp locations for the Main Hoop Assembly.
Step . Loosely fasten the tiger clamp “D”
assembly to the main hoop below the package
tray bar on the driver side and clamp “P” on
the passenger side using four 3/8” x 1” socket
head cap screws (See Fig 22)
Step 5. Slide the tiger clamp assembly up
into the package tray bar. Be careful not to
scratch the main hoop when positioning the
clamp assembly. Align the hole in the tiger tab
with those in the package tray bar and secure
the clamp assembly to the package tray bar
using a ½” x 1 ½” 12 point bolt and ½” flange
nut (See Fig 23). Do both the driver and
passenger sides.
Step 6. When both tiger clamp assemblies
are properly located to the main hoop tighten
all the socket head cap screws.
Always
tighten the tiger tab side of the clamp first.
Remember to use Anti-Seize on all fasteners
that are threaded into stainless clamps.
Step 7. After installation of the main hoop,
package tray bars and trunk bars is complete,
finish tightening all fasteners. Torque all 3/8”
fasteners to 45 ft-lbs and 1/2” fasteners to
75 ft-lbs.
Fig
Fig
Fig