ididit Cable Shift Linkage Kit: Column to GM Transmission User Manual
Page 8
7
6. Push the cable down through its outer cover so that it will be as short
as possible. Put the column in Park. Now, figure out where you want
the bracket to be, 5 o’clock will probably be a good place. Install the
swivel on the small thread and turn it until it is centered on the thread.
Now, install the small nut and turn it until it bottoms out on the swivel.
Do not tighten yet.
7. Reinstall the shift lever as close to the swivel as
possible. Now you could turn the bracket or loosen
the large nut and adjust so that the swivel goes into
the 5/16” hole that you drilled in the shift arm. Insert
the cotter pin in the swivel, tighten the large nut and
bolt on the bracket. Do not tighten so much that
it squeezes the delrin bushing in the bottom of the
column. This could make it hard to shift. Remember,
the cable has to be pushed down completely.
8. Route the cable towards the rear of the vehicle and then turn it in a nice
U shape. Stay away
from exhaust pipes.
If this cable gets too
close, it will melt and
not work at all. This is
very important.
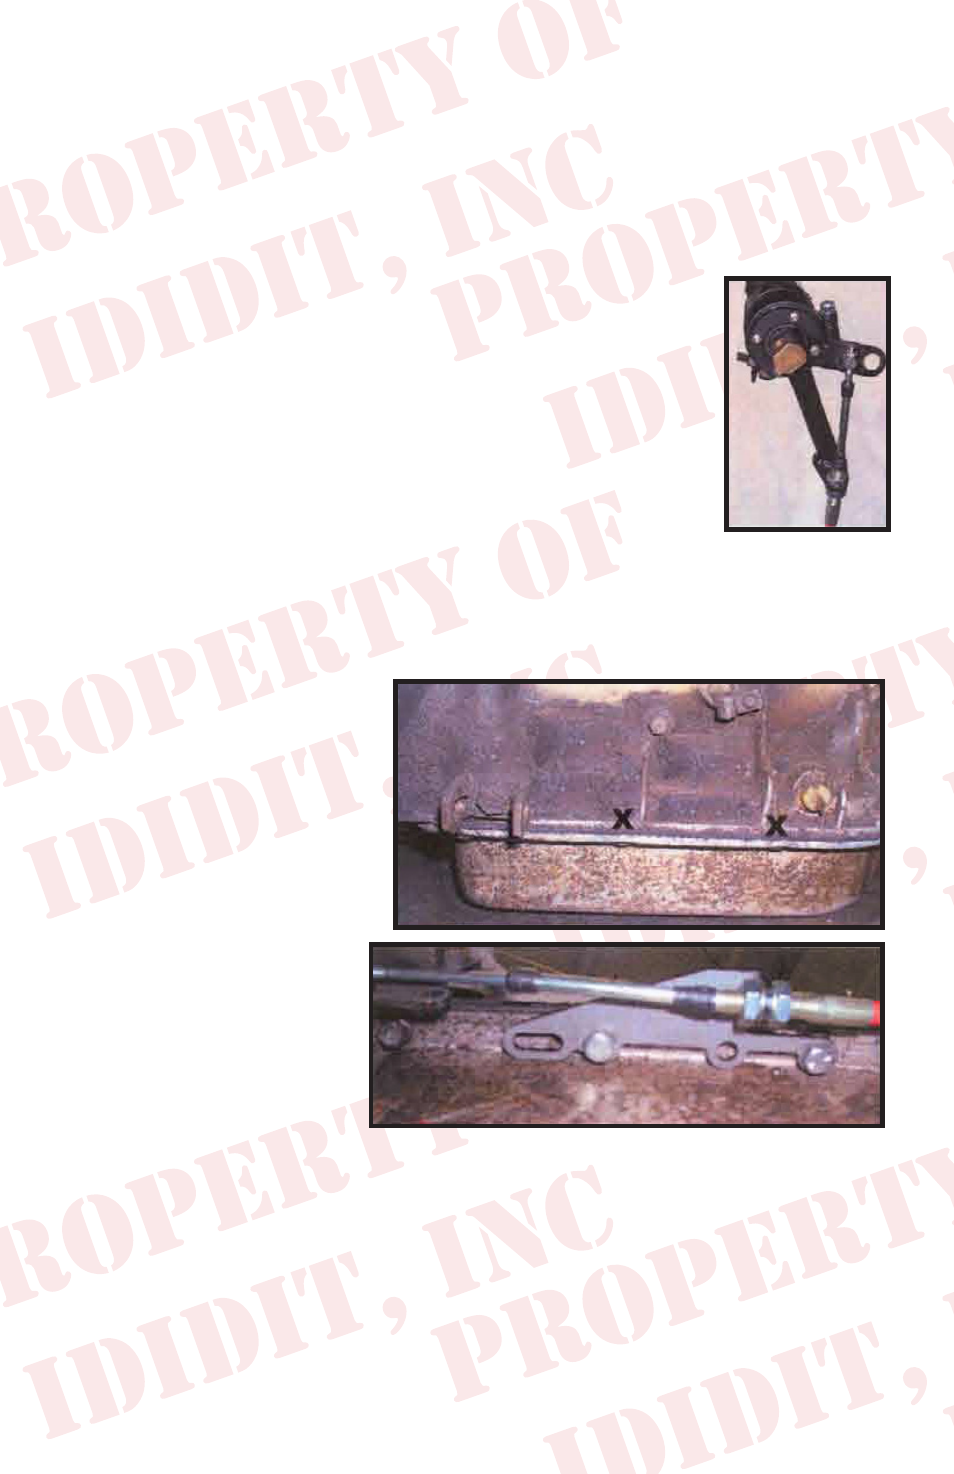
9. Looking at the side
of the transmission,
remove the stock
shift lever and the
two pan bolts marked
with X’s. Save the
nut and washer from
the shift lever and
the two pan bolts.
10. The two transmission pan bolts could be either Metric or American
threads. You will need to purchase two bolts 1/4” longer than the two
that you removed. Spacers need to be placed between the bracket and
the transmission pan with the two longer bolts holding it all together in
the holes of the bracket as shown.