ididit Cable Shift Linkage Kit: Column to GM Transmission User Manual
Page 3
1. Remove the 4 screws from the shift lever at the
bottom of the steering column and set the screws
and the lever safely aside.
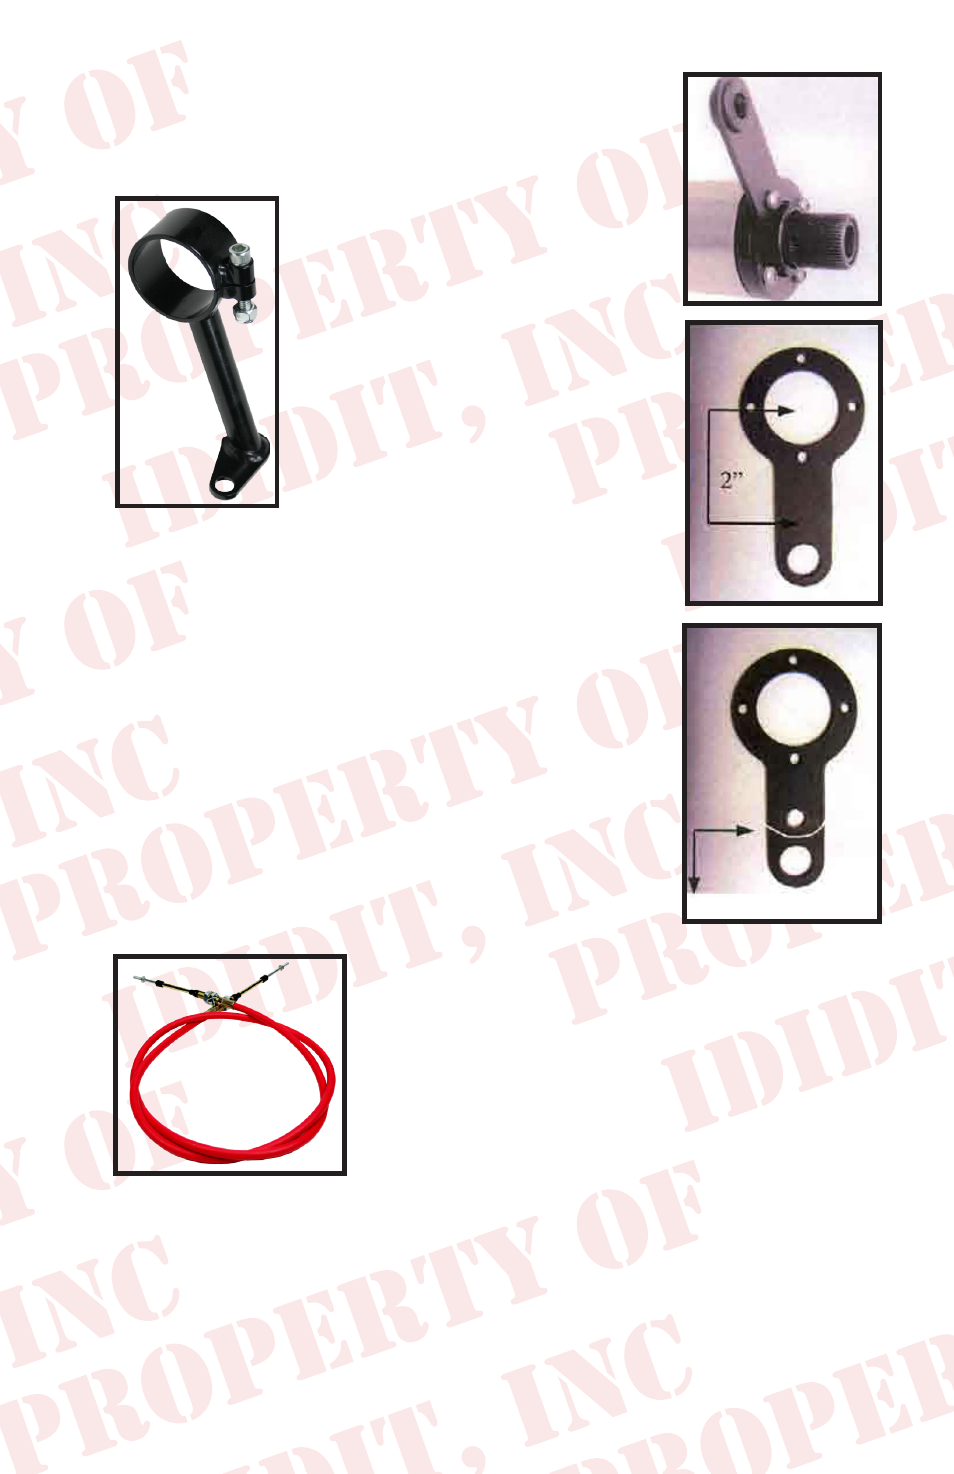
2. Take the cable bracket and
loosen the nut and bolt so that
the clamp will loosen a little.
Put the clamp on the column
with the small end appx. 5
o’clock looking at the column
from the front of the vehicle.
(Actually, anywhere would work
because the clamp is indexable).
The hole on the small end of the
clamp should face the front of
the vehicle. Do not tighten yet.
3. The gearshift lever will need a hole drilled exactly
2” from the center of the large hole towards the
linkage hole, in the center of the shift lever arm.
The hole should be 5/16” or .312 in diameter, no
larger!
4. If your designer eye tells you that you want to cut
off the access of the shift arm that is fine. Take a
look at the diagram to the right to see how we did
this.
5. The cable is the next
piece that you are looking for. Notice that both
ends are the same. We did that so that you could
be right the first time. You will need to take
the small nut and the rubber boots off so that
you can get one large nut and washer off. Put
the cable through he bracket from the bottom
side of the bracket and reinstall the large nut,
washer and boots. Try to center the nuts and washers on the available
threads. This is important later.
2
Trim if you want to!