ididit Retrofit Steering Column: 1976-86 Jeep CJ5 & CJ7 User Manual
Page 4
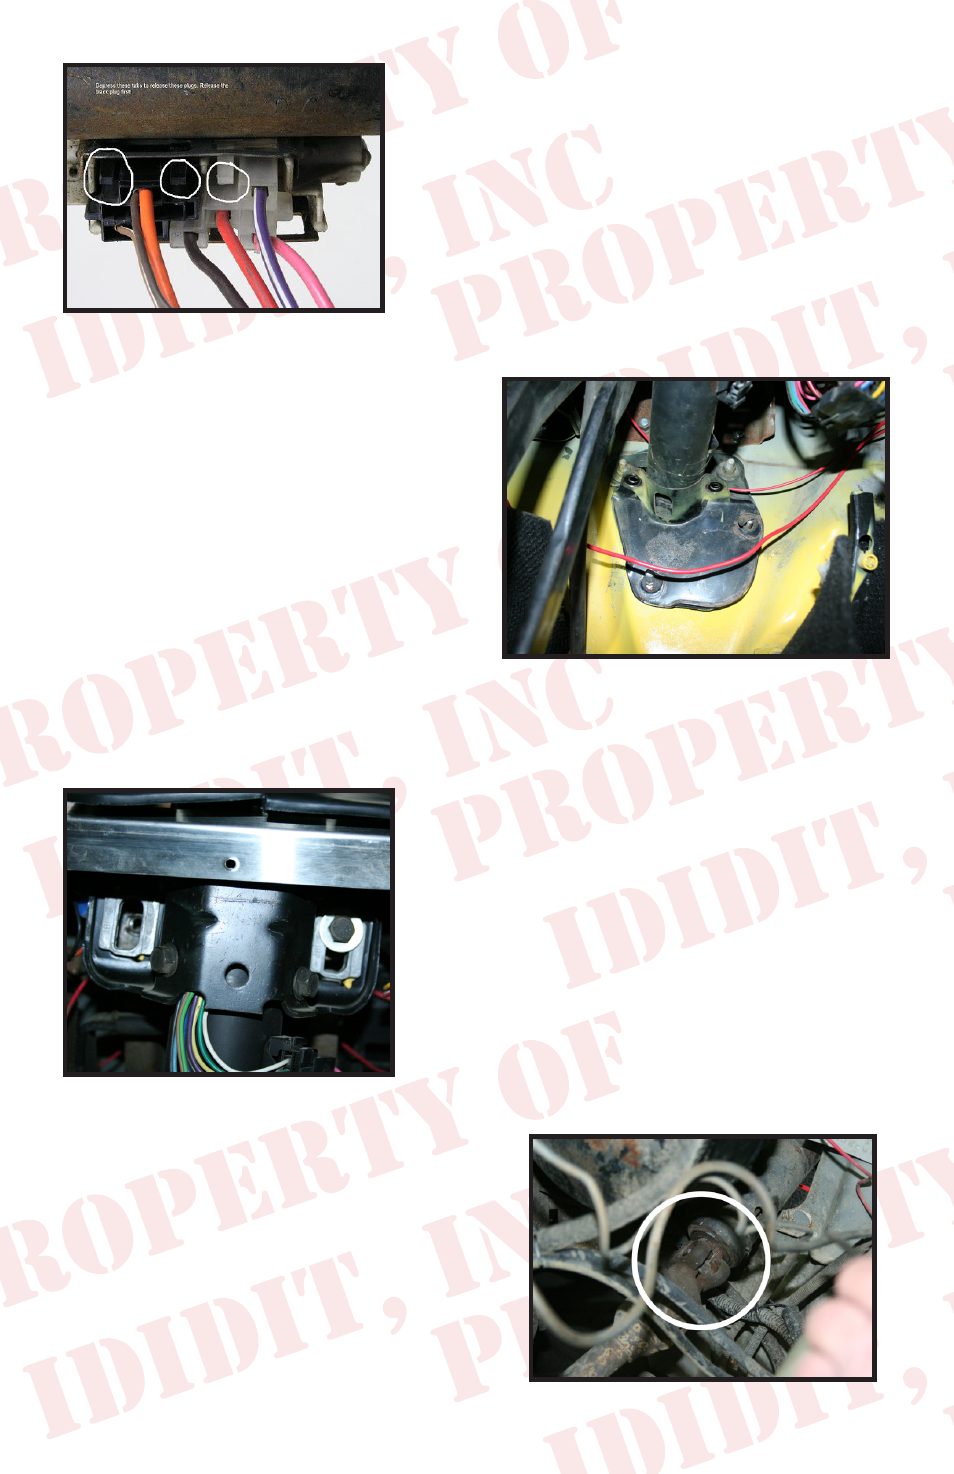
(Figure 4)
To remove the floor mount of the column, start with
the two vertical bolts. With a 1/2” socket loosen
and remove the bolts. Then you can remove the
other 4 bolts, also using a 1/2” socket. The mount
then will need to be pried away from the firewall.
If you’re careful you can do this without destroying
the seal. (See Figure 5) The seal will want to stay
with the mount. Once removed, let the mount set
loose on the column.
(Figure 5)
To remove the dash mount, there are 2 bolts
that must be removed using a 9/16” socket
with a 3” extension. These two bolts will
cause the column to drop loose from the
dashboard, so use some care when removing
them. (See Figure 6)
Though it is possible to pull the column
through the hole in the dash with the mount
still attached, it is easier to do if you remove
the electric part of the ignition switch first
using a 5/16” nut driver.
(Figure 6)
It is beneficial to have a helper at this point!!! The
only thing still holding this column in the vehicle
is the u-joint. (See Figure 7) The column now just
needs to be pulled from this joint. If the column
hangs up on this joint, the helper can pry this joint
open slightly with a #2 regular screwdriver. This
should release the joint from the column. Cau-
tion should be used while removing the column
through the dash as there are lots of items that will
catch on the dash while removing. Keep wires
clear and remove the floor mount as soon as the
column clears the floor board. You may have to
rotate the column to clear these items while re-
moving it.
(Figure 7)
You should now be able to remove the dash
mount and the dash cover. Both of these items
will be re-used for the new column. (See Figure
8 on next page) If you wanted to repaint the
floor mount, this is the time to do that. Also, a
new gasket for the floor mount might be a good
idea too.
3