HP NC550SFP Dual Port 10GbE Server Adapter User Manual
Page 19
Configuring and managing iSCSI targets 19
You must enable Boot Target after you have added the target via SendTargets (see the last step in
this section).
6.
Enter an ISID Qualifier, if needed. A unique ISID value is needed if you are connecting dual sessions
to the same target portal group. You can enter a number up to 65535. For more information, see
"Setting an ISID value (on page
)."
7.
If you want to enable Header Digest, tab to Header Digest and press Yes. For more information
about the Header Digest, see "Editing a target configuration (on page
)."
8.
Tab to Data Digest and press Yes to enable Data Digest. For more information about the Data
Digest, see "Editing a target configuration (on page
)."
9.
Optional step. Tab to Authentication Method and press Yes. Enter the CHAP configuration. For more
information, see "Enabling CHAP authentication (on page
)."
10.
Tab to Save/Login and press Enter.
11.
A message displays reminding you that you have left the iSCSI Target name blank and that the
SendTargets mechanism is enabled. Press Y to continue.
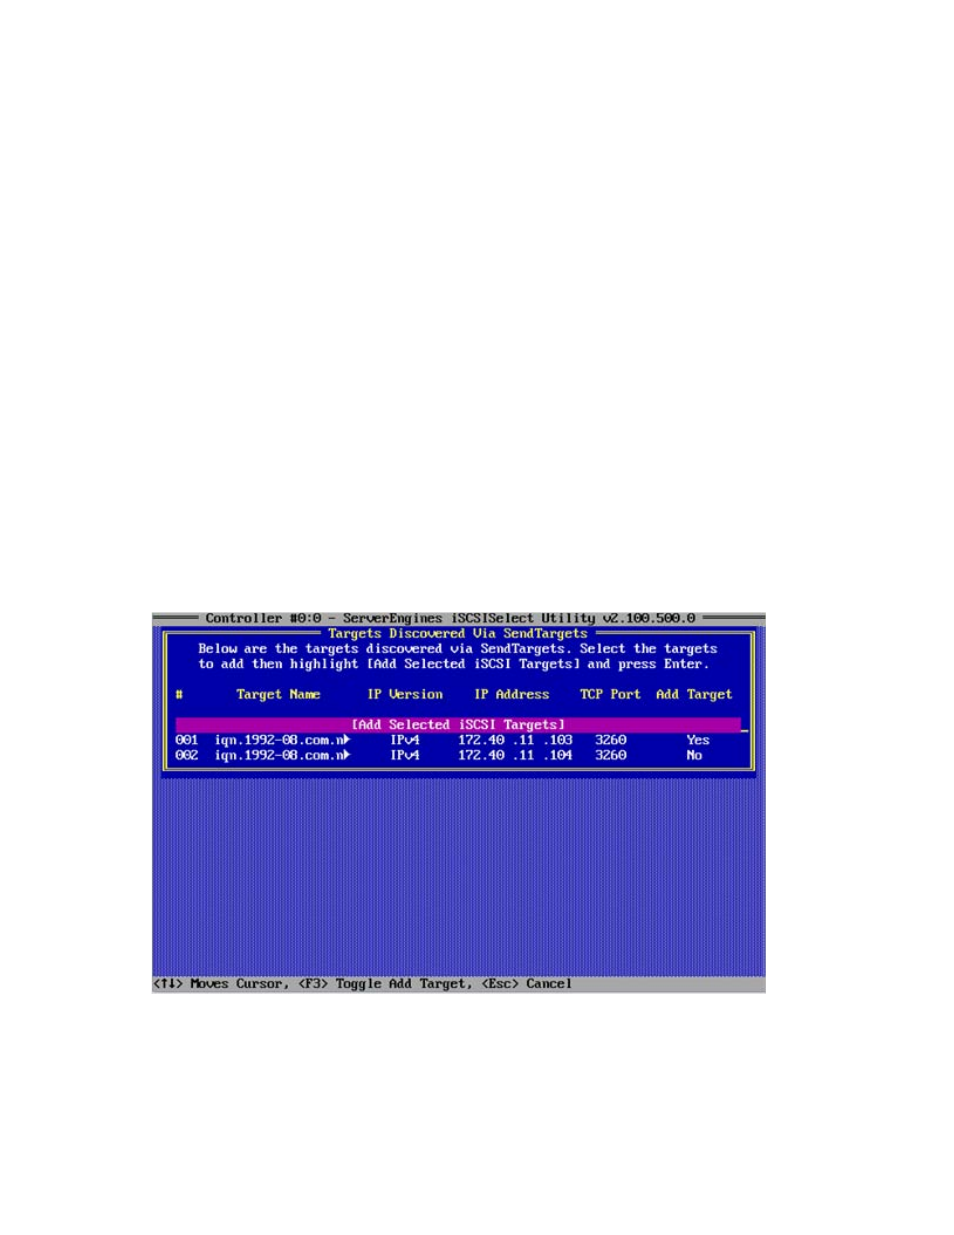
If the firmware logs into the target, the Targets Discovered Via SendTargets menu displays. If the
Login is unsuccessful, a failed message is displayed.
12.
After you have sent your SendTargets request to the target, a list of targets displays that you can log
into from the Targets Discovered Via SendTargets menu. From the list of targets on this menu, you
must specify which targets to add. To do this, select the target or targets you want to add from the
menu and press F3.
13.
After you have selected your targets to add, you can add the targets. To do this, move the cursor to
Add Selected iSCSI Targets and press Enter. If you enabled CHAP Authentication, you are prompted
to enter CHAP configuration for each target, one at a time.