Modifying fault categories, 2-2-2 modifying fault categories – HP Integrity NonStop J-Series User Manual
Page 78
SST/OB Advanced User Functions 78
9-2-2-2 Modifying Fault Categories
Follow the steps below to modify a custom fault category:
1.
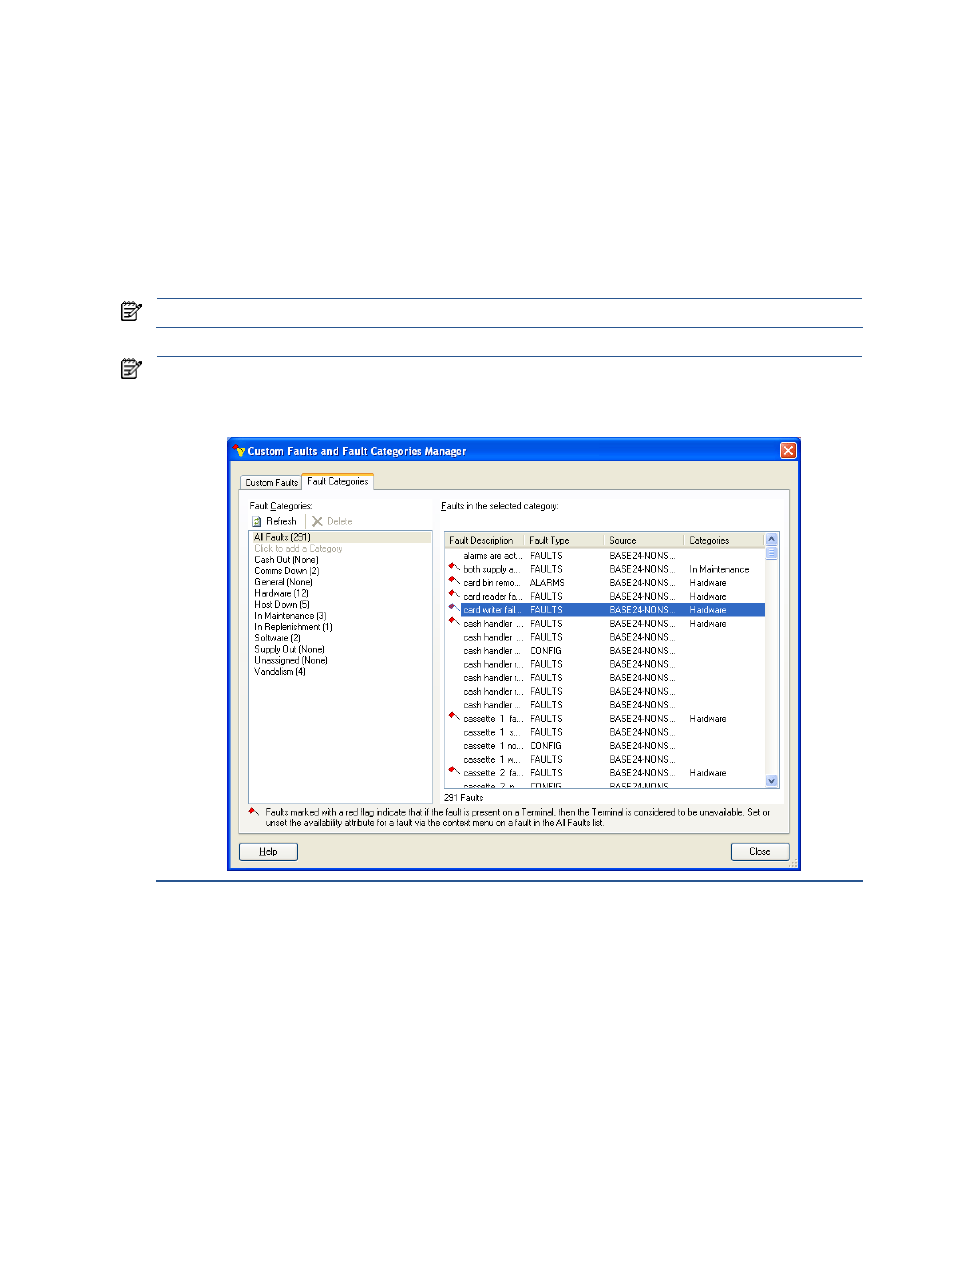
Click on the Faults and Fault Categories option in the Manage menu. This displays the Custom Faults and
Fault Categories Manager dialog box. Click on the Fault Categories tab to access the corresponding tab
page.
2.
Select the fault category to be modified from the Faults in the selected category area. The faults in the
selected fault category are displayed in the Faults in the selected category area.
3.
To remove faults from the list, select the fault and drag and drop it on to All Faults fault category in the
Faults in the selected category area.
4.
To add faults, click on All Faults item and select the faults from Faults in the selected category area and
drag and drop the selected faults on to the fault category.
NOTE:
Click on the Refresh icon to reflect the changes implemented.
NOTE:
The Affects Availability context menu option is available in the Faults in the selected category area,
when All Faults are selected. This option sets the Fault Availability to 0 from 1 for the selected fault. This is
indicated by a red flag next to the fault. The red flag indicates that the fault Availability is 1. If the Faults
Availability is 0, no icon is displayed.