Windows, Wireless network – Brother HL 3070CW User Manual
Page 27
27
Windows
®
Wireless Network
Windows
®
M
acin
tosh
Wireless Network
f
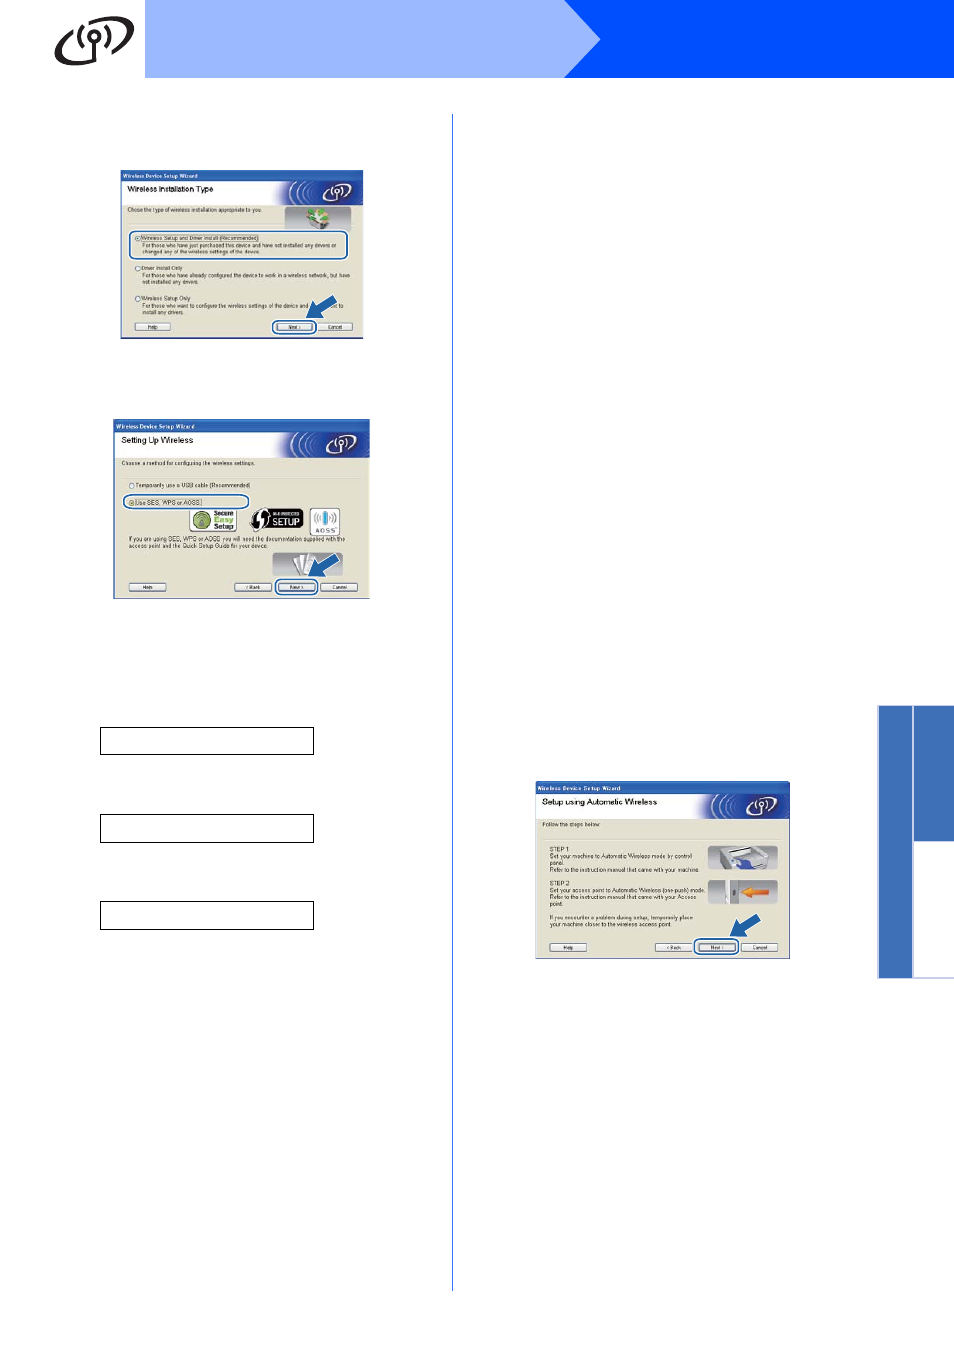
Choose Wireless Setup and Driver Install
(Recommended), and then click Next.
g
Choose Use SES, WPS or AOSS and click
Next.
h
Press any of the Menu buttons (a, b, OK or
Back) of the control panel on your printer.
i
Press a or b to choose Network.
Press OK.
Network
j
Press a or b to choose WLAN.
Press OK.
WLAN
k
Press a or b to choose SES/WPS/AOSS.
Press OK.
SES/WPS/AOSS
l
The printer searches for an access point that
supports SecureEasySetup™, Wi-Fi Protected
Setup or AOSS™ for 2 minutes.
m
Put your access point in the
SecureEasySetup™ mode, the Wi-Fi
Protected Setup mode or the AOSS™ mode,
depending on what is supported by your
access point. Please refer to the instruction
manual that came with your access point.
n
If the LCD shows Connected, the printer has
successfully connected to your
access point/router. You can now use your
printer in a wireless network.
If the LCD shows Connection Error, a
session overlap has been detected. The printer
has detected more than one access
point/router on your network with the
SecureEasySetup™ mode, the Wi-Fi
Protected Setup mode or AOSS™ mode
enabled. Make sure that only one access
point/router has the SecureEasySetup™
mode, the Wi-Fi Protected Setup mode or the
AOSS™ mode enabled and try starting from
again.
If the LCD shows No Access Point, the
printer has not detected your access
point/router on your network with the
SecureEasySetup™ mode, the Wi-Fi
Protected Setup mode or AOSS™ mode
enabled. Move the printer closer to your
access point/router and try starting from
again.
If the LCD shows Connection Fail, the
printer has not successfully connected to your
access point/router. Try starting from
h again.
If the same message is indicated again, reset
the print server back to its factory default
settings and try again. For resetting, see Reset
the network settings to the factory
default on page 40.
o
Click Next.