Step 3, Configuring the print/scan server, English – Brother NC-2200W User Manual
Page 10
English
9
Configuring the Print/Scan
Server
1
Insert the NC-2200w CD-ROM into your
CD-ROM drive.
(For Windows
®
users) The opening
screen will appear automatically.
(For Mac OS
®
X 10.2.4 to 10.3 or greater
users) Double-click the NC2200w icon
on your Macintosh
®
, and then
double-click the Start Here OSX icon.
2
Select your language.
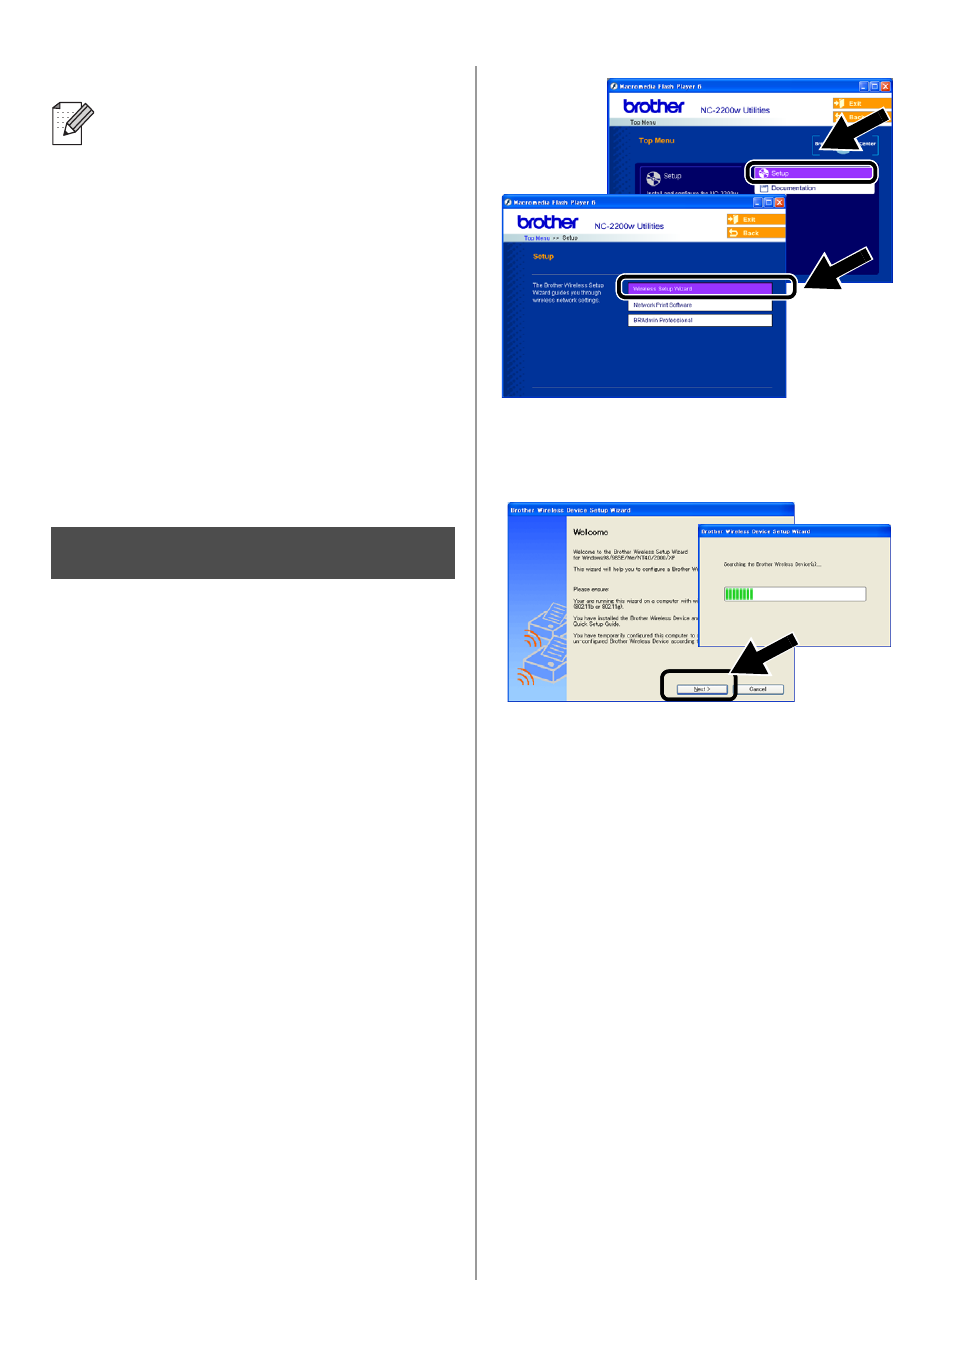
3
Click Setup and then Wireless Setup
Wizard.
4
Review the Welcome information and
when you are sure you have completed
the necessary tasks, click Next.
5
Follow the screens. For more
information, refer to Chapter 2 of the
NC-2200w Network User’s Guide on the
CD-ROM we have supplied with the
NC-2200w.
6
After exiting the Wireless Setup Wizard,
change the wireless settings of your
computer back to their original settings
using the information you noted when
Changing your Computer’s Wireless
Settings to configure the NC-2200w on
page 6.
If the Network name (SSID/ESSID) you
want to choose is not listed, try the
following:
■
Unplug the AC adapter, plug it back in
again and then wait for a few minutes.
■
Move your Brother Printer/MFC/DCP
with the NC-2200w installed closer to
your computer and try again.
■
Reset the NC-2200w back to its
default factory settings and try again.
Refer to page 16 to reset to factory
default settings.
■
Refer to Chapter 6 of the NC-2200w
Network User’s Guide on the
CD-ROM we have supplied with the
NC-2200w.
Step 3