Using the viewer, How to use the viewer’s toolbar – Milestone Viewer 1.2 User Manual
Page 5
Milestone XProtect Viewer; User’s Manual
Using the Viewer
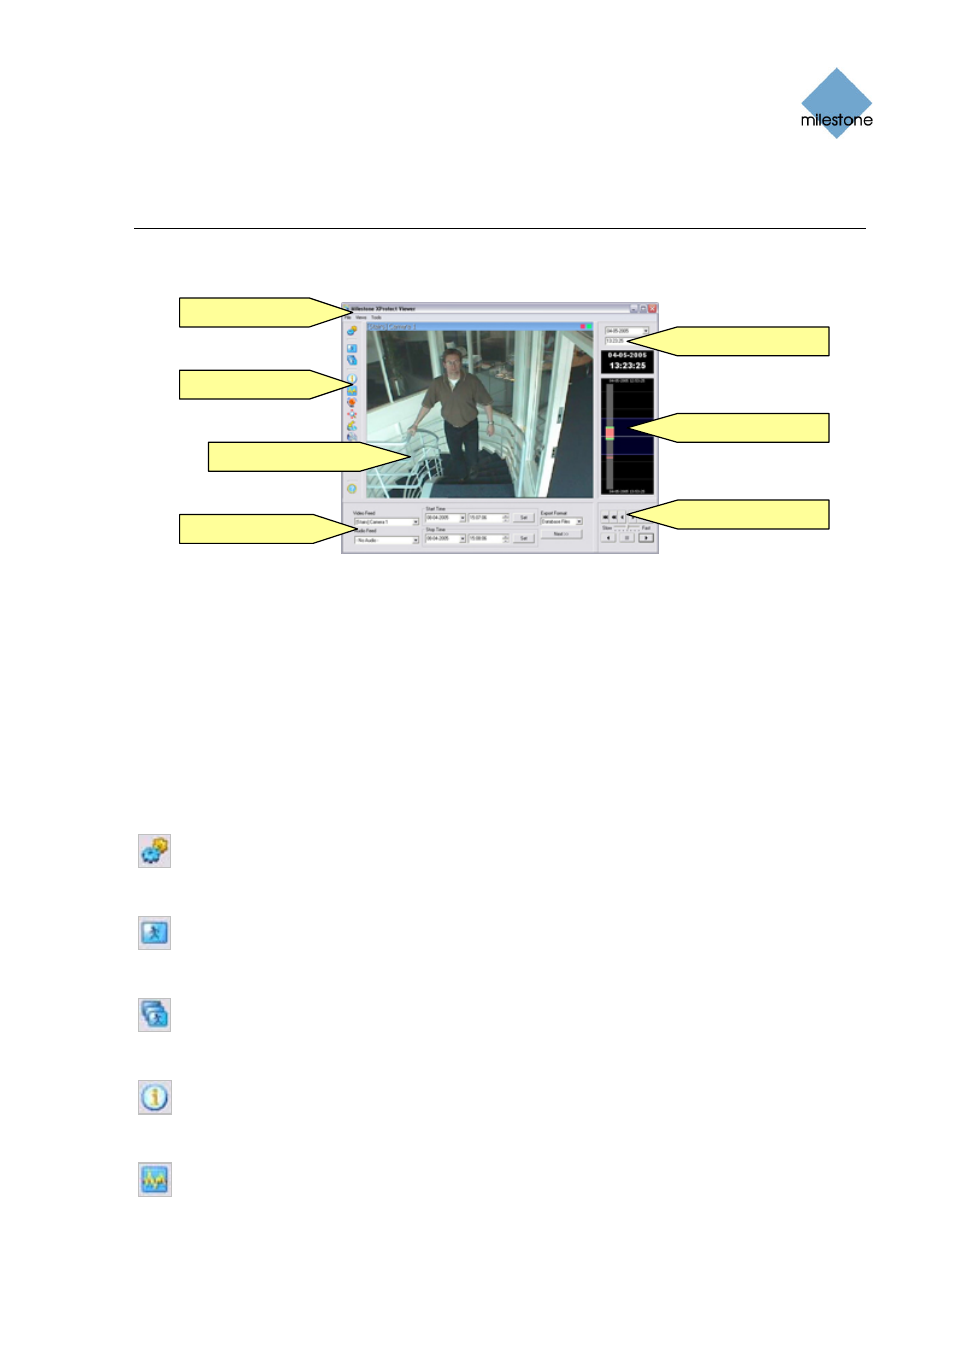
Menu Bar
Date/Time Selector
Toolbar
Timeline Browser
Camera Layout
Playback Controls
Control Panel
Example illustration of the Viewer and its elements: In this example, the Viewer displays video
from a single camera, but the Viewer can also display video from several cameras simultaneously.
Note that the content of the Viewer's toolbar may vary depending on configuration.
How to Use the Viewer’s Toolbar
The Viewer's toolbar lets you quickly switch between the Viewer's different features. Icons in the
toolbar simply serve as shortcuts to the features available from the File and Tools menus in the
Viewer's menu bar. When you select a feature in the toolbar, settings for the feature typically
become available in the Viewer's control panel, located in the lower part of the window, below the
camera layout.
Settings: Opens the Viewer's Settings control panel, in which you are able to specify
settings for the camera layout, and specify the time span for use in the timeline. See
also How to Set Up the Camera Layout on page 6.
Single View: Switches to a single, enlarged view of video from the camera selected in
the camera layout. You may also simply double-click a camera in the camera layout to
switch between single view and multi view.
Multi View: Switches to multi-view, displaying all cameras in the selected camera
layout view. You may also simply double-click a camera in the camera layout to switch
between single view and multi view.
Database Information: Opens the Database Information control panel, in which you
select the cameras you want displayed in the camera layout. See also How to Set Up the
Camera Layout on page 6.
Motion View: Opens the Motion View control panel, in which you are able to view a
graph displaying sequences with motion. The graph is draggable, allowing you to browse
the sequences.
www.milestonesys.com
Page 5
Using the Viewer