Milescraft 1293 - InteriorDoor Kit User Manual
Page 5
© 2008 Milescraft • www.milescraft.com
5
NOTE: For the holding clamp in this system to work properly on jambs, with casing attached, the casing must be
positioned so at least 1/8th of an inch of jamb is exposed. If jamb edge is not exposed, it will be necessary to
remove casing.
Jamb Mortising
1. Select the proper template required.
Note: Although each template is identified, it is recommended you place which ever strike plate or hinge for
which you are mortising, into the window of the template and check for proper fit (See Fig. 1).
A) Strike Plates: Look for a 1/16 inch gap on all sides except for the tongue area of the plate (the template will
allow the cutter to exit the jamb in the tongue area).
B) Dead Bolt Receiver Plates: Look for a 1/16 inch gap around all four sides.
C) Hinges: Look for a 1/16 inch gap on top and bottom of hinge.
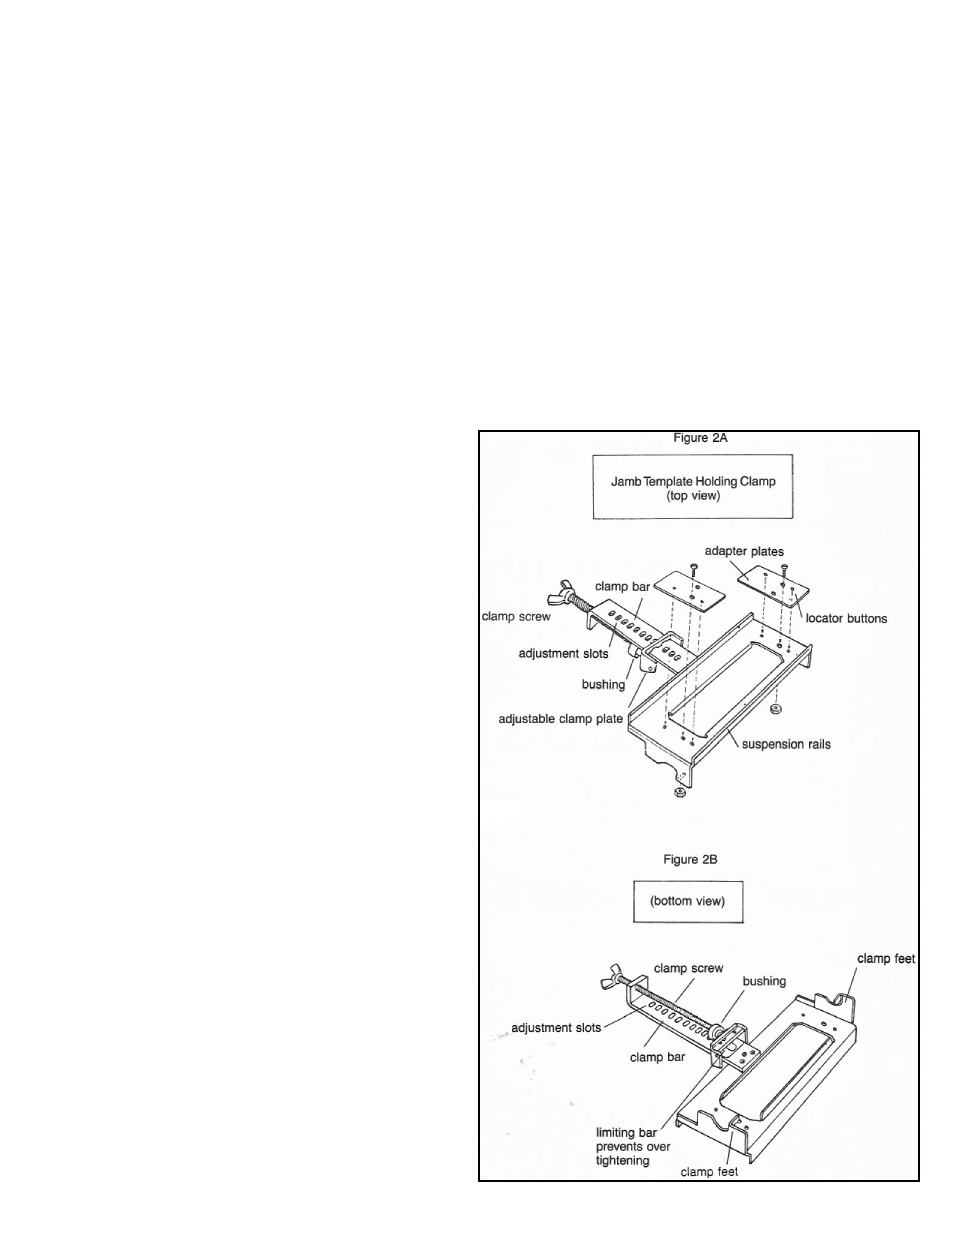
2. Attach the selected template onto the holding clamp with the screws and nuts provided.
Note: For strike plate and dead bolt receiver plate templates-you must first attach the 2 adaptor plates with
screws and nuts provided (seeFig.2 A). Make certain the adaptor plate locator buttons are positioned in the holes
provided in the-clamp before tightening the screws. (Do not use adaptor plates with hinge templates.)
Note: It is not necessary to excessively tighten nuts with a wrench.
3. Measure and Mark
A) For mortising strike plates and dead bolt receiver
plates, use the latch hole in the jamb (that was
transferred from the door) for your template arrow
centering mark. Up and down positioning for these
plates is not as critical as it is for hinges.
B) Mortising for hinges:
CAUTION: Use very accurate positioning marks with a
sharp pencil or knife. This is important for this system to
produce the desired results.
Using a tape measure, butt the tape end to the upper
horizontal section of the door jamb and make accurate
marks where you want the hinge center lines to be
(See Figure 3A). Keep note of these measurements if you
are mortising for hinges in a matching door.
For replacement of a jamb, and use of an existing door
with hinges already mortised and mounted, you must
take accurate measurements from the top of the door
to each hinge center line. (For proper clearance
between top of door and jamb header, use door spacer
shim provided. Lightly nail shim on top of door.)
(See Fig. 3B) Butt the tape measure to the top of the
horizontal section of the jamb. Use the same door
hinge center measurements to mark the jamb.
CAUTION: Always check jambs and doors for plumb
and square prior to mortising for the hinges.
4. Position and Secure the holding clamp to the jamb.
Note: The jamb holding clamp attaches the same way
for both 1 3/8 inch door jambs and 1 3/4 inch door
jambs
First, place the 2 clamp feet in position on the jamb. Now,
while holding the unit on the jamb, disengage the
Figure 2