SHIMPO FGV-series User Manual
Page 2
2
R
R
R
R
Reverse the Display
everse the Display
everse the Display
everse the Display
everse the Display
If unit is used with the hanger or mounted on a test stand
and the display must be reversed, follow this procedure:
1. Press the POWER switch and hold it; display will go
blank.
2. Press and hold UNIT switch.
3. Release POWER switch while you are still holding the
UNIT switch; display is still blank.
4. Press the POWER switch once more and release it while
still holding the UNIT switch. At this point you should
see the display reversed.
5. Release the UNIT switch; the display stays in that mode.
If you want to go back to the normal mode, repeat steps
1 through 5.
Select A
Select A
Select A
Select A
Select Average or P
verage or P
verage or P
verage or P
verage or Peak
eak
eak
eak
eak
If you want to measure force in real time (average) the dis-
play will show just the digits and units of the force being
measured. If you want to measure "peak" force:
1. Press the PEAK button and the word PEAK will
appear in the upper left corner of the display.
2. The display will freeze after capturing the peak force.
3. Press ZERO to cancel previous peak and continue with
your tests.
If you want to go back to average mode press the PEAK
button again and the word PEAK will disappear from the
display.
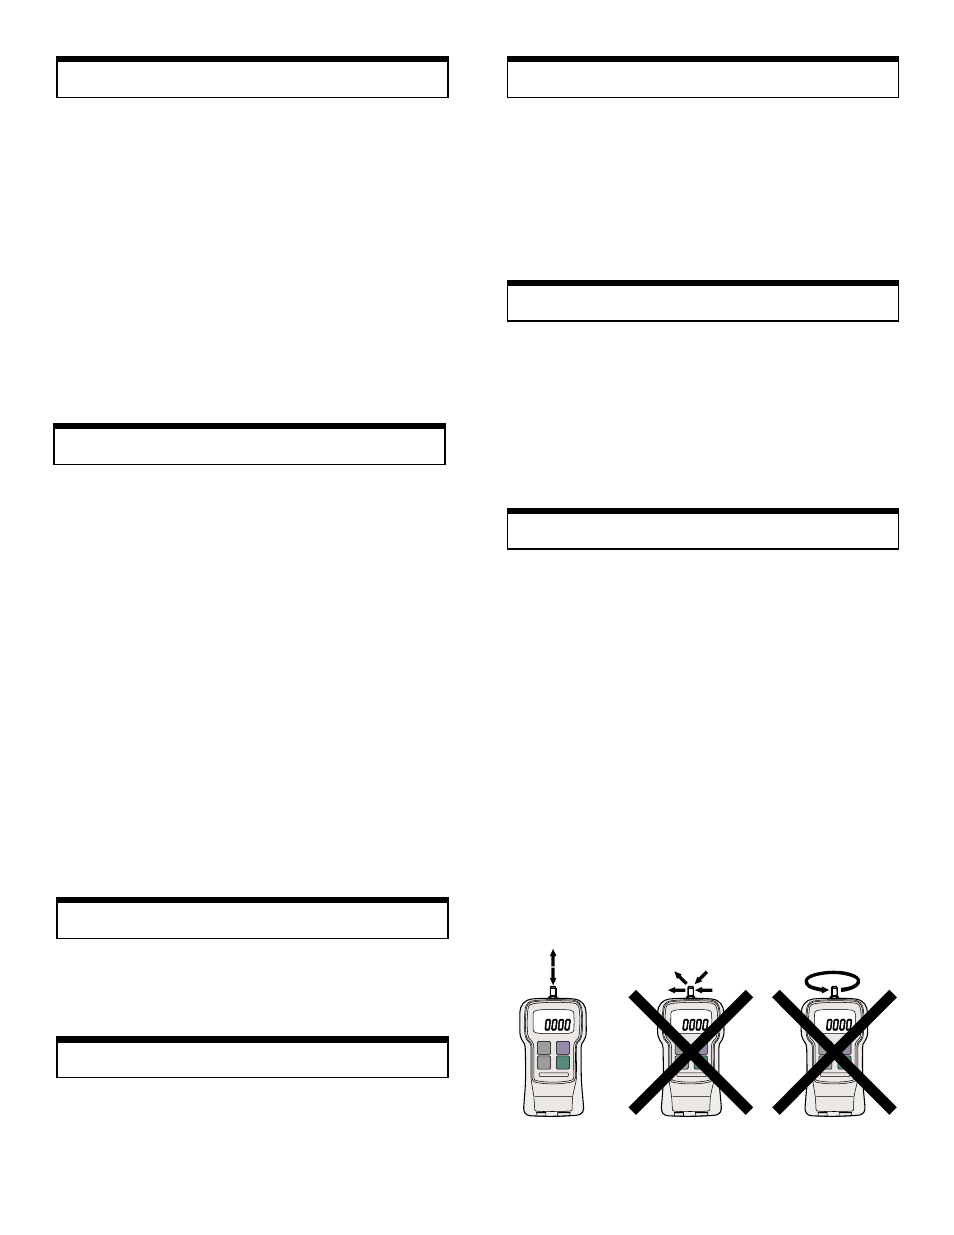
NOTE: It is very important that you measure forces (ten-
sion or compression) that are in line with the measuring
shaft and not at any angle (see fig. 1). Failure to observe
this directive will damage the instrument. Also, after the
gauge is positioned and ready to take a measurement (with
the proper attachment in place) tare the unit by pressing the
ZERO switch. In the PEAK mode to clear the display for
another measurement, press the ZERO switch.
To measure tensile force use the hook attachment. The dis-
play will show the force measured and a minus sign (-) will
appear on the left of the display (right next to the digits).
Measure T
Measure T
Measure T
Measure T
Measure Tension
ension
ension
ension
ension
Measure Compression
Measure Compression
Measure Compression
Measure Compression
Measure Compression
To measure compression force use the proper attachment.
No sign will appear on the left of the display during a com-
pression measurement.
Low Battery
Low Battery
Low Battery
Low Battery
Low Battery
When the battery charge starts to get low, a LO BAT sign
appears in the upper left corner of the display. At this point,
if necessary, the adapter/char ger can be used to power the
unit indefinitely. With the power off it takes approx. 12 hrs.
to fully charge. When the battery is fully charged the adapter/
charger cuts off completely to protect the battery.
A
A
A
A
Auto P
uto P
uto P
uto P
uto Power Off
ower Off
ower Off
ower Off
ower Off
If the power on the gauge is turned on and there is no activ-
ity for 10 minutes, the power is automatically cut-off to
conserve battery charge. One minute before cut-off, the sign
PWR appears above the display digits to remind the opera-
tor that there is 1 minute left before power cut-off. If the
adapter/charger is powering the gauge, the Auto Power Cut-
Off function becomes inactive.
T
TT
TTracking F
racking F
racking F
racking F
racking Function
unction
unction
unction
unction
A tracking function has been introduced to check and com-
pensate for temperature drift. When measuring very minute
forces (a few oz.) and at a very slow rate, you may want to
turn off the tracking function. To turn the tracking function
on or off, follow the steps below:
1. Turn POWER off.
2. Press PEAK and UNIT switches simultaneously and hold
these until step 3 is complete.
3. Press POWER switch and release it to turn the power
on. If tracking function was on, the display will show
TRK OFF momentarily.
4. Release buttons PEAK & UNIT. The tracking function
is now off. Repeat above steps to turn it on. It is a good
idea to have this function on all the time unless it is ab-
solutely necessary to cancel it.
Fig. 1