Figure 16 channel setup, Figure 17 individual channel setup, To exit t – Detcon 1600A-N1P User Manual
Page 19: Figure 16, Figure 17
1600A-N1P
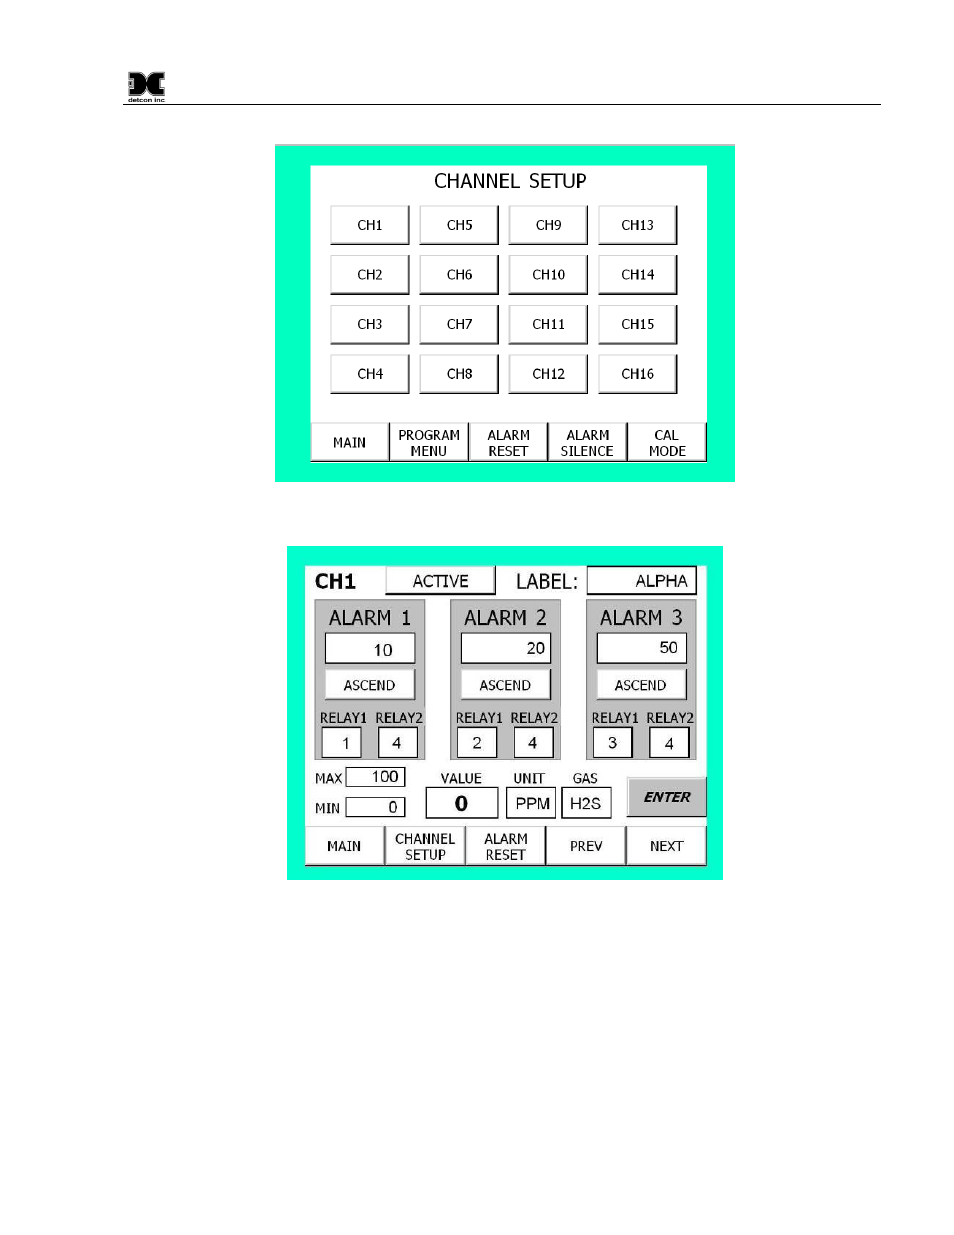
Figure 16 Channel Setup
Figure 17 Individual Channel Setup
Channel Activation: If the channel is active, touch the ACTIVE button to disable it; touch the ENTER button
to save change. If the channel is disabled, touch the DISABLED button to activate it; touch the ENTER button
to save change. The main display will show “DISABLED” if a channel is selected as disabled.
Tags/Labels: The Main, Zone 2 and individual channel screens displays the current tag names assigned to
each active gas channel. To add or change a Tag Name, enter Channel Setup, press channel you wish to
change, press the current tag/label, type the new tag on the screen, press “ ” (enter key on on-screen keyboard
). When each entry in the channel setup screen is complete, press the ‘ENTER’ key to save the entry.
Alarm 1, 2, 3: Set point, direction, and relay assignments are all handled in the 3 alarm blocks. The Set
points are changed by touching the value window below each alarm designation. The example shown in figure
1600A-N1P Instruction Manual
Rev. 0.1
Page 15 of 40