Star Water Systems HCP05 User Manual
Page 3
4
95 North Oak Street • Kendallville, IN 46755 • © 2014 Star Water Systems. All rights reserved.
5
95 North Oak Street • Kendallville, IN 46755 • © 2014 Star Water Systems. All rights reserved.
Checking and Setting Tank PSI – Factory tank
PSI settings are 26 PSI (1/2 hp) and 36 PSI (1 hp).
If the inlet PSI is HIGHER than the factory settings,
increase the tank PSI to be approximately 5 PSI
higher than incoming pressure. To check the tank air
pressure, turn off power, open a tap on the discharge
line to release pressure from the pump, unscrew
the black plastic cover and apply a pressure gauge
to the valve as shown in FIG 3. Add tank pressure
as required, due to the tanks small volume, minimal
air volume is needed to increase tank pressure.
Reinstall black plastic cover.
FIG 3 SET TANK PRESSURE
IL1307
NOTE: If using optional water tank (FIG. 1), set both
tanks to the same pressures.
GENERAL OPERATION GUIDELINES
• What Causes The Unit To Start? – The pump
will turn ON when the flow rate is greater
than 0.7 GPM or when the pressure output is
less than the pump pressure activation point
(approximately 25 psi - 1/2hp, 35 psi - 1hp).
• Dry Run Protection - After the unit recognizes
a continual low flow of water, the unit will
shut down to protect itself from running dry.
Hourly, it will turn on to sample the water flow
requirements, and return to shut down if running
dry. The home owner can fix the run dry issue
and return the pump to normal operation by
unplugging the pump for 5 seconds.
• Dead Head Protection - If there is no water
demand (discharge is shut off), the unit will shut
down to protect the pump from damage. Once
water flow is restarted, the pump will re-start the
power automatically.
• Rapid Cycle Protection – If the unit cycles
repeatedly on/off, the unit will shut down to
protect the pump life. The optional water tank
not maintaining pressure could be a potential
cause. Hourly, it will turn on to sample the water
flow requirements, and return to shut down if the
problem persists. The home owner can fix the
concern and return the pump to normal operation
by unplugging the pump for 5 seconds.
NAMEPLATE DATA
Model
HCP05
HP
1/2
Volts
115
HZ/Ph
60/1
Amp
6.0
Amb
40C
Class
B
Rating
Cont
LOCATION
Indoor/outdoor area – insure draining thru pressure
relief valve is available in order to avoid damage in
case of leakage.
Outdoor area – unit should be covered by a weather
proof housing, insure adequate ventilation.
FREEZING (OR REMOvING PUMP FOR
MAINTENANCE)
The pump and all piping must
be protected from freezing. If freezing weather
is forecast, and the unit will be exposed to
temperatures less than 32ºF (0ºC), remove the pump
by closing off ball valves #1 and #2, (see FIG. 1) and
removing the pump, using the union connections.
Store pump in a heated area. Open ball valve #3 to
allow city water to pass forward if desired. Insure
the piping is adequately protected from the cold
environment.
OPERATING CONDITIONS
Ambient temperature range 32ºF (0ºC) to 104ºF
(40ºC).
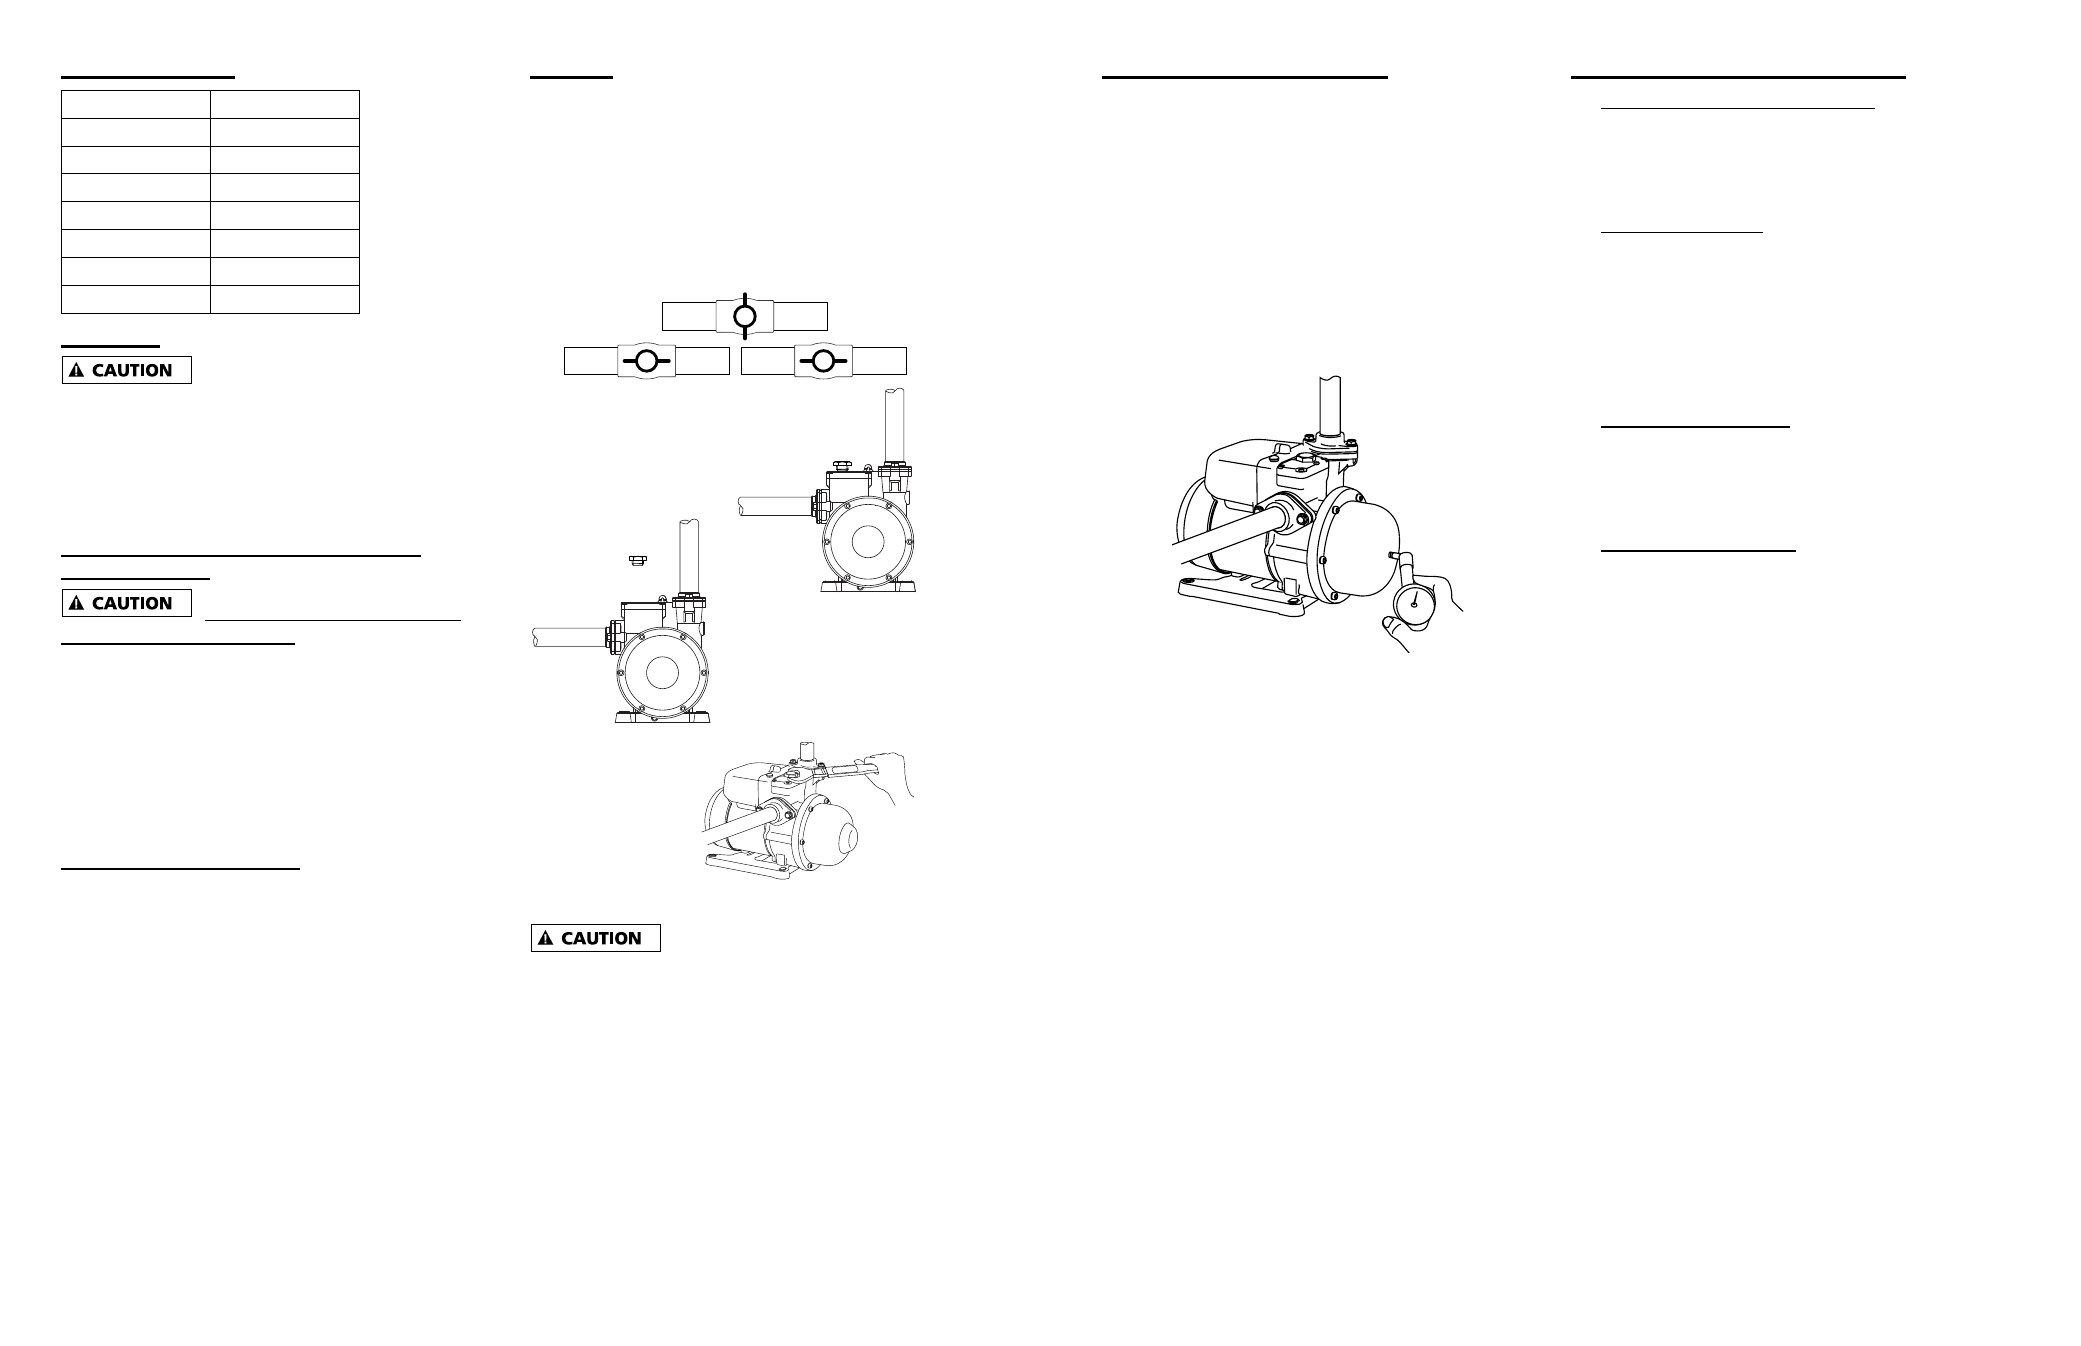
PRIMING
After installation (with the pump OFF), open ball
valves #1 and #2, and slowly unthread the air relief
plug (FIG 2). Allow inlet water pressure to fill the
pump cavity and remove in-line air pockets. After
the pump cavity fills with water, retighten the air relief
plug.
FIG 2 PRIMING ILLUSTRATION
a. Open ball valves #1 and #2, close 3.
d. Tighten the air
relief plug.
c. Ensure water fills
chamber from city water.
Replace plug immediately
to avoid excess moisture
on pump.
IL1207
b. Loosen the air relief plug.
#1
#2
#3
Torque : 26 in-lb
26
in b
If unit is shut down for extended
period of time or air enters into the system, it may be
necessary to repeat the above priming instructions to
insure the internal pump cavity is running with water
to avoid dry running damage to the internal seals.