Star Water Systems FB12DCC (Flint & Walling) User Manual
Page 5
5
© Copyright 2013. All rights reserved.
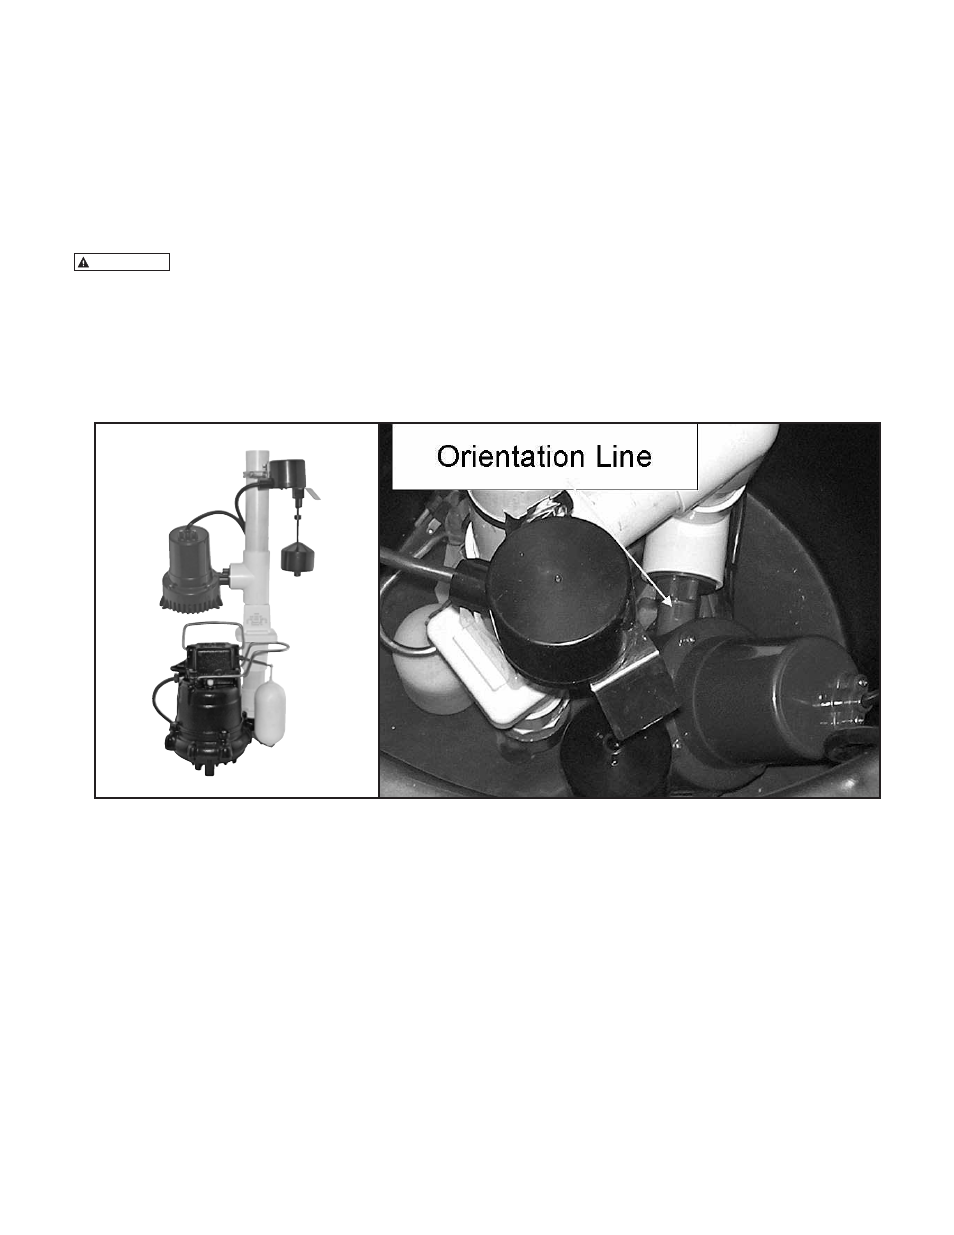
INSTALLATION SB12DCC & FB12DCC IN AN 18" x 22" BASIN
The models SB12DCC & FB12DCC can be installed in an 18" x 22" basin if the primary pump is not extremely large .
3SEL & 3SEHL pumps will work for this application. Below is a brief description of the assembly modification needed to
accommodate a shorter basin.
Two additional 90° elbows and two small sections of 1-1/2" PVC SCH 40 pipe are all that is needed.
Dry fit a simple pipe loop as shown in the picture below. Pipe lengths may vary slightly depending on the size and
shape of the basin.
IMPORTANT
THE PUMP NEEDS TO BE GLUED IN AT AN ANGLE IN ORDER TO AVOID BECOMING AIRLOCKED.
Glue in the pump with the orientation line pointing up. Note the orientation line on the pump as shown below. This
should be pointing up.
Glue all sockets using a commercial grade PVC cleaner and solvent cement.
Other important notes to ensure a trouble free installation.
1. Make sure the “off” point of the battery backup switch is ABOVE the discharge height of the backup pump. If it is not,
the pump will run continuously.
2. Make sure the operation of the float is free of any other components in the sump including the primary pump, the
basin wall, and the backup pump itself.
3. Test the unit per the installation instructions. If air locking is experienced, even with the pump correctly oriented, a
small weep hole can be drilled in the side of the green discharge prior to the check valve. If doing so, make sure the jet
stream is not directed towards the float switch.