1 start-up operation checklist, pilot monitor (pm), 1 getting started – LumaSense Technologies M8100SM-EXP User Manual
Page 31
E
2
T QUASAR Flare Monitors Operation Manual
Operating the M8100PM-EXP 31
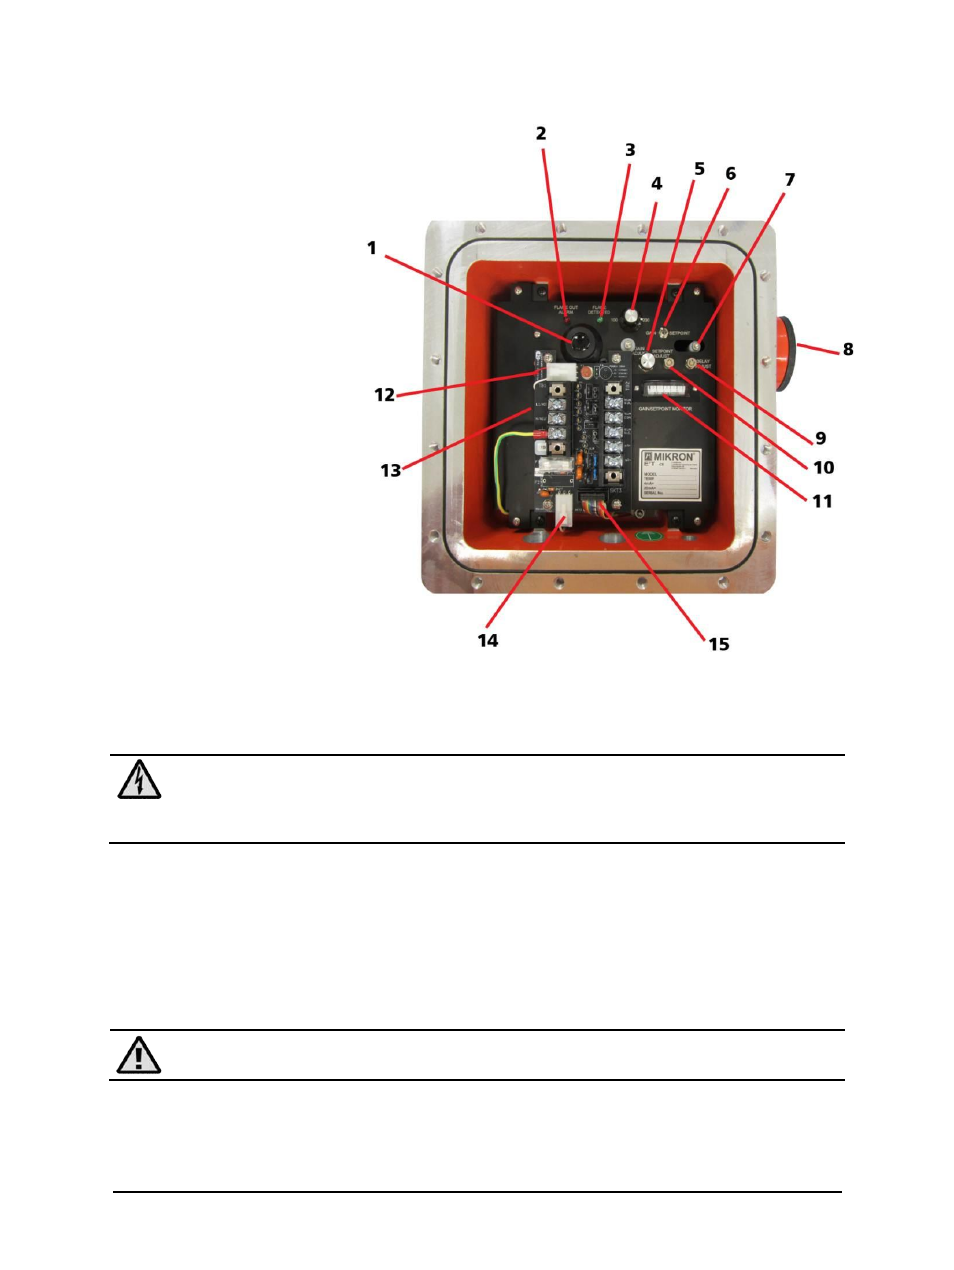
1. Eyepiece Lens with
Reticle
2.
Status Red LED:
Alarm
3.
Status Green LED
4.
AGC Compensation (PM)
5.
System Gain Adjust
6.
Gain/Setpoint Selector
7.
Focus Adjust and Lens
Locking Screw
8.
Objective Lens
9.
Delay Adjust
10.
Set-Point Adjust
11.
Gain/Setpoint
Monitor
12.
Heater Connection
13
. Output PCB
14.
Main Supply
Connector to Electronics
15.
Signal I/O to Electronics
Figure 9: Opto-Electronics Module
5.1 Start-Up Operation Checklist, Pilot Monitor (PM)
Warning: At no time should the cover be removed unless the power is switch-off first.
When it is necessary to service the instrument with the power applied, ensure that
proper safe environmental conditions exist and that such maintenance is authorized
and pursuant to safe conditions.
5.1.1 Getting Started
1. Remove the top cover and sixteen M8 x 1.25 socket head screws.
2. Ensure that the sight path is clear.
3. Ensure that the optics are properly focused on the target (See Sections 3.2, 3.6, and 3.7).
4. Verify that the proper power and signal connections have been made as per Chapter 4,
Electrical Installation.
Caution: Ensure that safe conditions exist before applying power to the instrument.
Allow at least 30 minutes of warm-up time before proceeding.