Main menu setup guide – LT Security LTD7904 User Manual
Page 20
14
Digital Video Recorder User Manual
4
Main menu setup guide
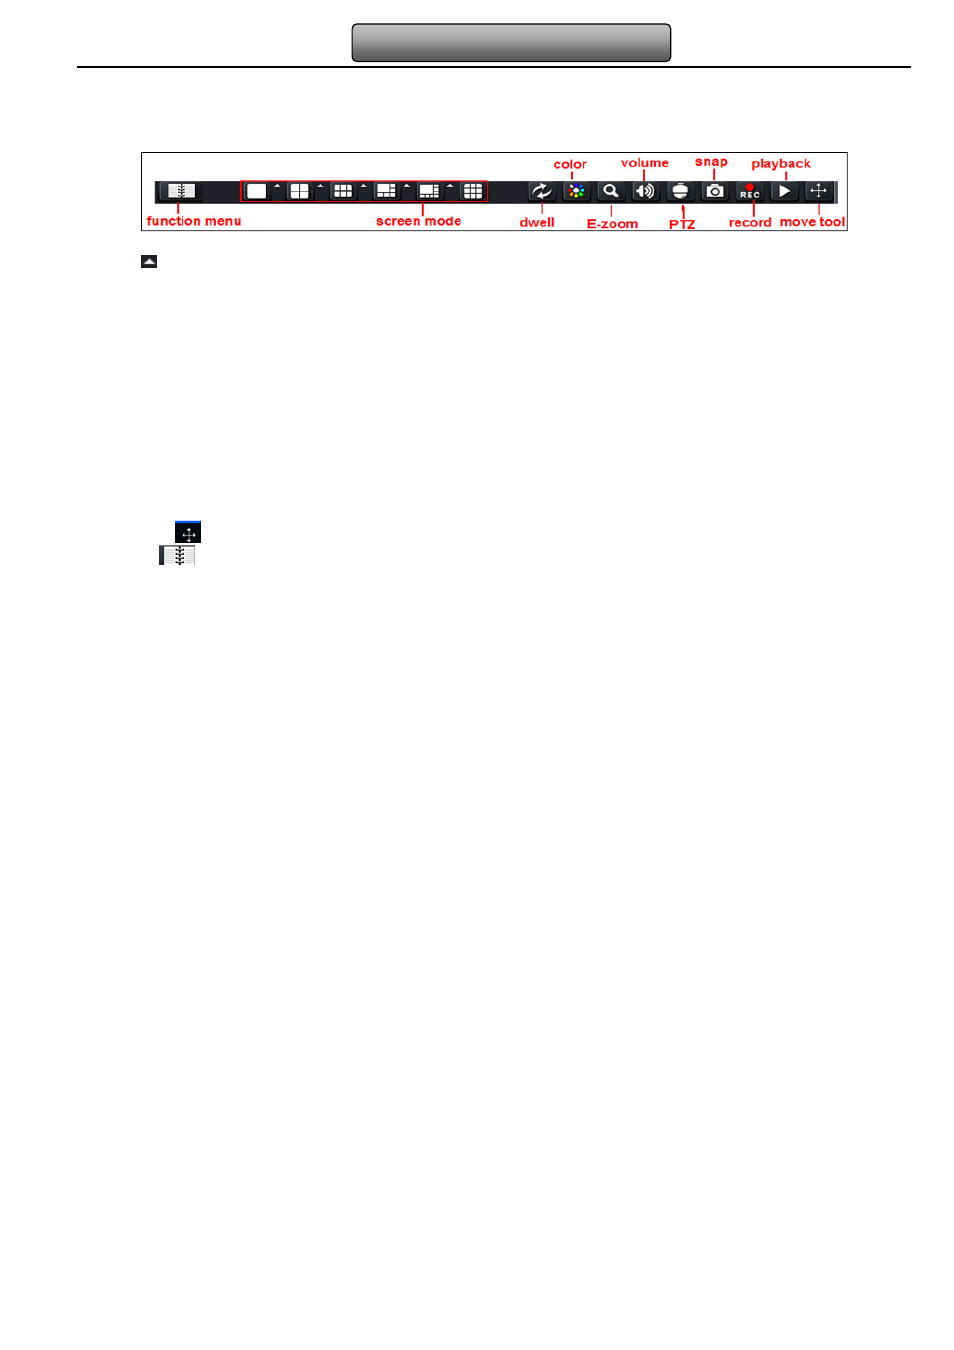
Click right mouse or press ESC button on the front panel, the control bar will display on the bottom of the screen, refer to Fig 4-1:
Fig 4-1 main menu toolbar
Click the
icon beside the screen display mode to display a channel select dialog. 6/8 channels can realize single channel big
screen. Images can drag to any place to display in the live interface.
Dwell: Range of selecting to dwell is from single picture preview mode to 1/4/6/8 picture preview mode.
Color: Click this button; user can adjust the color of live pictures.
E-Zoom: Single channel large screen electronic amplification
Left click the channel which needs to amplify; Click the right mouse, select Zoom in button and then click the left mouse to amplify
the image. Press left mouse to drug the cursor, user can view the image. Double-click the left mouse to exit. Click the right mouse to
return to the main interface.
Volume: Enable sound.
PTZ: Click the PTZ button, user can control rotation position, speed of the dome and start track, auto scan or cruise in this interface.
User can refer to PTZ configuration for more details.
Snap: click this button; user can snap the live pictures. These pictures will automatically be saved in the SATA disk.
Record: Click this button, user can start manual record.
Playback: Click this button, the device can playback the record files.
User can click
button and drag it anywhere with the left mouse
Click Menu
button, the interface will pop-up as Fig 4-2; press MENU button on the front panel or operate with remote