Hired-Hand PowerTrak: Seal Kit Installation User Manual
Seal kit installation, For 3 or 9 wire powertrak, Tools required
Hired-Hand, Inc.
ã 1733 County Road 68 ã Bremen, AL 35033 ã Phone 256-287-1000 ã Fax 256-287-2000
Seal Kit Installation
for 3 or 9 wire PowerTrak
tm
Part No. 4801-0141 Rev 12-01
Tools Required
Drill
9/64 Drill Bit
Small Hand Saw
1” Flat File
Marker
Cleaning Solvent
7/16” Wrench
1/8” Allen Wrench
1/4” Nut Driver or Drill Attachment
7/16” Socket
Directions
Installing Brush Assembly:
1.
Disconnect electrical power to the PowerTrak.
2.
Once power has been disconnected, open and remove the side
swinging door.
3.
Clean the outside surface where the brush assembly will attach to
the PowerTrak.
4.
Find the brush brackets (Figure 1) and place them in their proper
position (Figure 2).
5. Note: There is a left and a right bracket. (When attached to the
sides of the PowerTrak, the mounting holes will be placed towards
the front of the machine.
6.
Mark the position of all holes in the brush brackets, then remove
the brackets and drill one 9/64” hole for each mark. (3 per side.)
7.
When the holes are drilled, place a strip of weather-strip foam tape
around the opening for the cable in the sides of the PowerTrak.
8.
Attach the brush brackets with three of the sheet metal screws
included with the kit. The brackets should be sealed by the
weather-strip tape from step 7 above.
Installing Enclosed Bottom Assembly:
9.
Disconnect All Power To Machine!
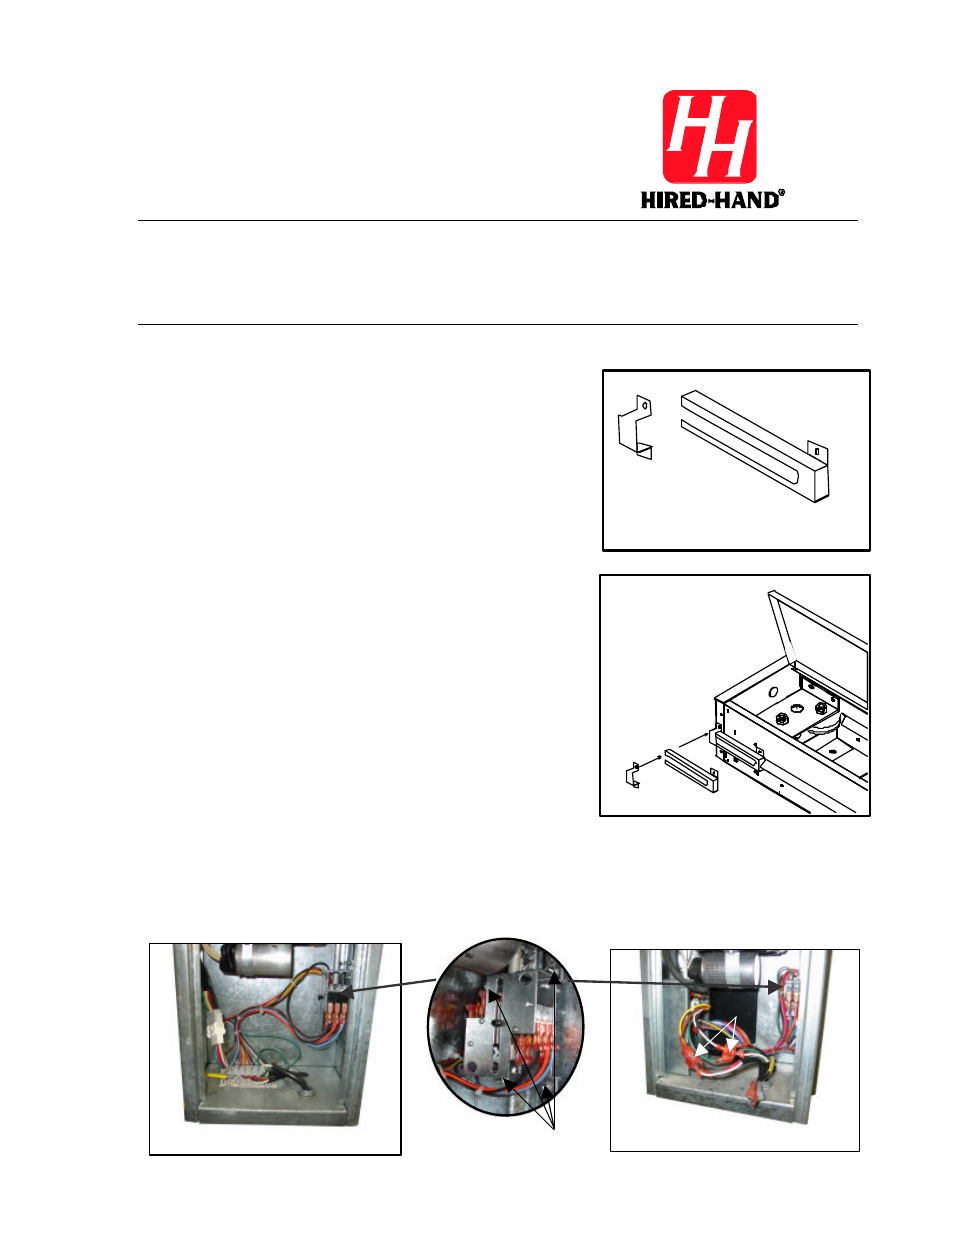
10. Disconnect wiring quick connects at the bottom of the machine. See Figure 3 for the three wire machine and
Figure 4 for the nine wire machine. On the 9 wire machine the large connector is for the limit switches and the
small connector is for the motor.
11. Remove the four bolts holding the limit switch assembly to the cabinet. (Figure 3 or 4)
Figure 1 Brush Bracket
Quick
Disconnect
Figure 2
Brush Bracket
Mounting
Figure 3 Three Wire Machine
Limit Switch Bolts
Figure 4 Nine Wire Machine
Quick
Disconnect