Connecting overload to a contactor, Connecting contactor to controller and loads, 1 evolution stage connections – Hired-Hand Contactor Control System (CCS): Triple Pole 16-Stage User Manual
Page 5: Manual operate switch
Part No. 4801-5321
Triple Pole 16-Stage Contactor Panel
3
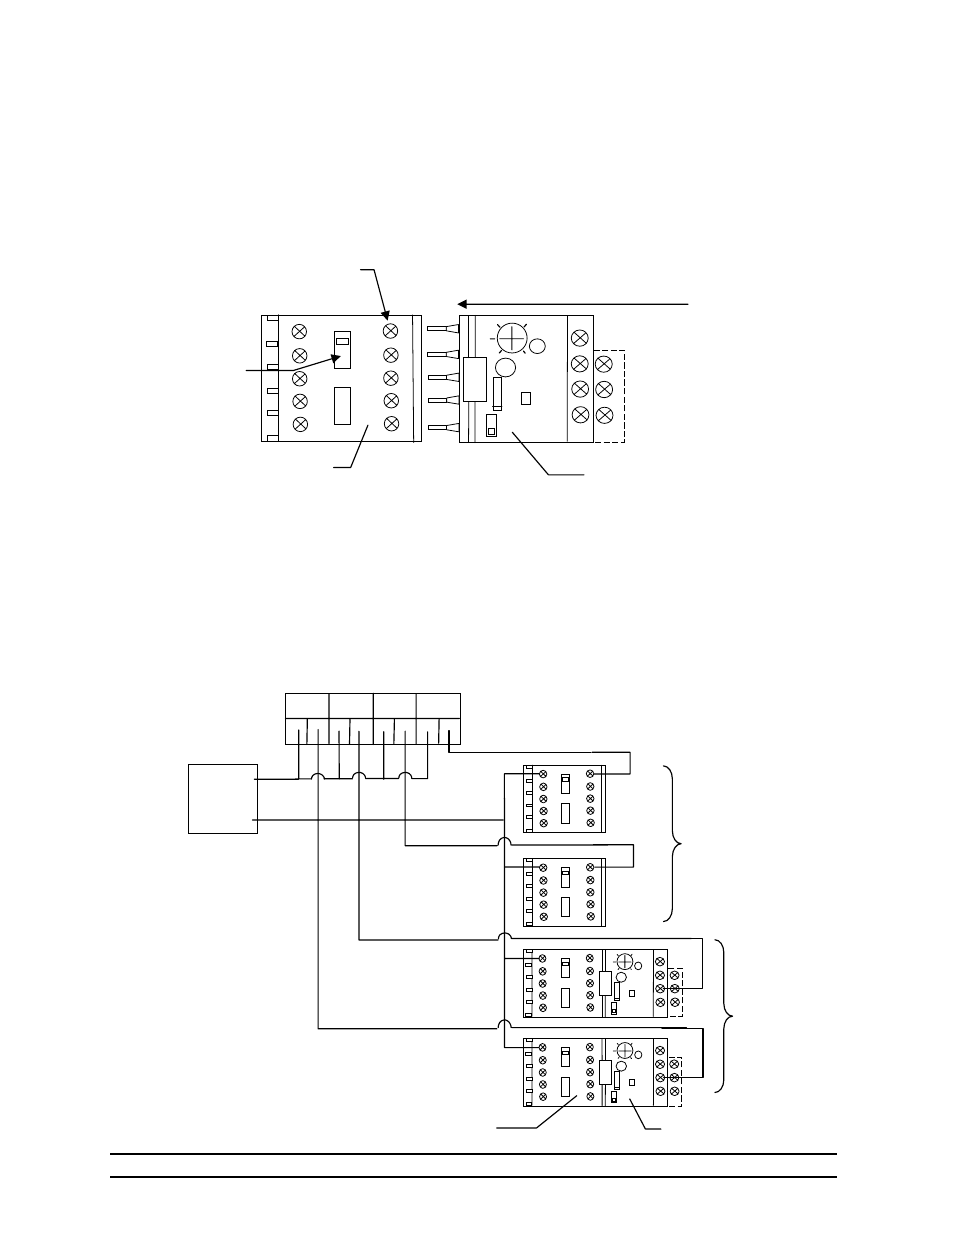
8. Connecting Overload to a Contactor
Overloads can easily be attached to a contactor by:
(1) First disconnect all electrical power leading to the contactor.
(2) Using a Phillips head screwdriver, unscrew the five terminal screws on the right of the
contactor. These are labeled (2T1, 4T2, 6T3, 14NO and A2).
(3) Carefully place the overload unit so the five pins align with the contactor as shown below.
(4) Press the overload into the contactor until a “snap” is heard.
(5) Tighten the five terminal screws (2T1, 4T2, 6T3, 14NO and A2).
(6) Verify the overload control options (See Section 7).
9. Connecting Contactor to Controller and Loads
This section displays several methods of connection the Contactor Panel to Controllers, Power Sources
and Loads.
9.1
Evolution Stage Connections
The following diagram shows four stages connected to an Evolution Controller. Stages 1 and 2 are
contactors without overload protection. Stages 3 and 4 use overload protection.
Evolution Stage Connections
STAGE
1
STAGE
2
STAGE
3
STAGE
4
L1
240 VAC
L2
A1
A2
A2
A1
A1
A1
Without
Overload
With
Overload
Contactor
Overload
Contactor
1 L1
3 L2
5 L3
13 A1
1410
6 T3
4 T2
2 T1
A2
2.
6
2.
2
1.
8
TEST
LR
2K
96
98
95
97
2 T1
4 T2
6 T3
H A
RE
S
E
T
Overload
Slide Overload to the left
to install
Open these screws before
inserting the overload
95
95
Manual
Operate
Switch