Important – Hired-Hand Polar Cool: Portable Evaporative Cooling System User Manual
Page 13
Manual No. 4801-5035 Rev 8-07
PolarCool
Page 13 of 22
7.9
Belt Inspection or Removal (48” Model Only)
1. Disconnect all electrical power to PolarCool!
2. Remove pads.
3. TEST FOR LOOSE BELT: Press on belt with finger
about halfway between pulleys. Belt should deflect
about 3/4" if correctly fitted.
4. To remove belt, slowly rotate belt while carefully
rolling belt off of prop pulley.
5. After removing belt, turn belt inside out. Links should
resemble Diagram A.
6. Flex belt to form a short, tight loop at one end.
7. Twist and unlock tabs holding link. This will open
belt.
8. Remove links as required to tighten belt.
9. After removing link(s), reattach belt together by locking tabs through holes.
10. Turn belt to place tabs to inside of belt.
11. Hook belt onto motor pulley. Roll belt onto Prop pulley.
12. After belt is installed, press on belt with finger about halfway between pulleys. Belt should deflect about
3/4" if correctly fitted.
NOTE: Make sure arrows on belt are pointing in direction of prop rotation.
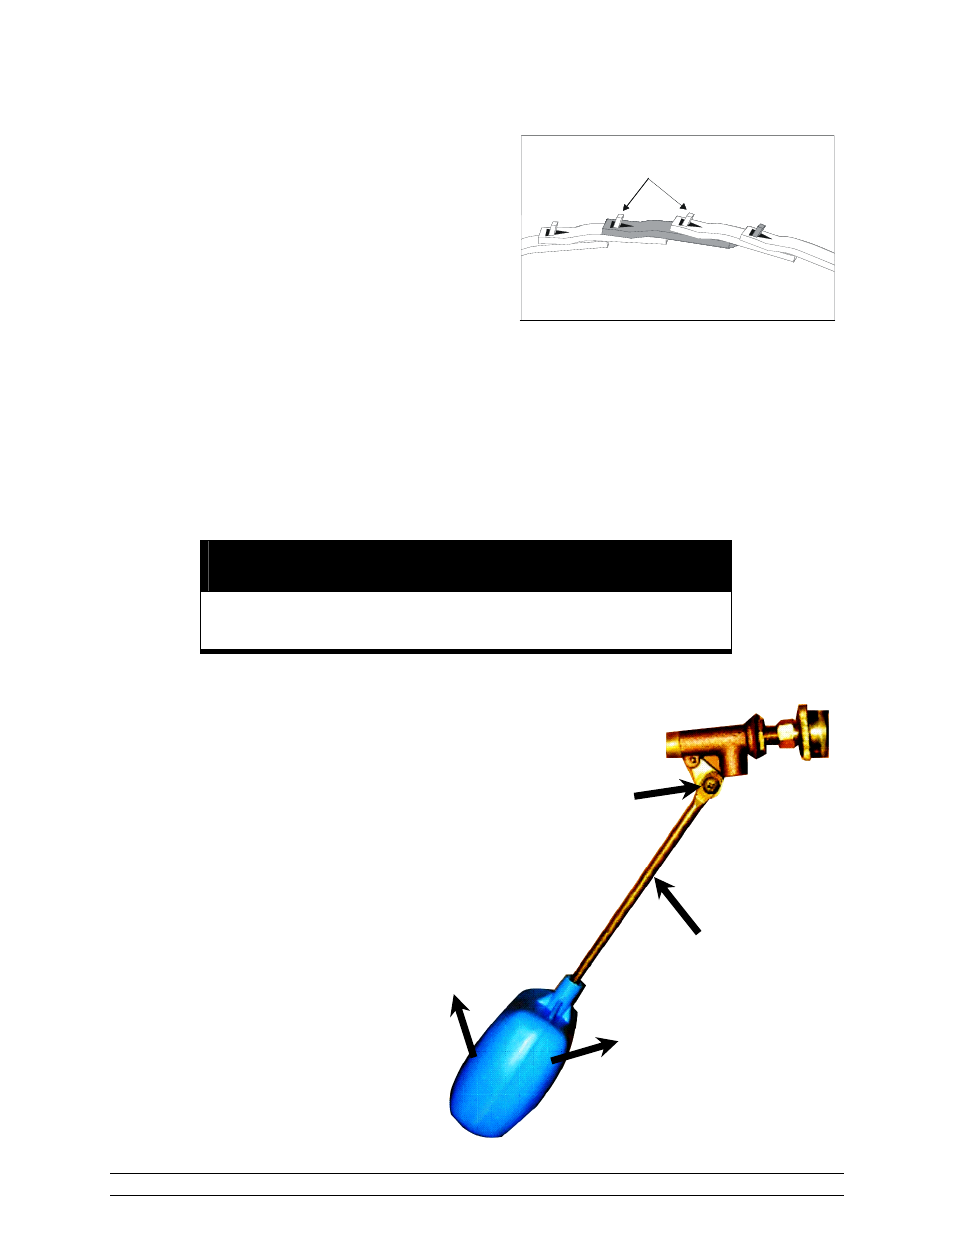
7.10 Float
Adjustment
Important!
Float Is Preset By Manufacturer
And Should Not Require Adjustment Under Normal Circumstances!
If adjustment is required, perform the
following steps:
1. Disconnect all electrical power to
PolarCool appliance!
2. Carefully remove pads.
3. Locate float valve inside PolarCool.
Refer to Replacement Parts
Diagram.
4. Use a screwdriver and loosen
adjustment screw as shown in figure
at right.
5. To decrease water level in reservoir,
move float arm downward as shown
in diagram at right. Retighten
adjustment screw.
6. To increase water level in reservoir,
move float arm upward as shown in
diagram at right. Retighten
adjustment screw.
7. Replace pads. Return PolarCool to
operation.
Diagram A
To open belt, twist and
push tabs through holes.
NOTE: Section of belt shown inside out.
Shaded region indicates 1 link of belt.
Diagram A
To open belt, twist and
push tabs through holes.
NOTE: Section of belt shown inside out.
Shaded region indicates 1 link of belt.
Float Arm
Adjustment
Screw
Increase Water
Level
Decrease Water
Level