Hired-Hand Mega Flow SlantWall Fans: Butterfly Cone Fan Unassembled User Manual
Page 9
Part No. 4801-5327 Rev 6/07
Mega-Flow Butterfly Cone - Unassembled
Page 9 of 12
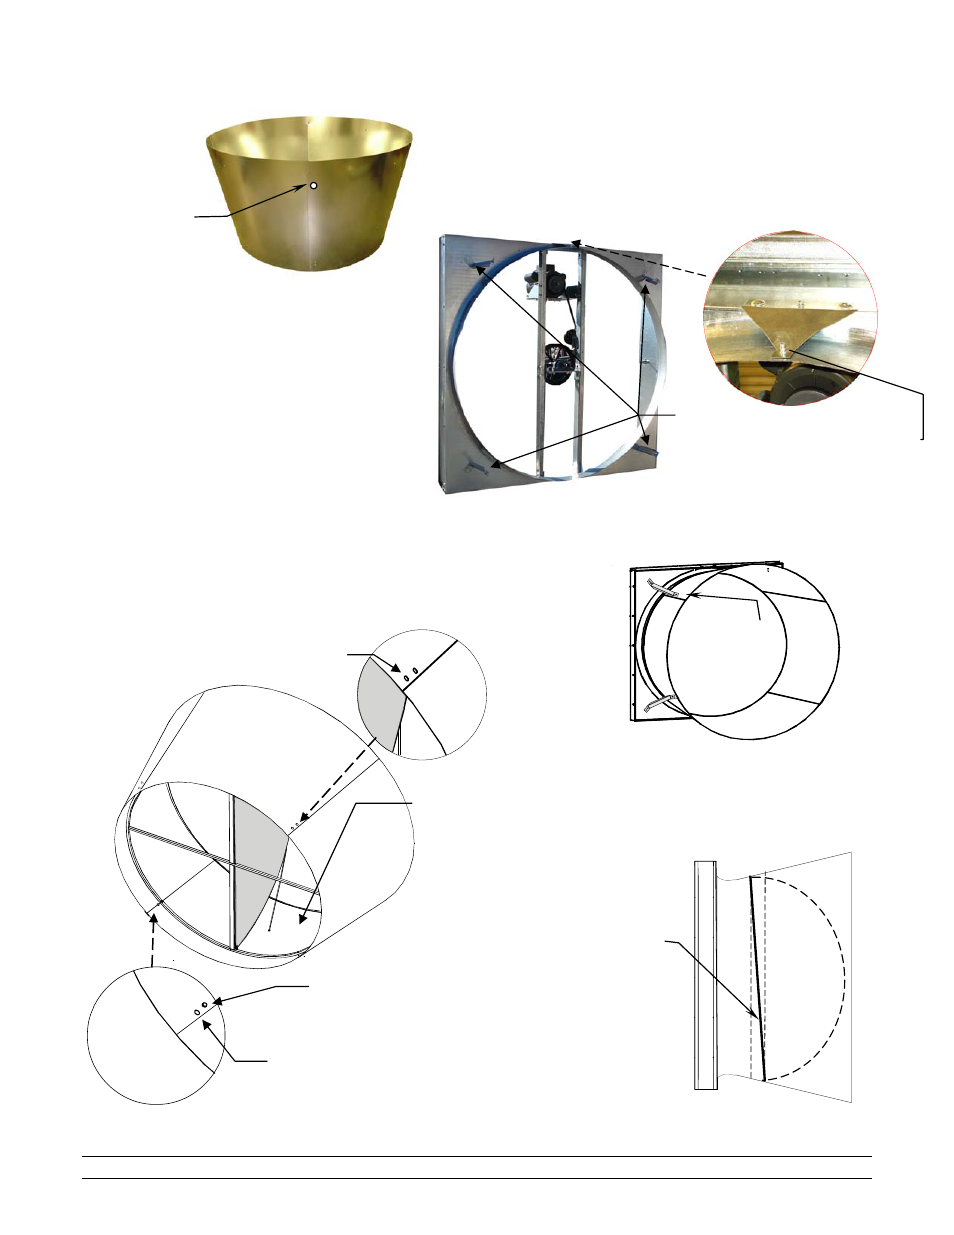
Top and Bottom bolts are
inserted from inside the
cone.
Mounting
Brackets
Pilot hole
at top
outside of
cone
Cone attaches to the Cone
Support Bracket (6403-
3160) over the Pim screw
18. To complete the last flange connection, roll the cone panels so
the small end is on the floor. See Figure 6. IMPORTANT! The
four pilot holes should be at the top end on the outside of the
cone.
19. Mount cone to fan. Bend the mounting
brackets back slightly to help clear the area
of the cone edges. Hang the centered slot
in the small end of the cone over the Pim
screw mounted on the Fan housing. See
Figure 8. Screw can be fastened with ¼"-
20 lock nut, if necessary (not included).
20. Align the cone over the remainder of the fan
housing. Using four 1/4"-20 Truss Head
Phillips bolts and 1/4-20 lock nuts, insert the
bolts from the inside of the cone. See Figure
9.
21. Mount the Damper Ring. Ring is mounted in the holes closest to the
orifice on the top and farthest away from the orifice in the bottom. Use
¼-20x1" bolts, nuts and washers (provided) to attach ring to cone.
Washers go on outside of cone. See Figures 10 and 11.
Figure 9 - Mount Cone onto Fan
Figure 10 - Mount the Ring Assembly
CAUTION: Fan Ring
must be plumb and
level in order for
doors to operate
properly.
NOTE: Lower cone ring
fits into outer hole.
NOTE:
Fan Not Shown For
Clarity.
Figure 8 - Install Cone Mounting Brackets
Figure 11 - Side View of Cone
Slanting the
ring allows
gravity to
assists the
doors to
shut.
NOTE: Check the ring mounting from
the side of the fan. The ring is slanted
to allow the force of gravity to assist in
closing the butterfly doors.
NOTE: Inner hole
will be capped in a
later step.
Figure 7 - Assembled Cone
Upper cone ring fits into
inner hole.